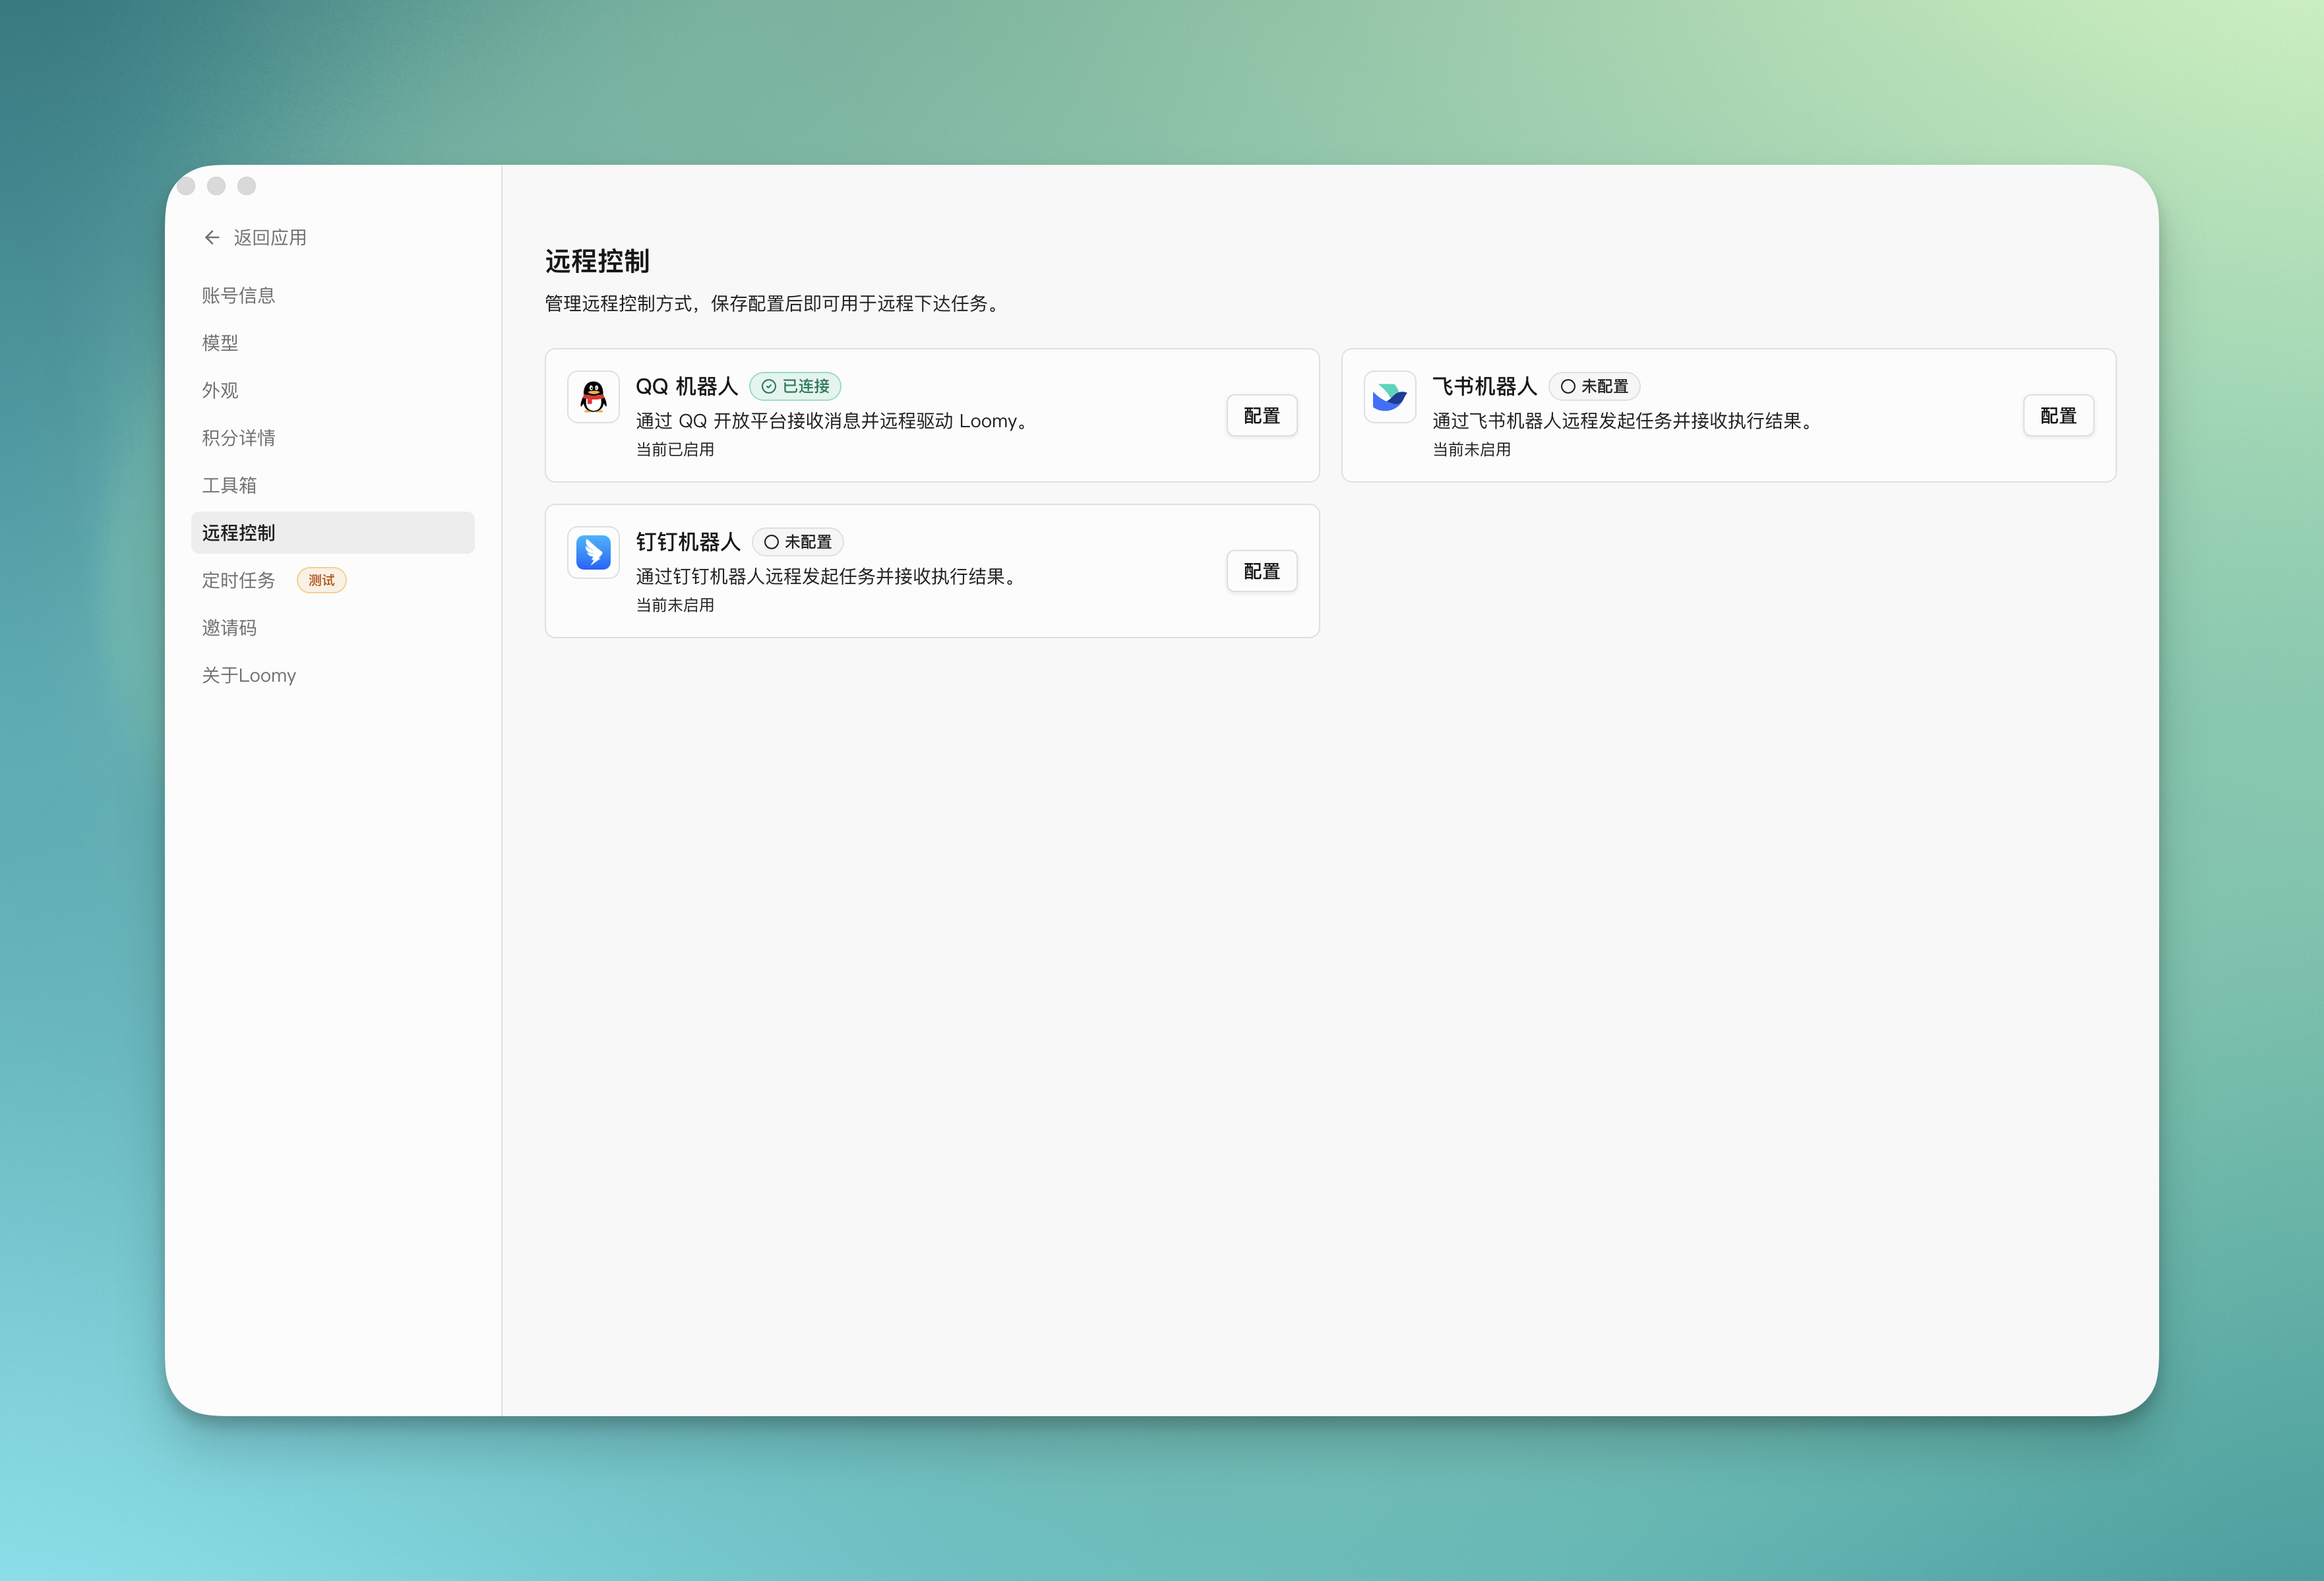
Remote Control
The remote control feature allows you to send commands to Loomy through instant messaging tools, check task progress, trigger operations, or get execution results even when you are not sitting in front of your computer.
Applicable Scenarios
- Remotely check whether tasks are completed when on a business trip or temporarily away from your desk
- Trigger Loomy to execute a fixed process through messages
- Quickly query current to-dos, running status, or key results on your phone
Note: When using remote control, you must ensure that Loomy is running in the background on your local device.
Connect to QQ Bot
- Open "Settings" in the left menu of Loomy, and find the remote control or corresponding bot connection configuration area.
If you don't want to configure it yourself, you can directly use the QQ OpenClaw bot:
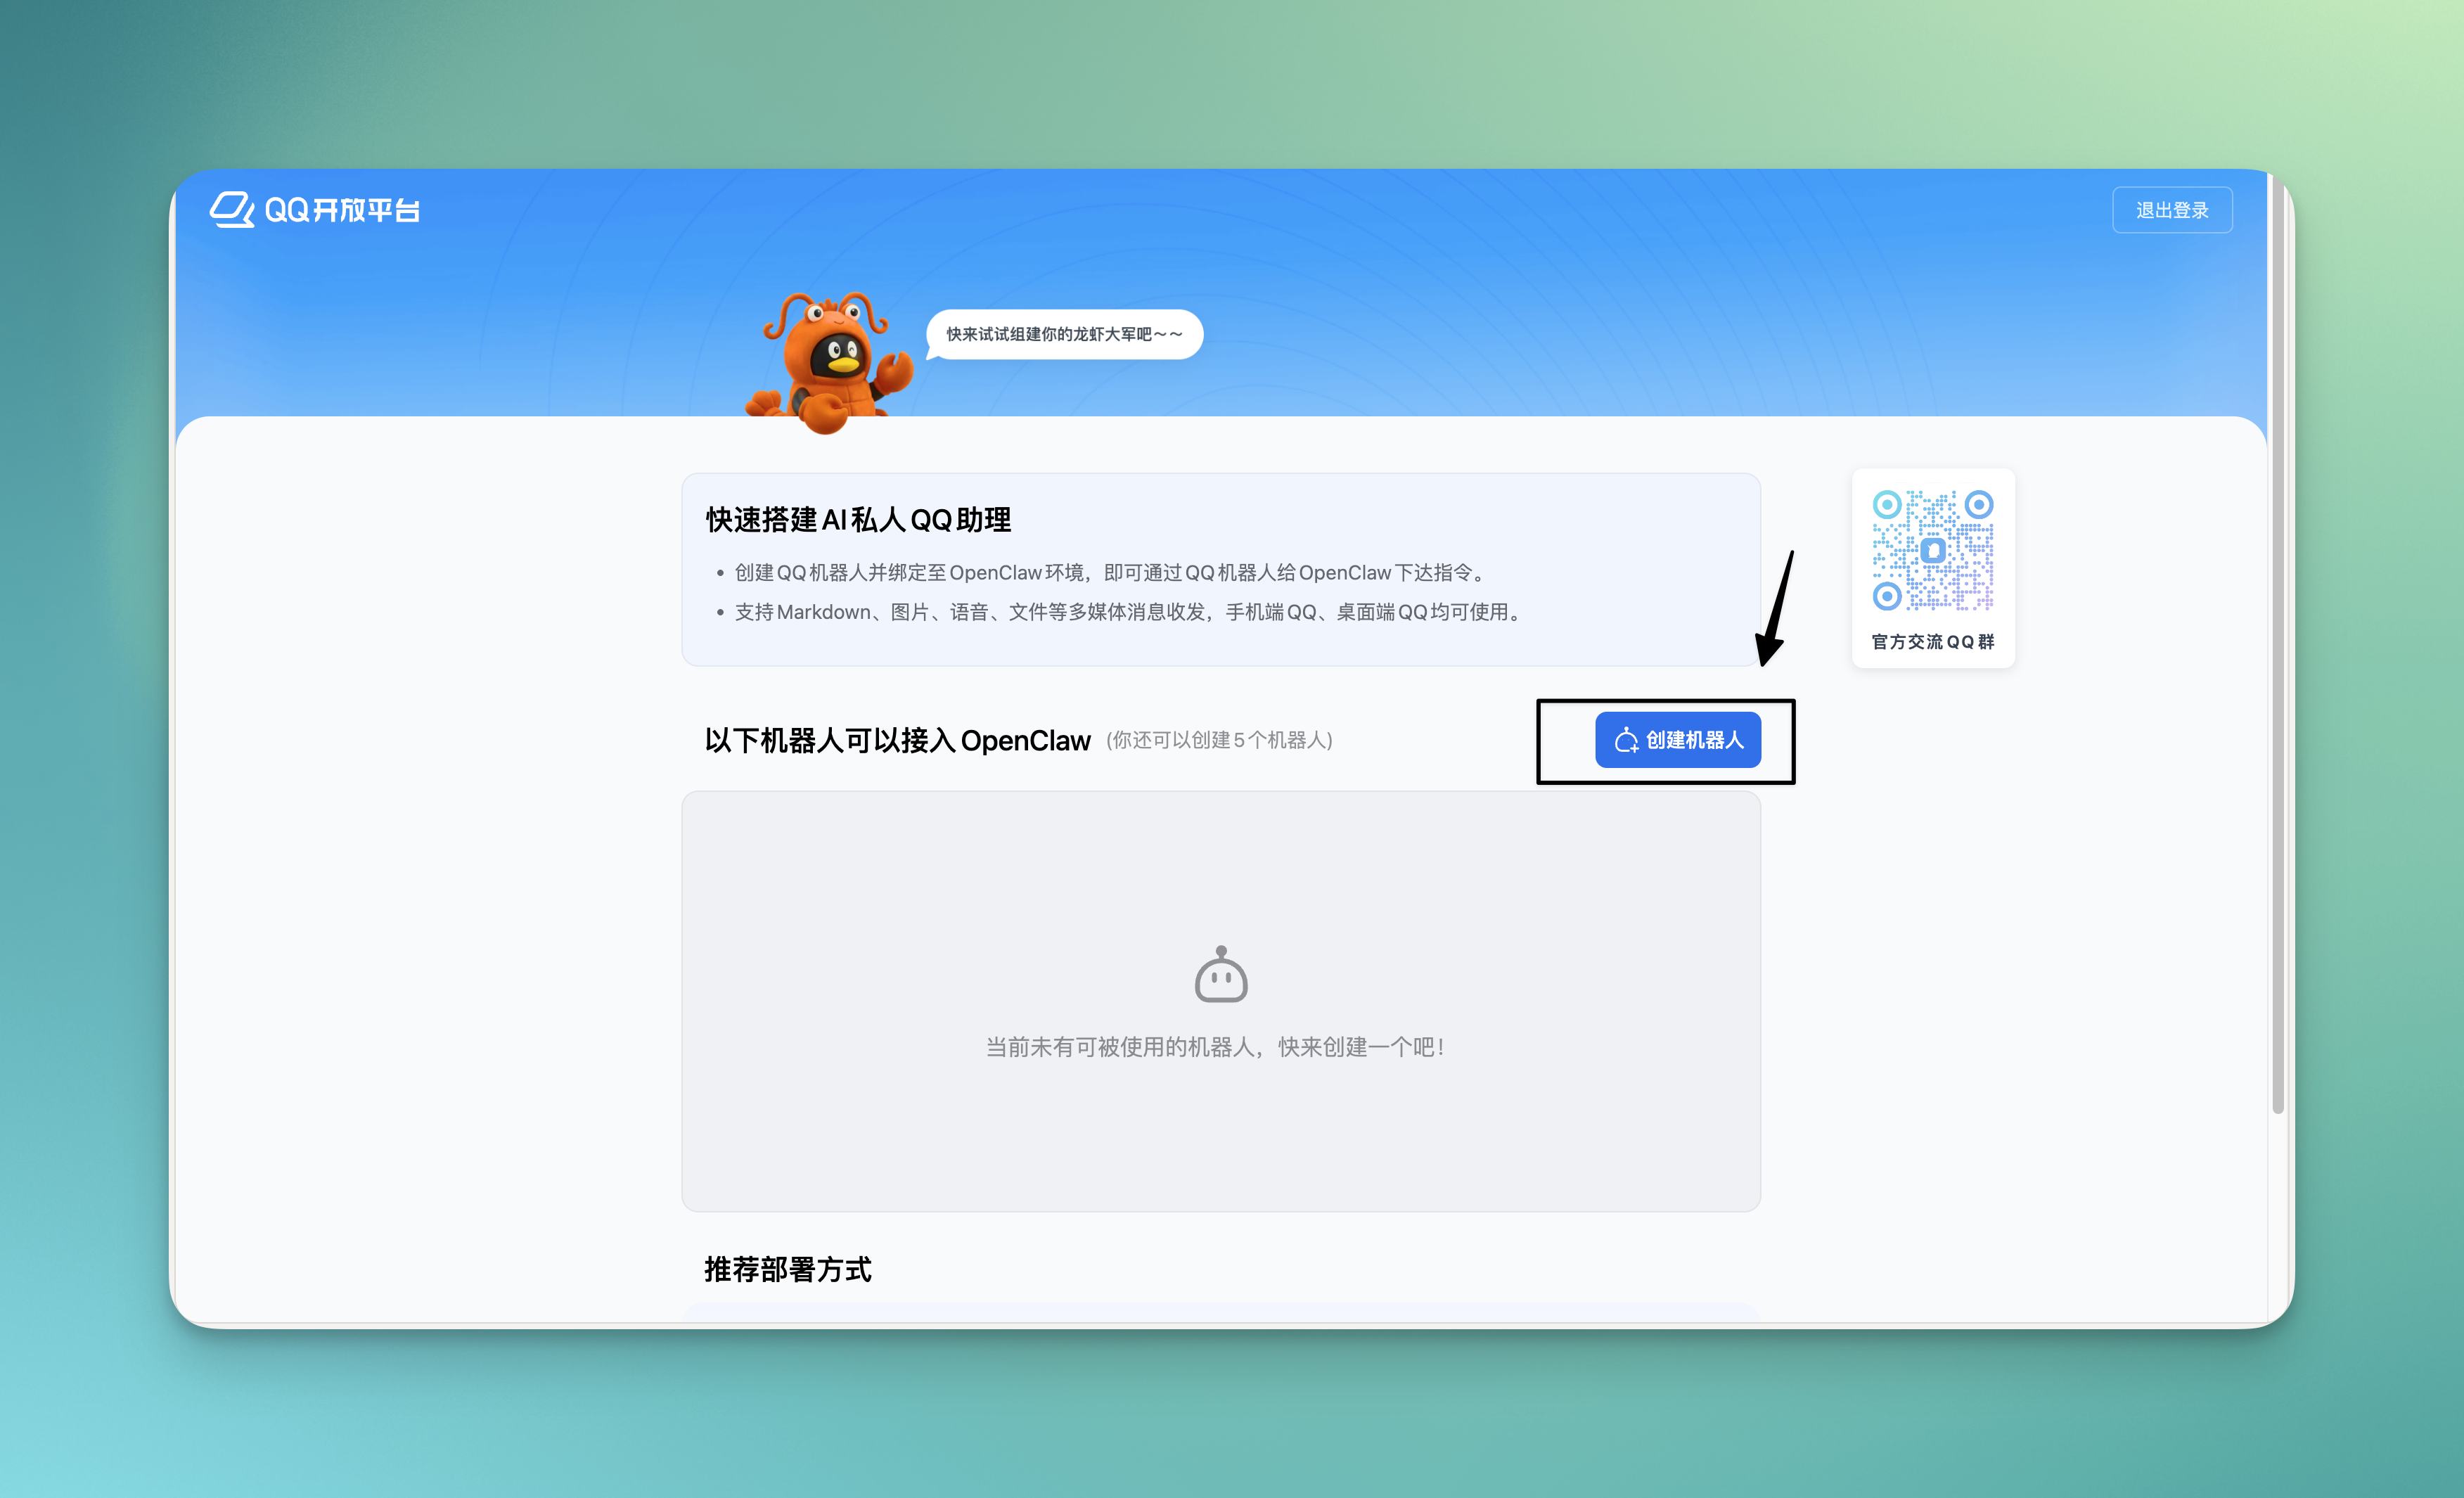
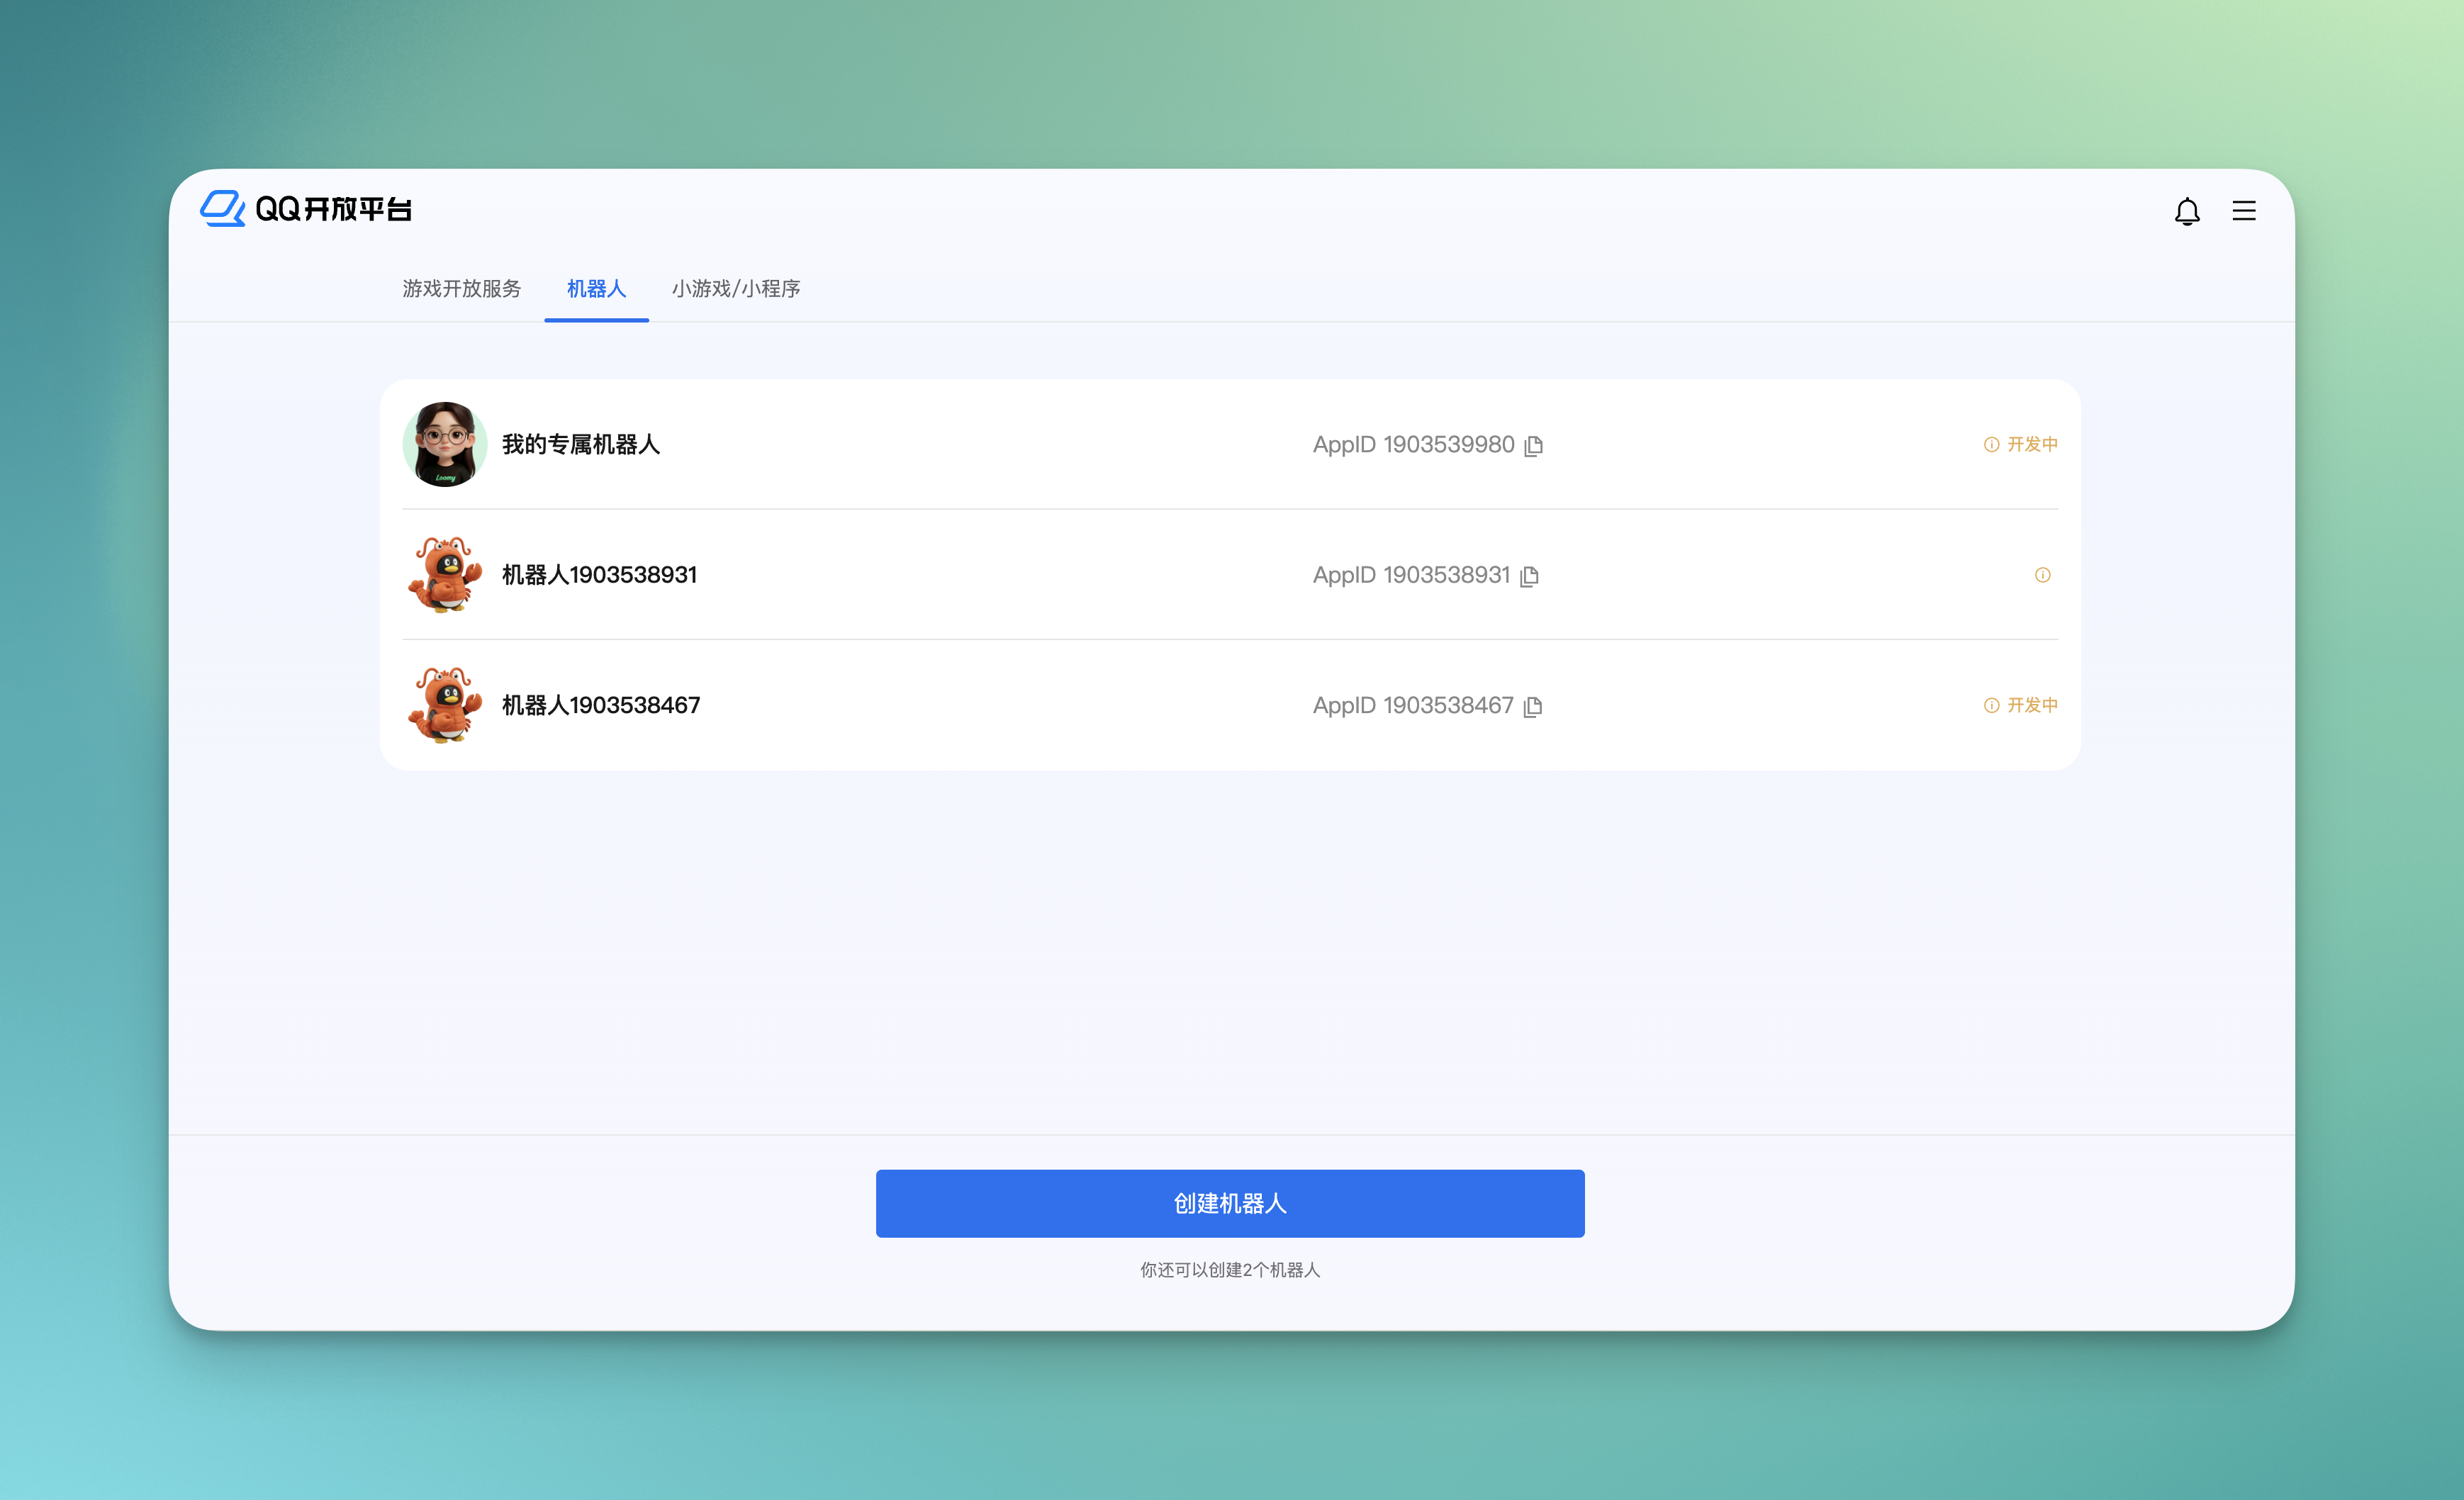
- Log in to the QQ Open Platform: QQ OpenClaw Bot Creation Page, click create bot, and copy the AppID and AppSecret.
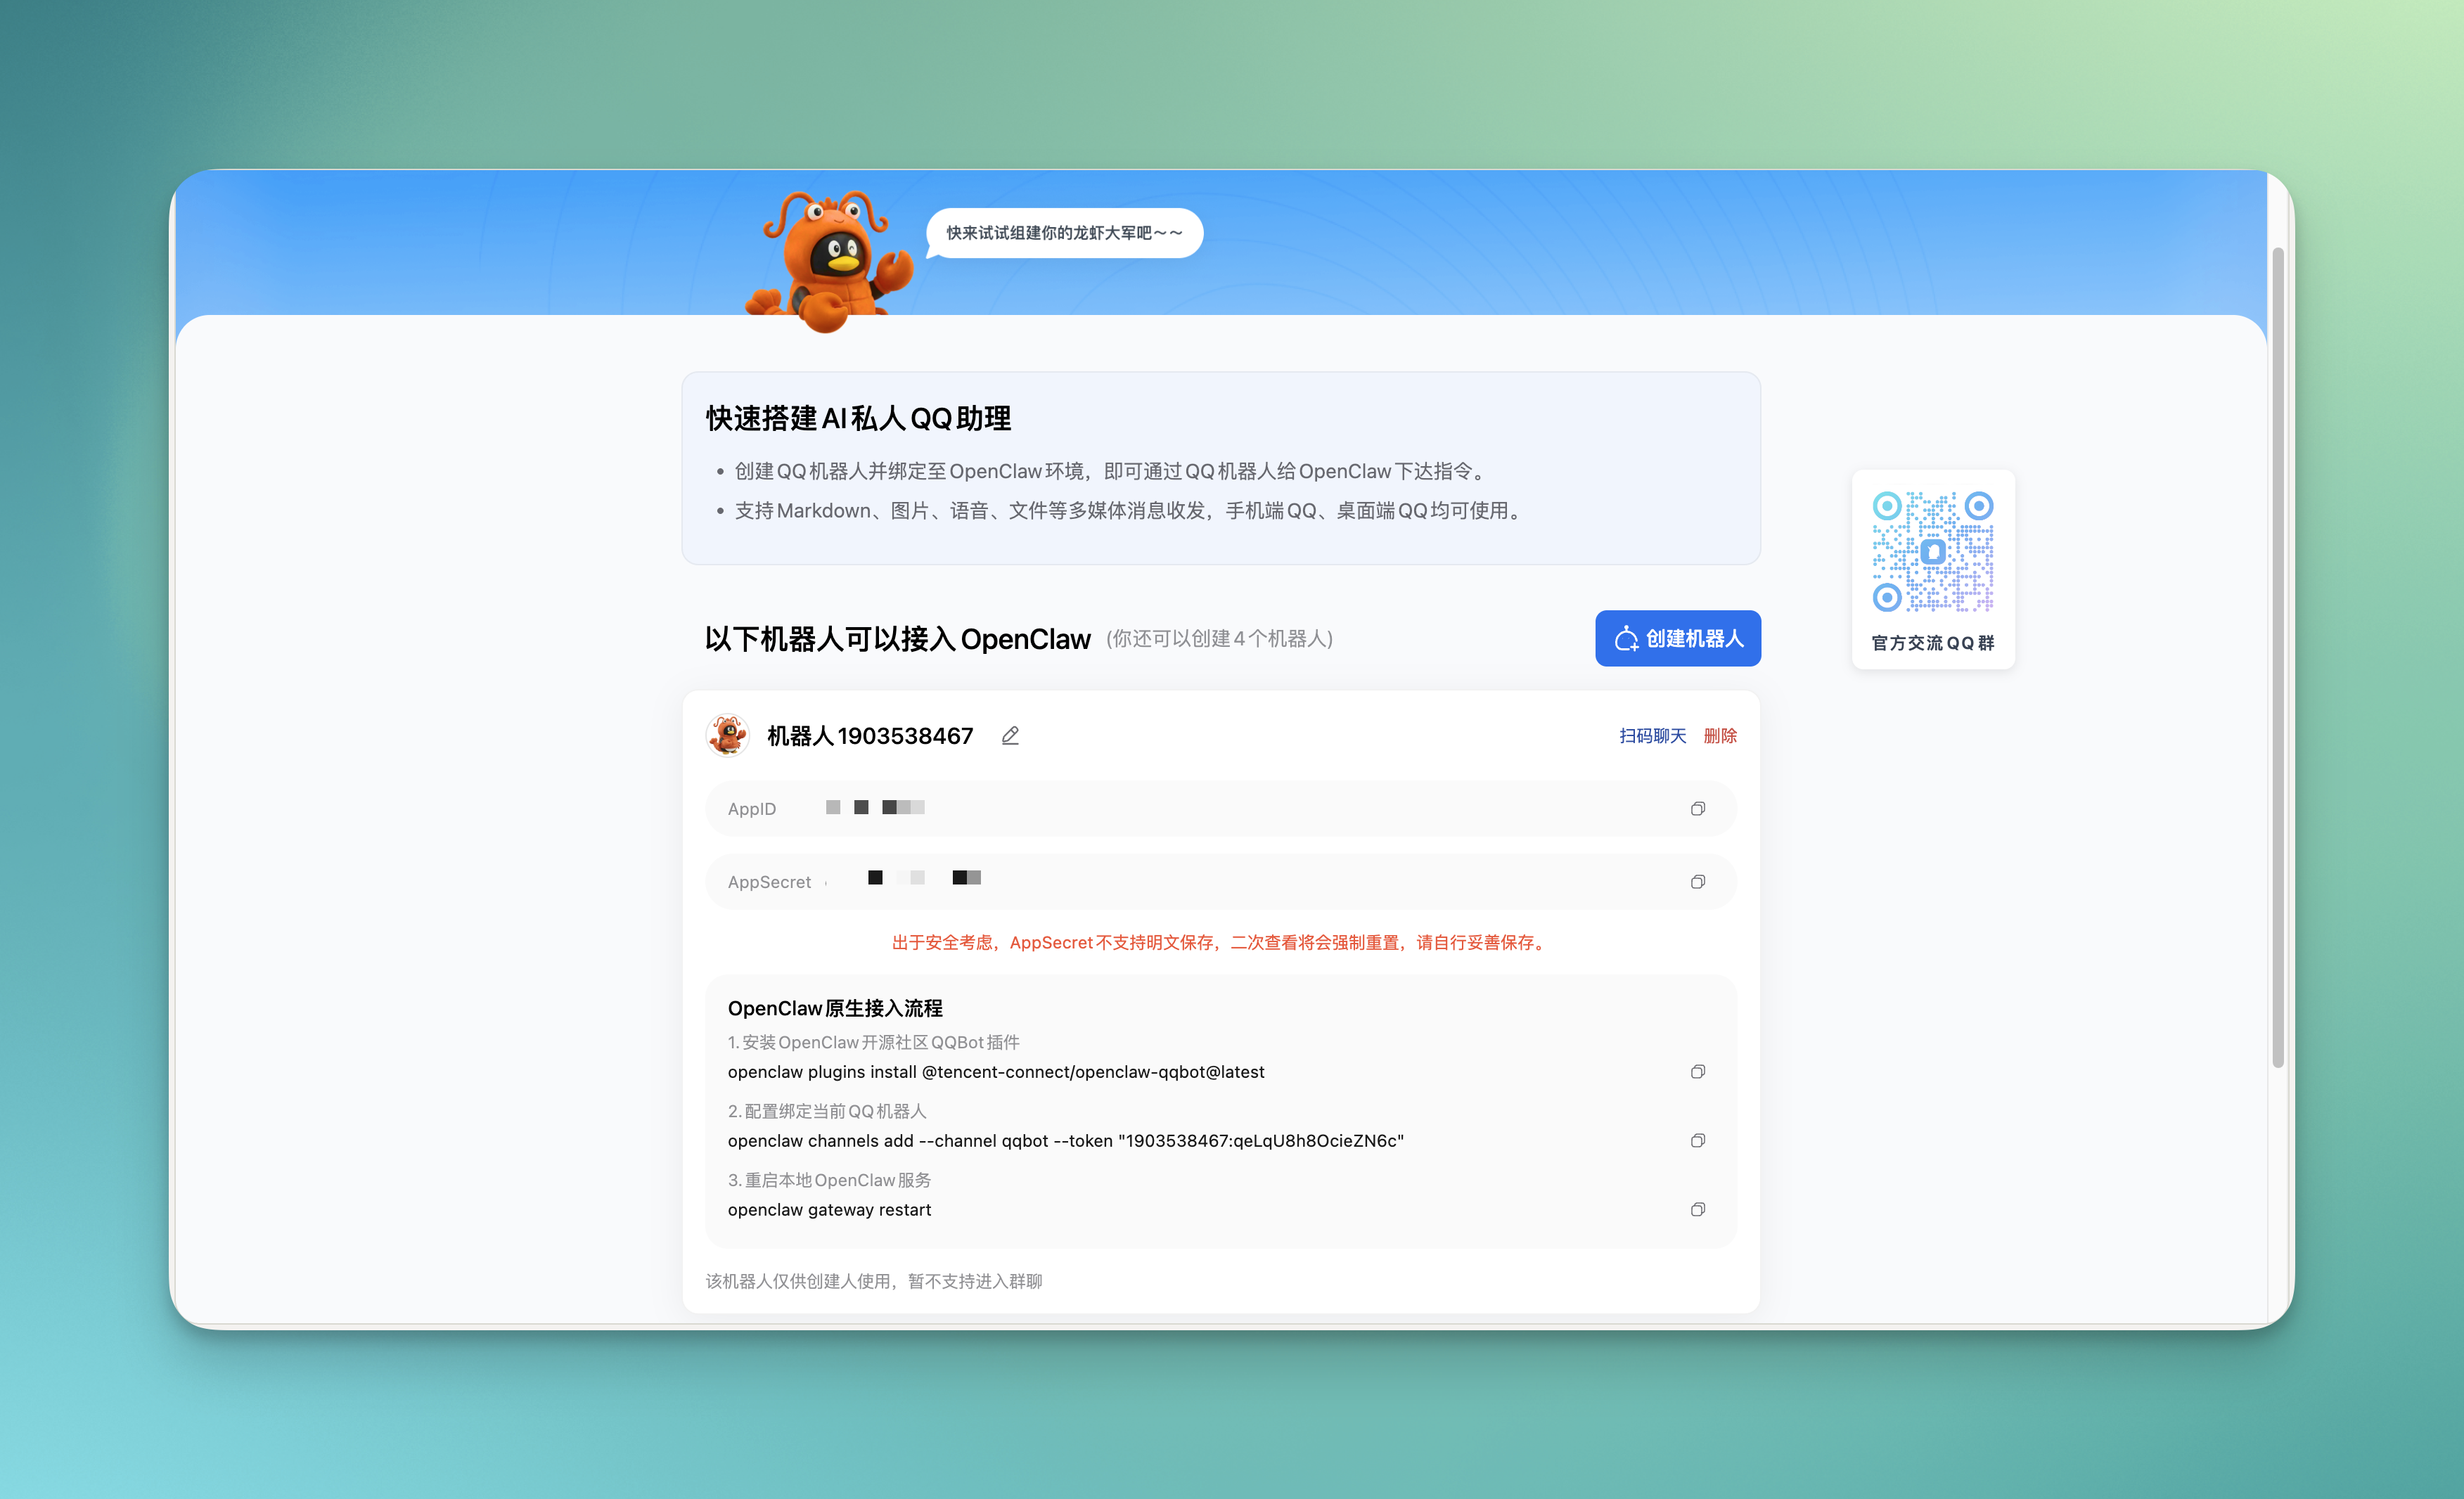
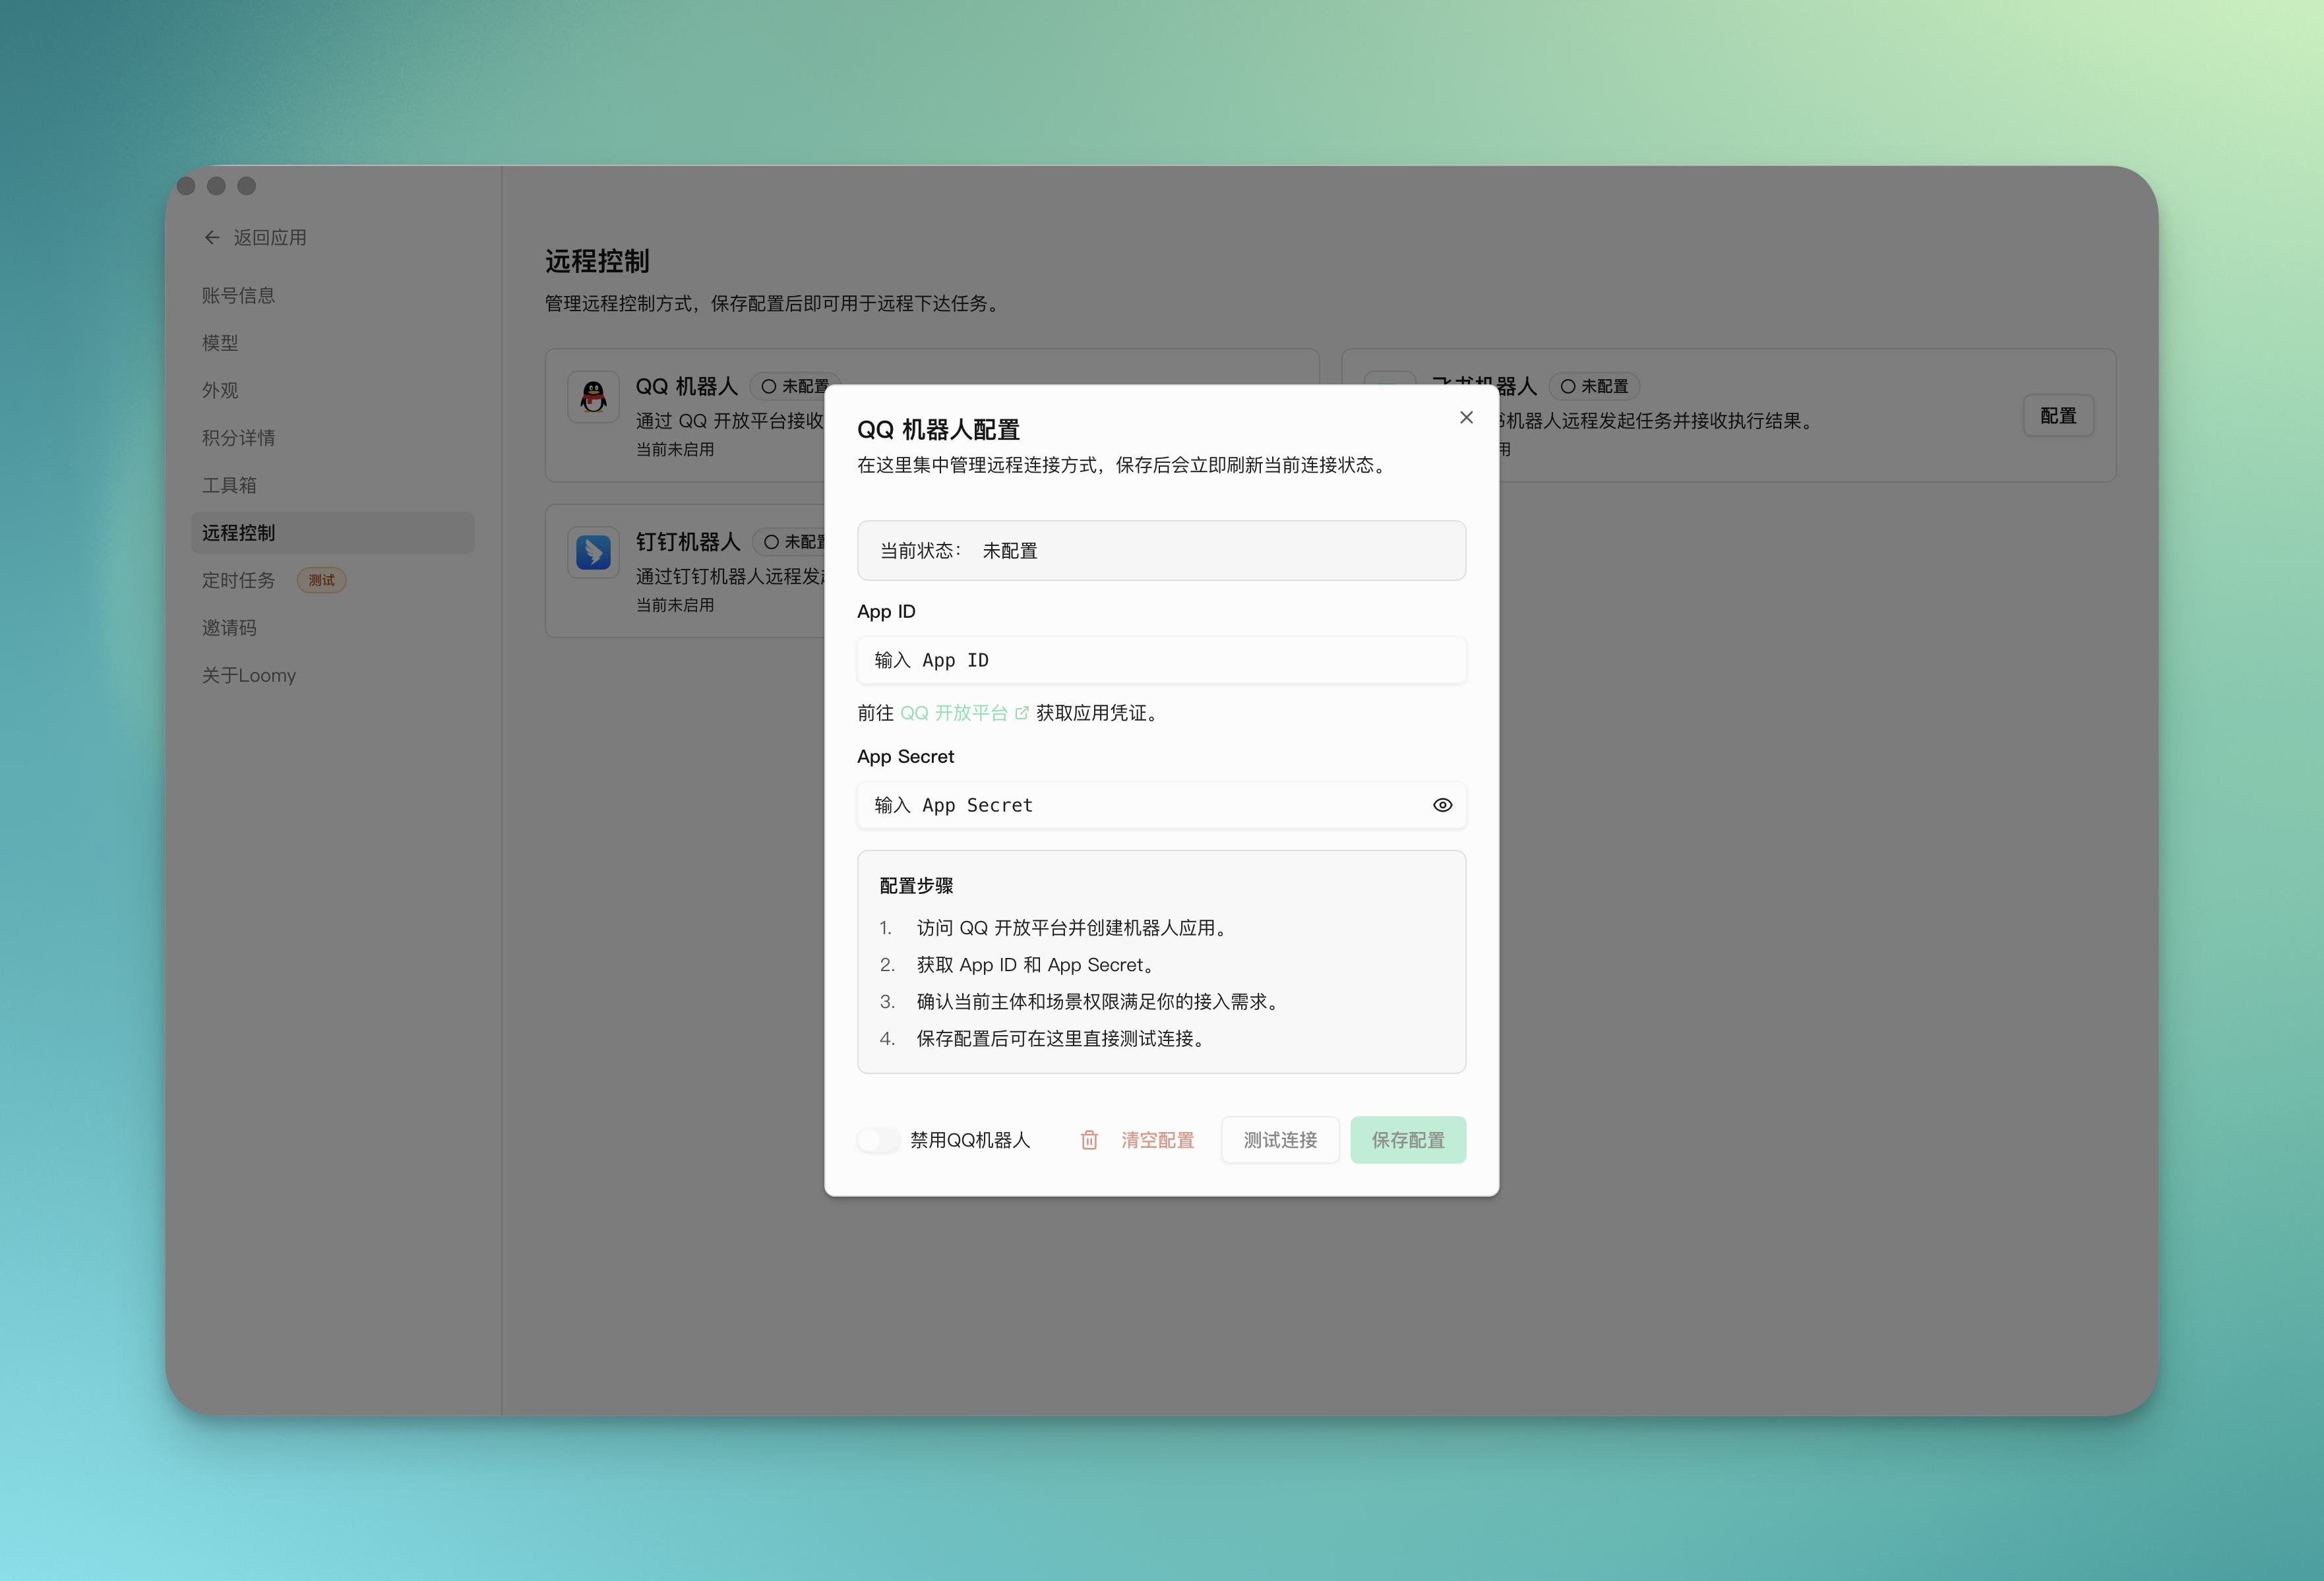
- Fill in the obtained AppID and AppSecret into the Loomy bot configuration information, click enable QQ bot, test the connection, and save the configuration.
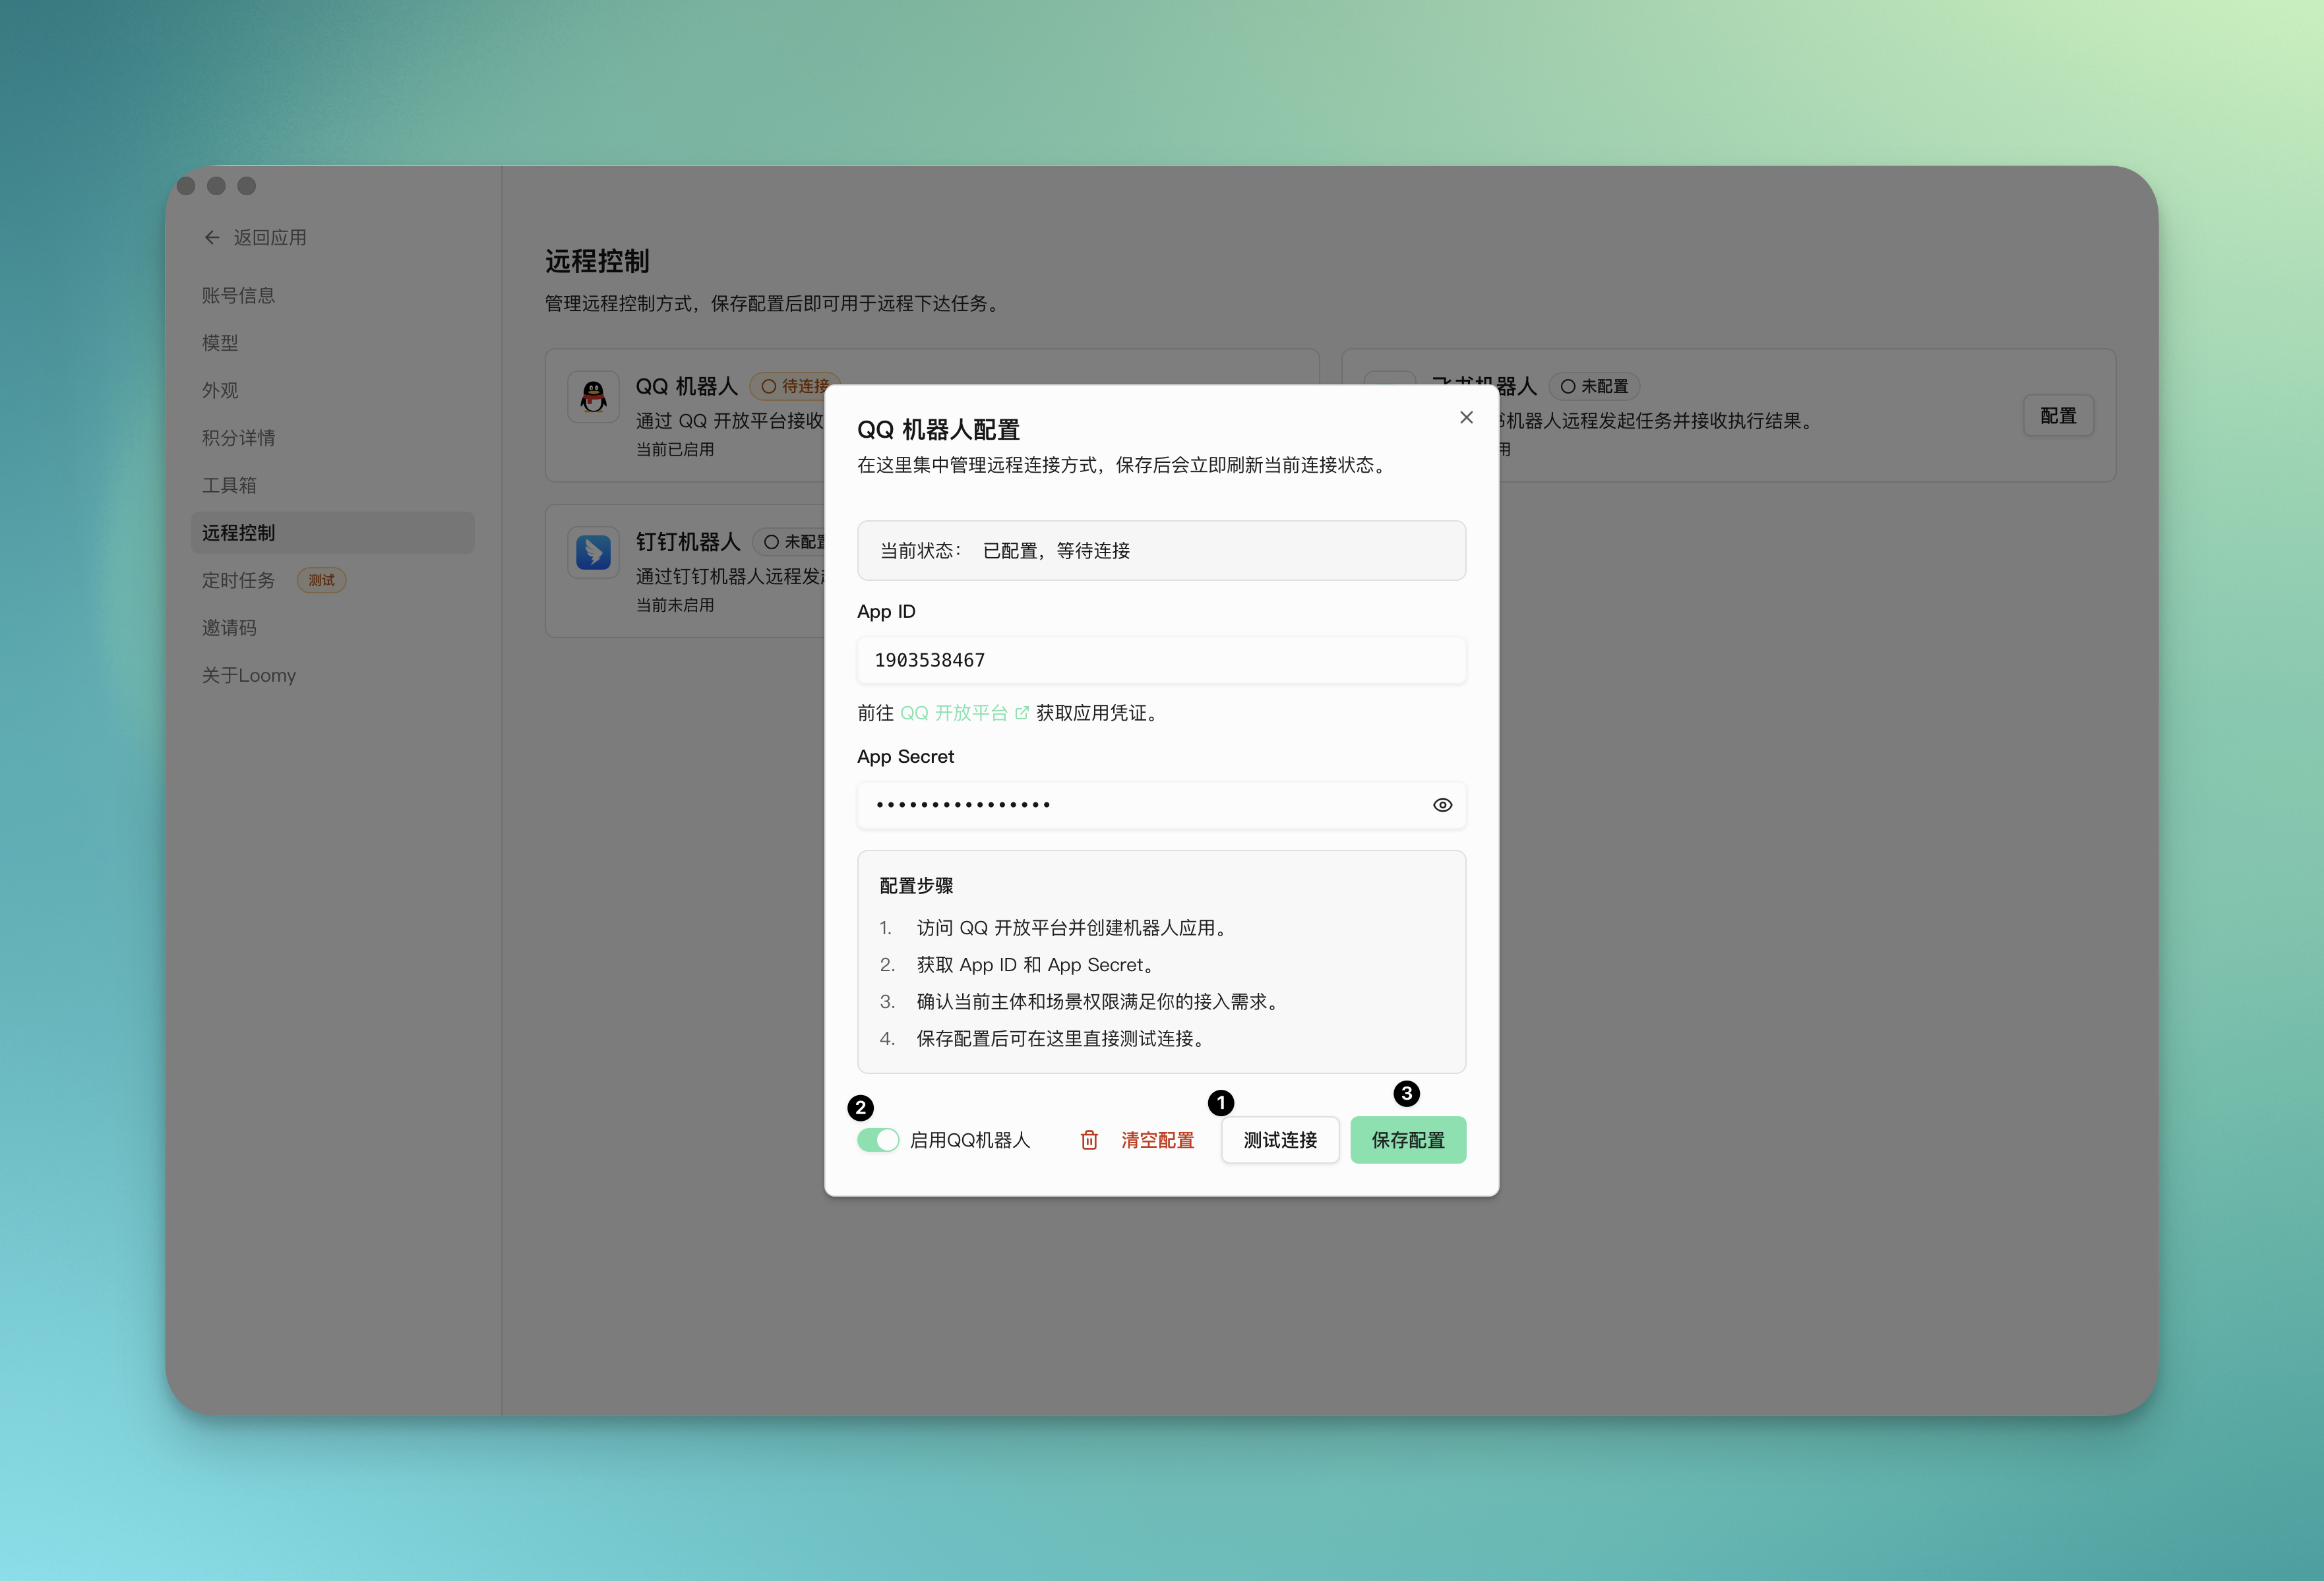
At this time, the QQ bot in the remote control shows "Connected".
- Open your QQ, a new chat window will appear showing that the bot has been created successfully, and you can start chatting~
If you want to configure permissions yourself:
- Log in to the QQ Open Platform, click Bot -> Create Bot, and fill in the name, avatar, description, and other information.
- Callback Configuration, select the events you need to add.

- Development Management, copy AppID and AppSecret.
- Same as above, fill in the obtained AppID and AppSecret into the Loomy bot configuration information, click enable QQ bot, test the connection, and save the configuration.
At this time, the QQ bot in the remote control shows "Connected".
- Open your QQ, a new chat window will appear showing that the bot has been created successfully, and you can start chatting~
Connect to Feishu Bot
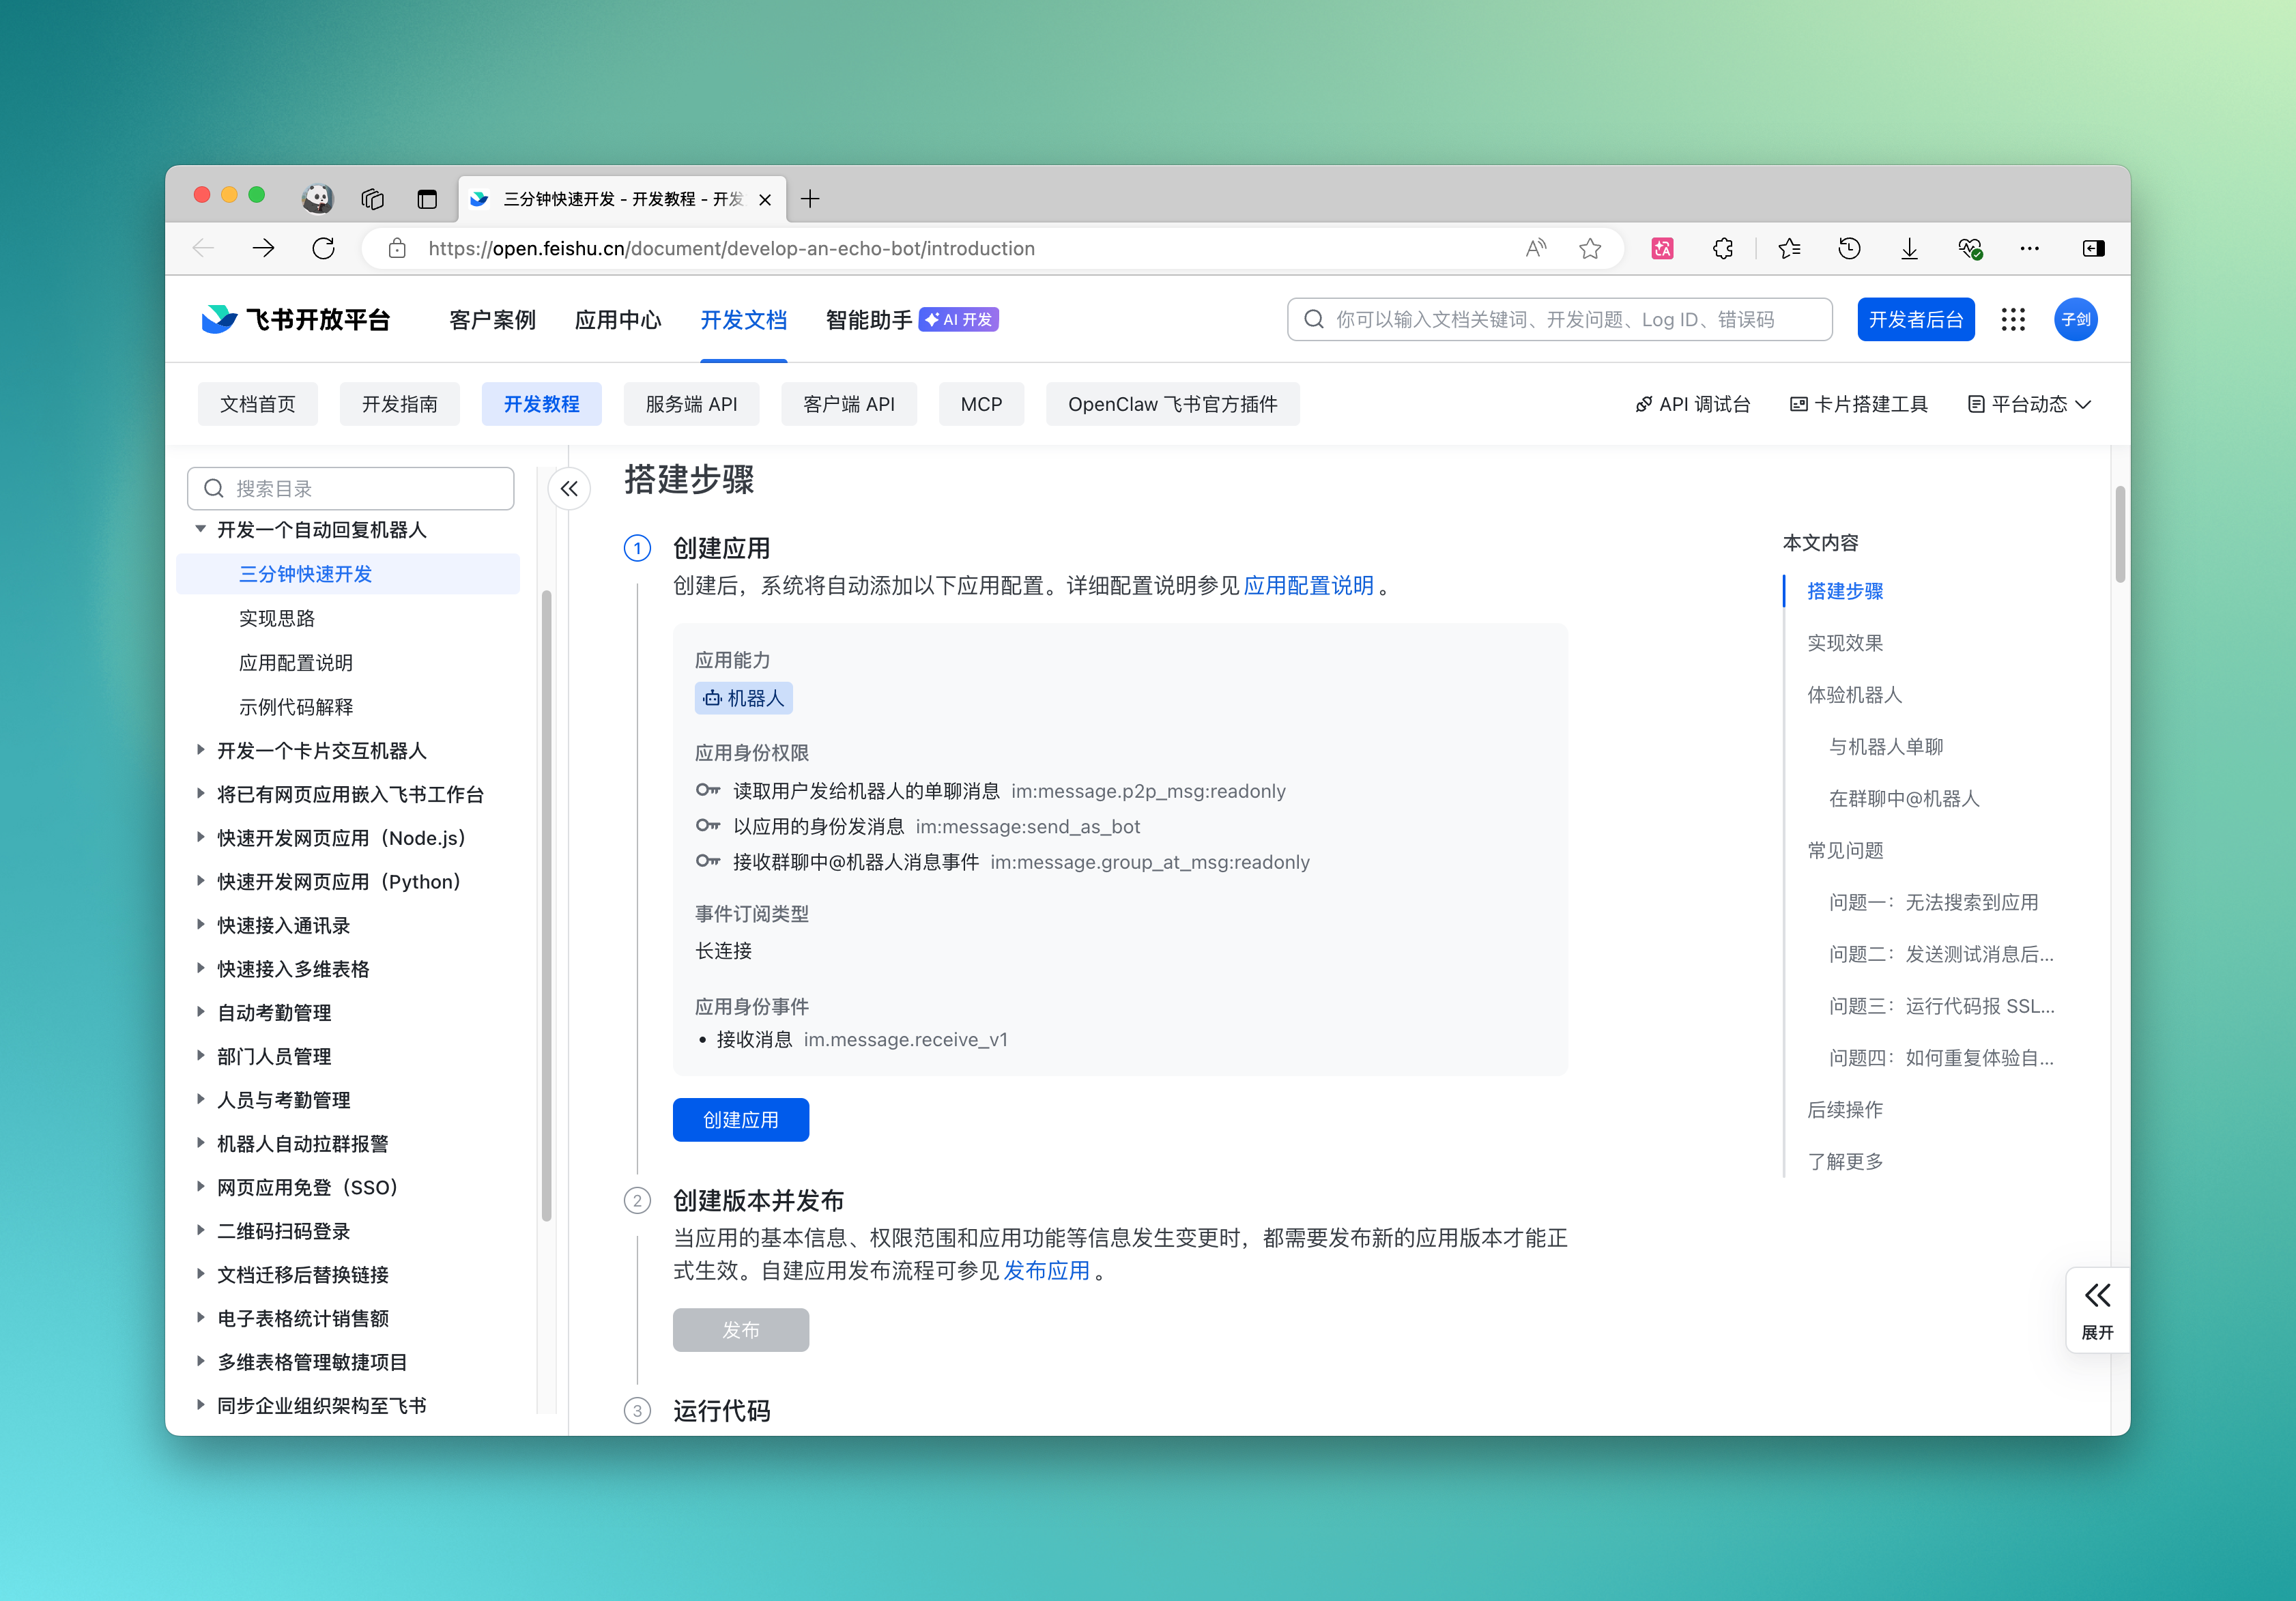
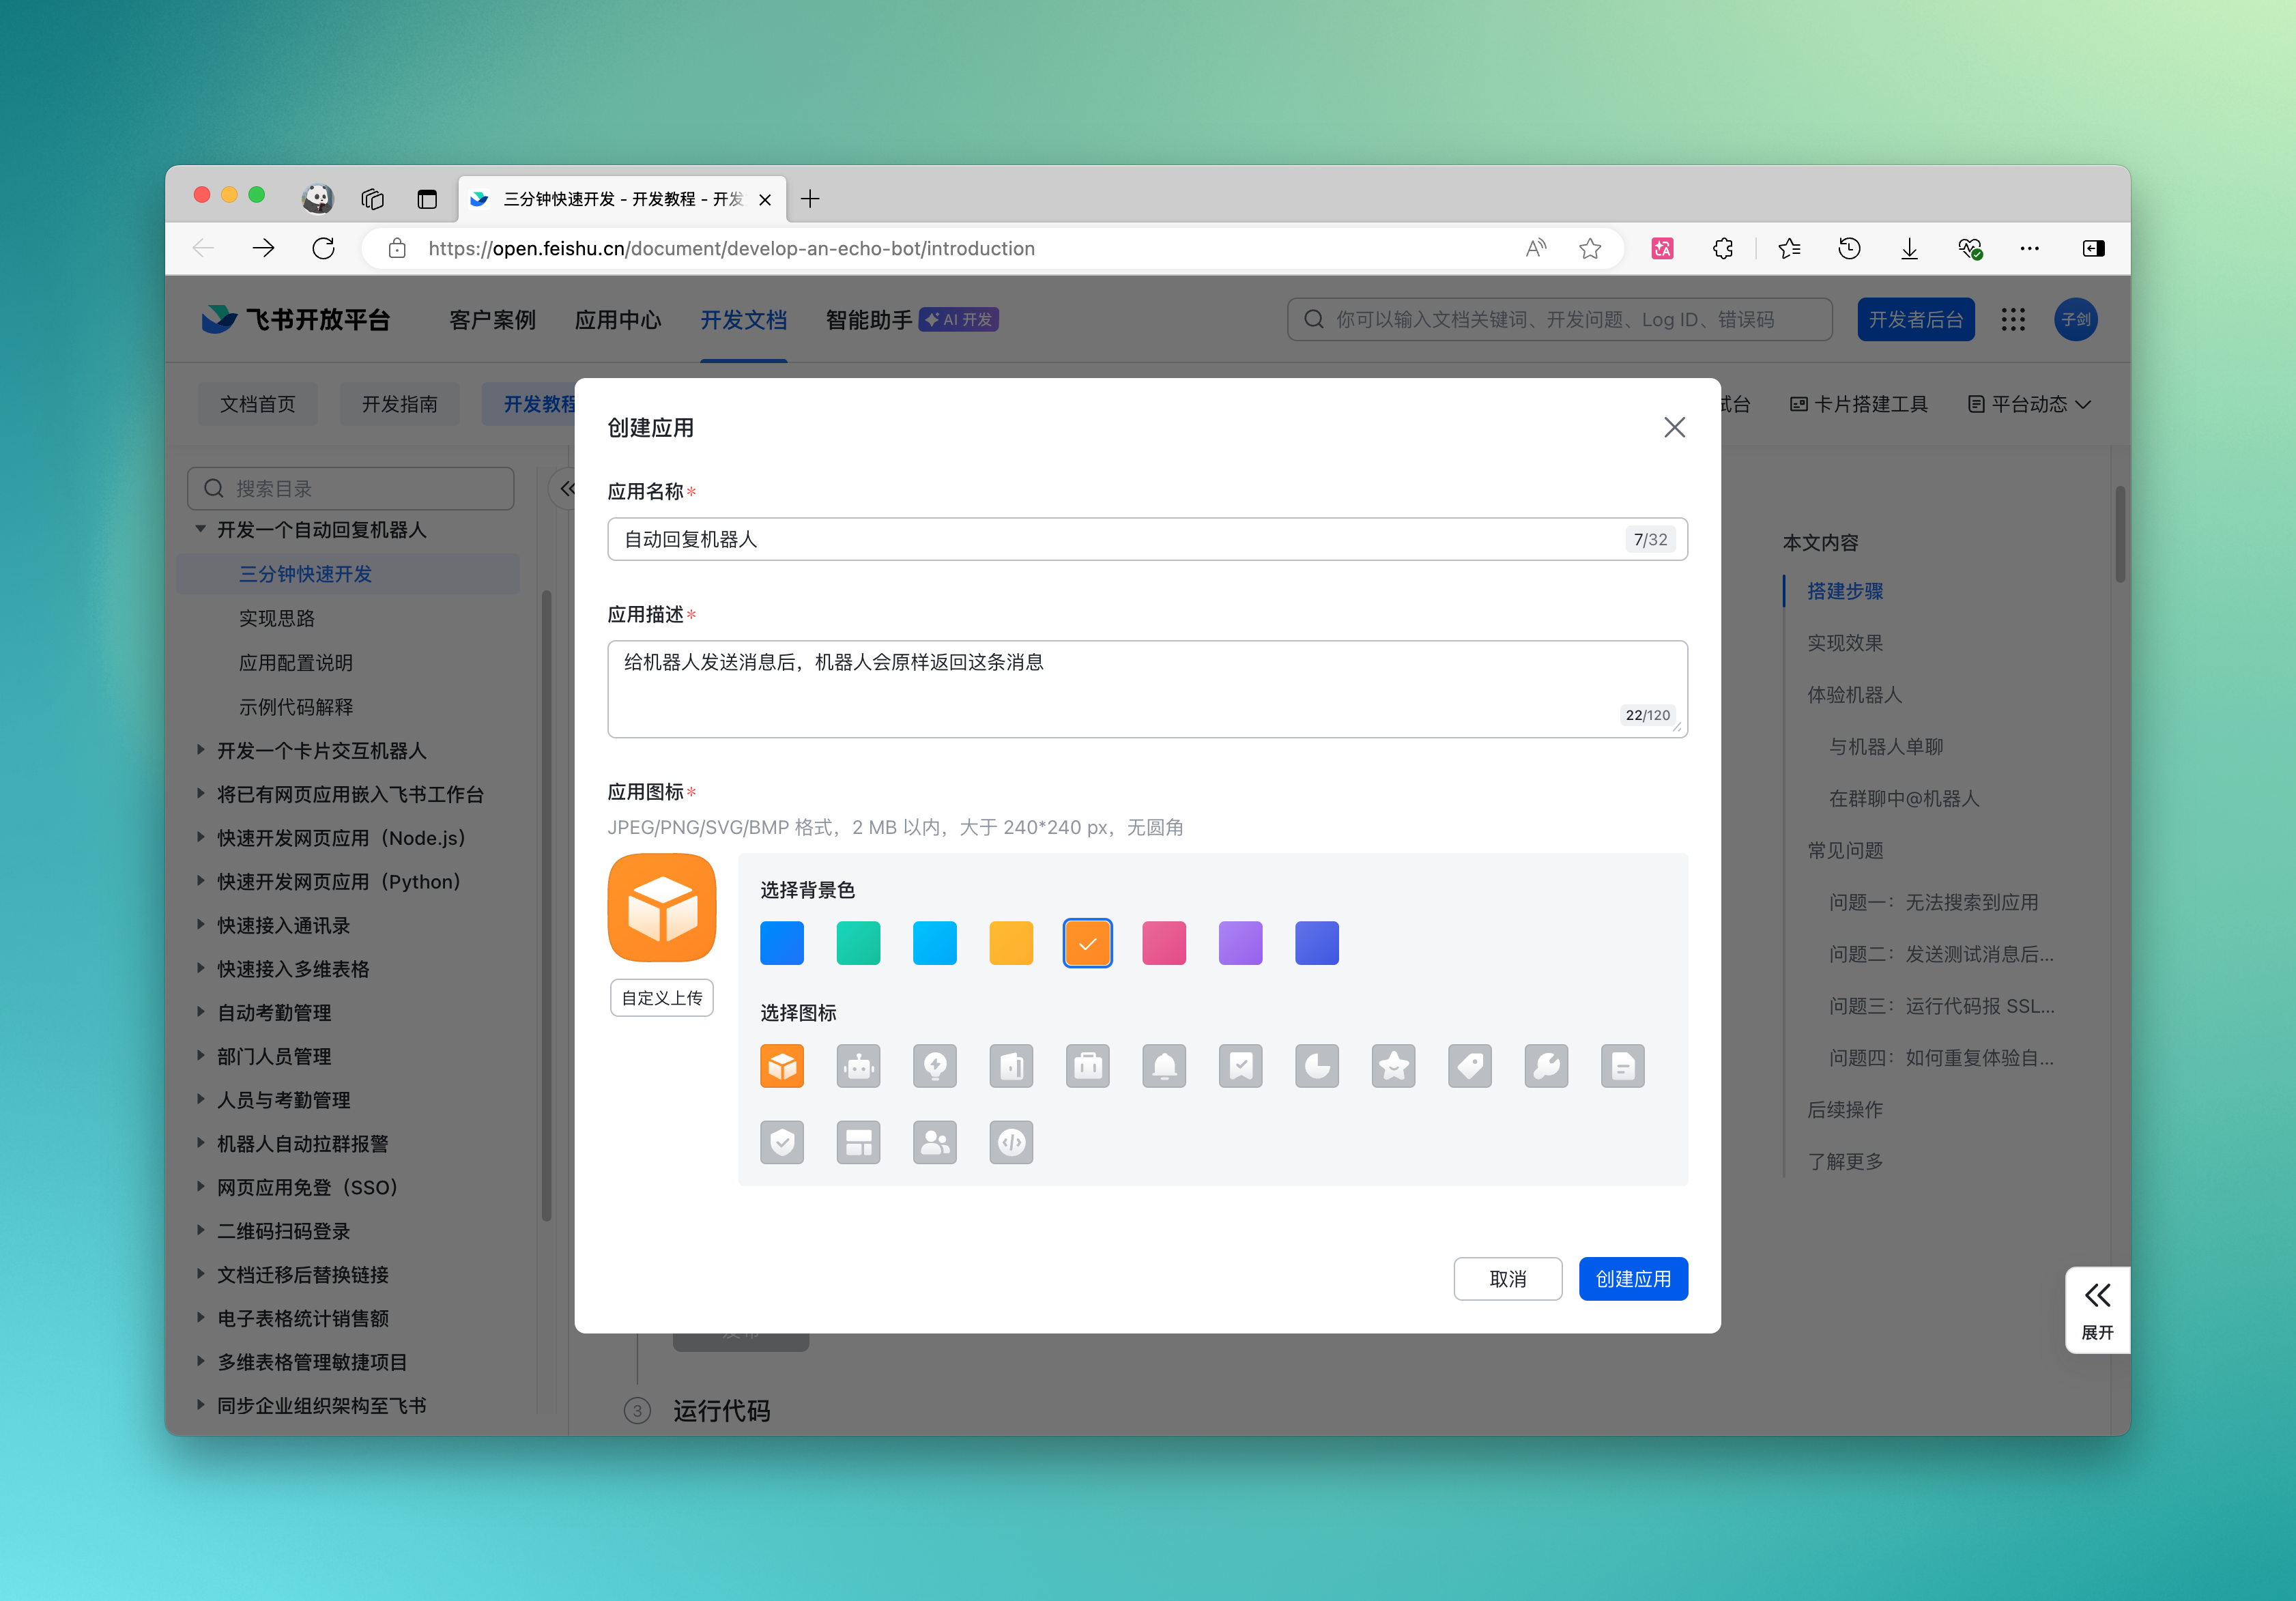
- Create an enterprise custom app on the Feishu Open Platform and enable bot capabilities. You can refer to the official bot creation instructions provided by Feishu first:
Follow the instructions to click "Create App" and fill in the corresponding information:
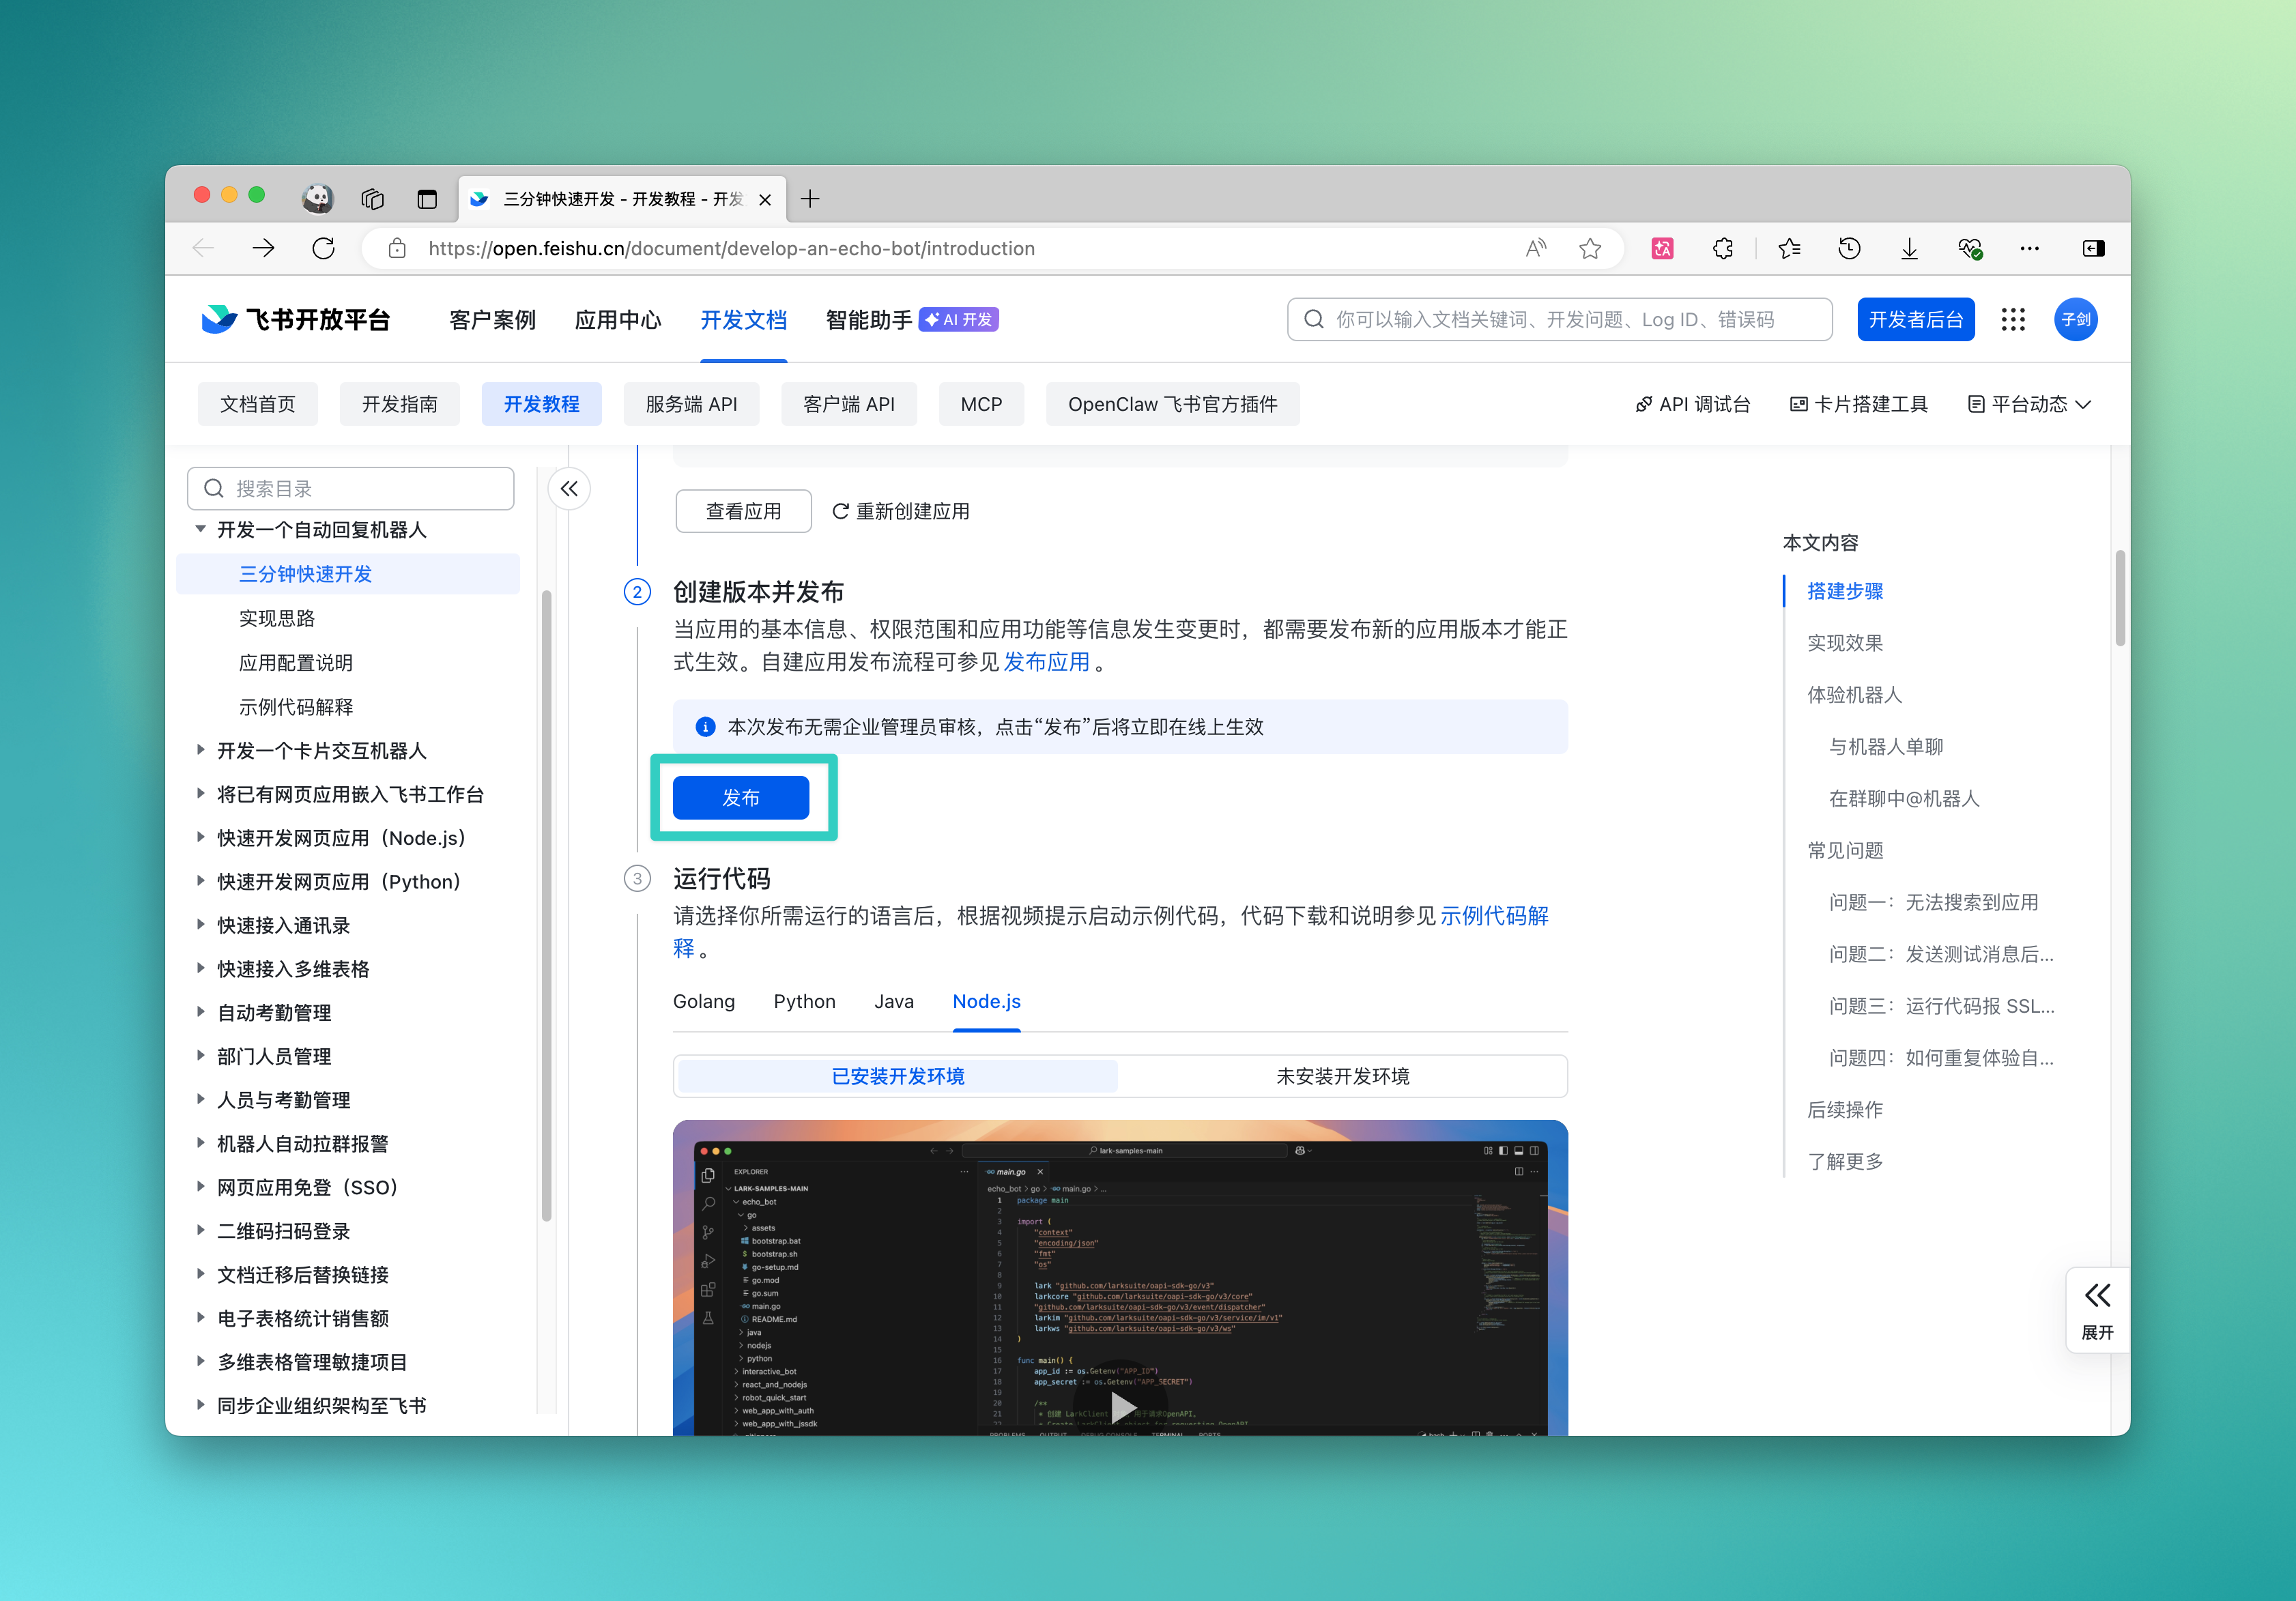
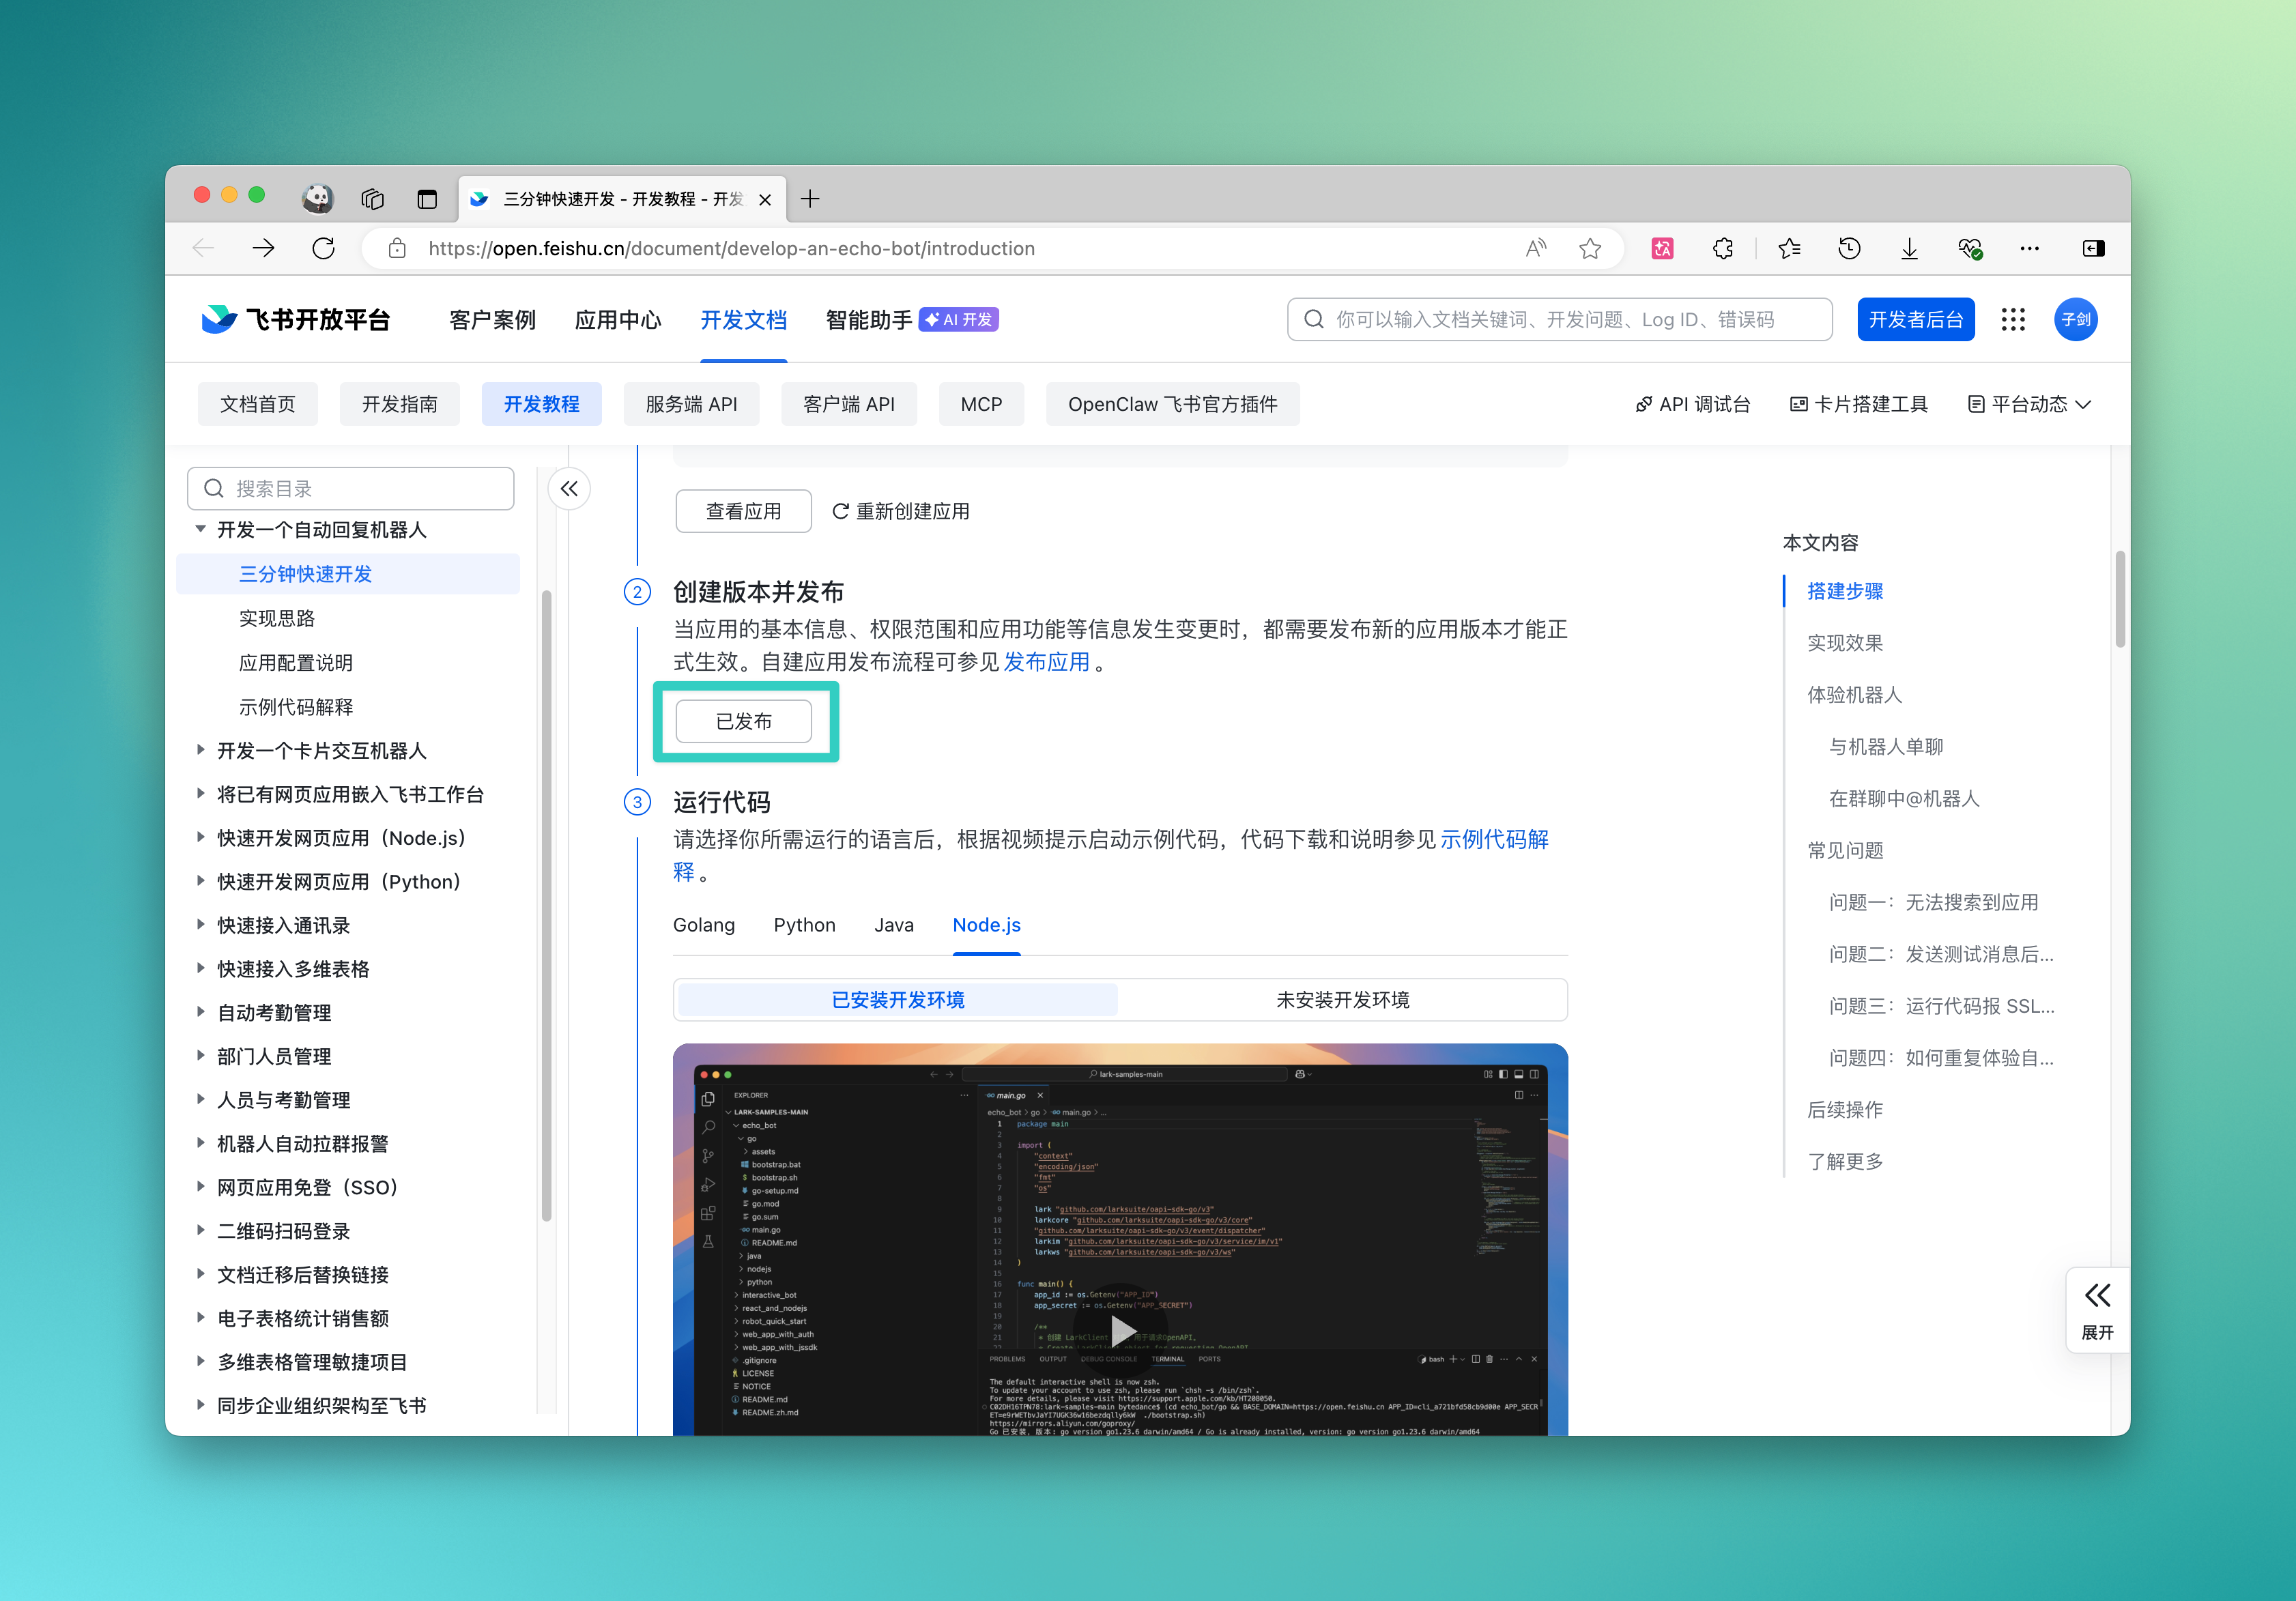
- After completing the app creation, publish the bot, ensure the bot status is "Published", and then click "Published" to jump to the bot list page:
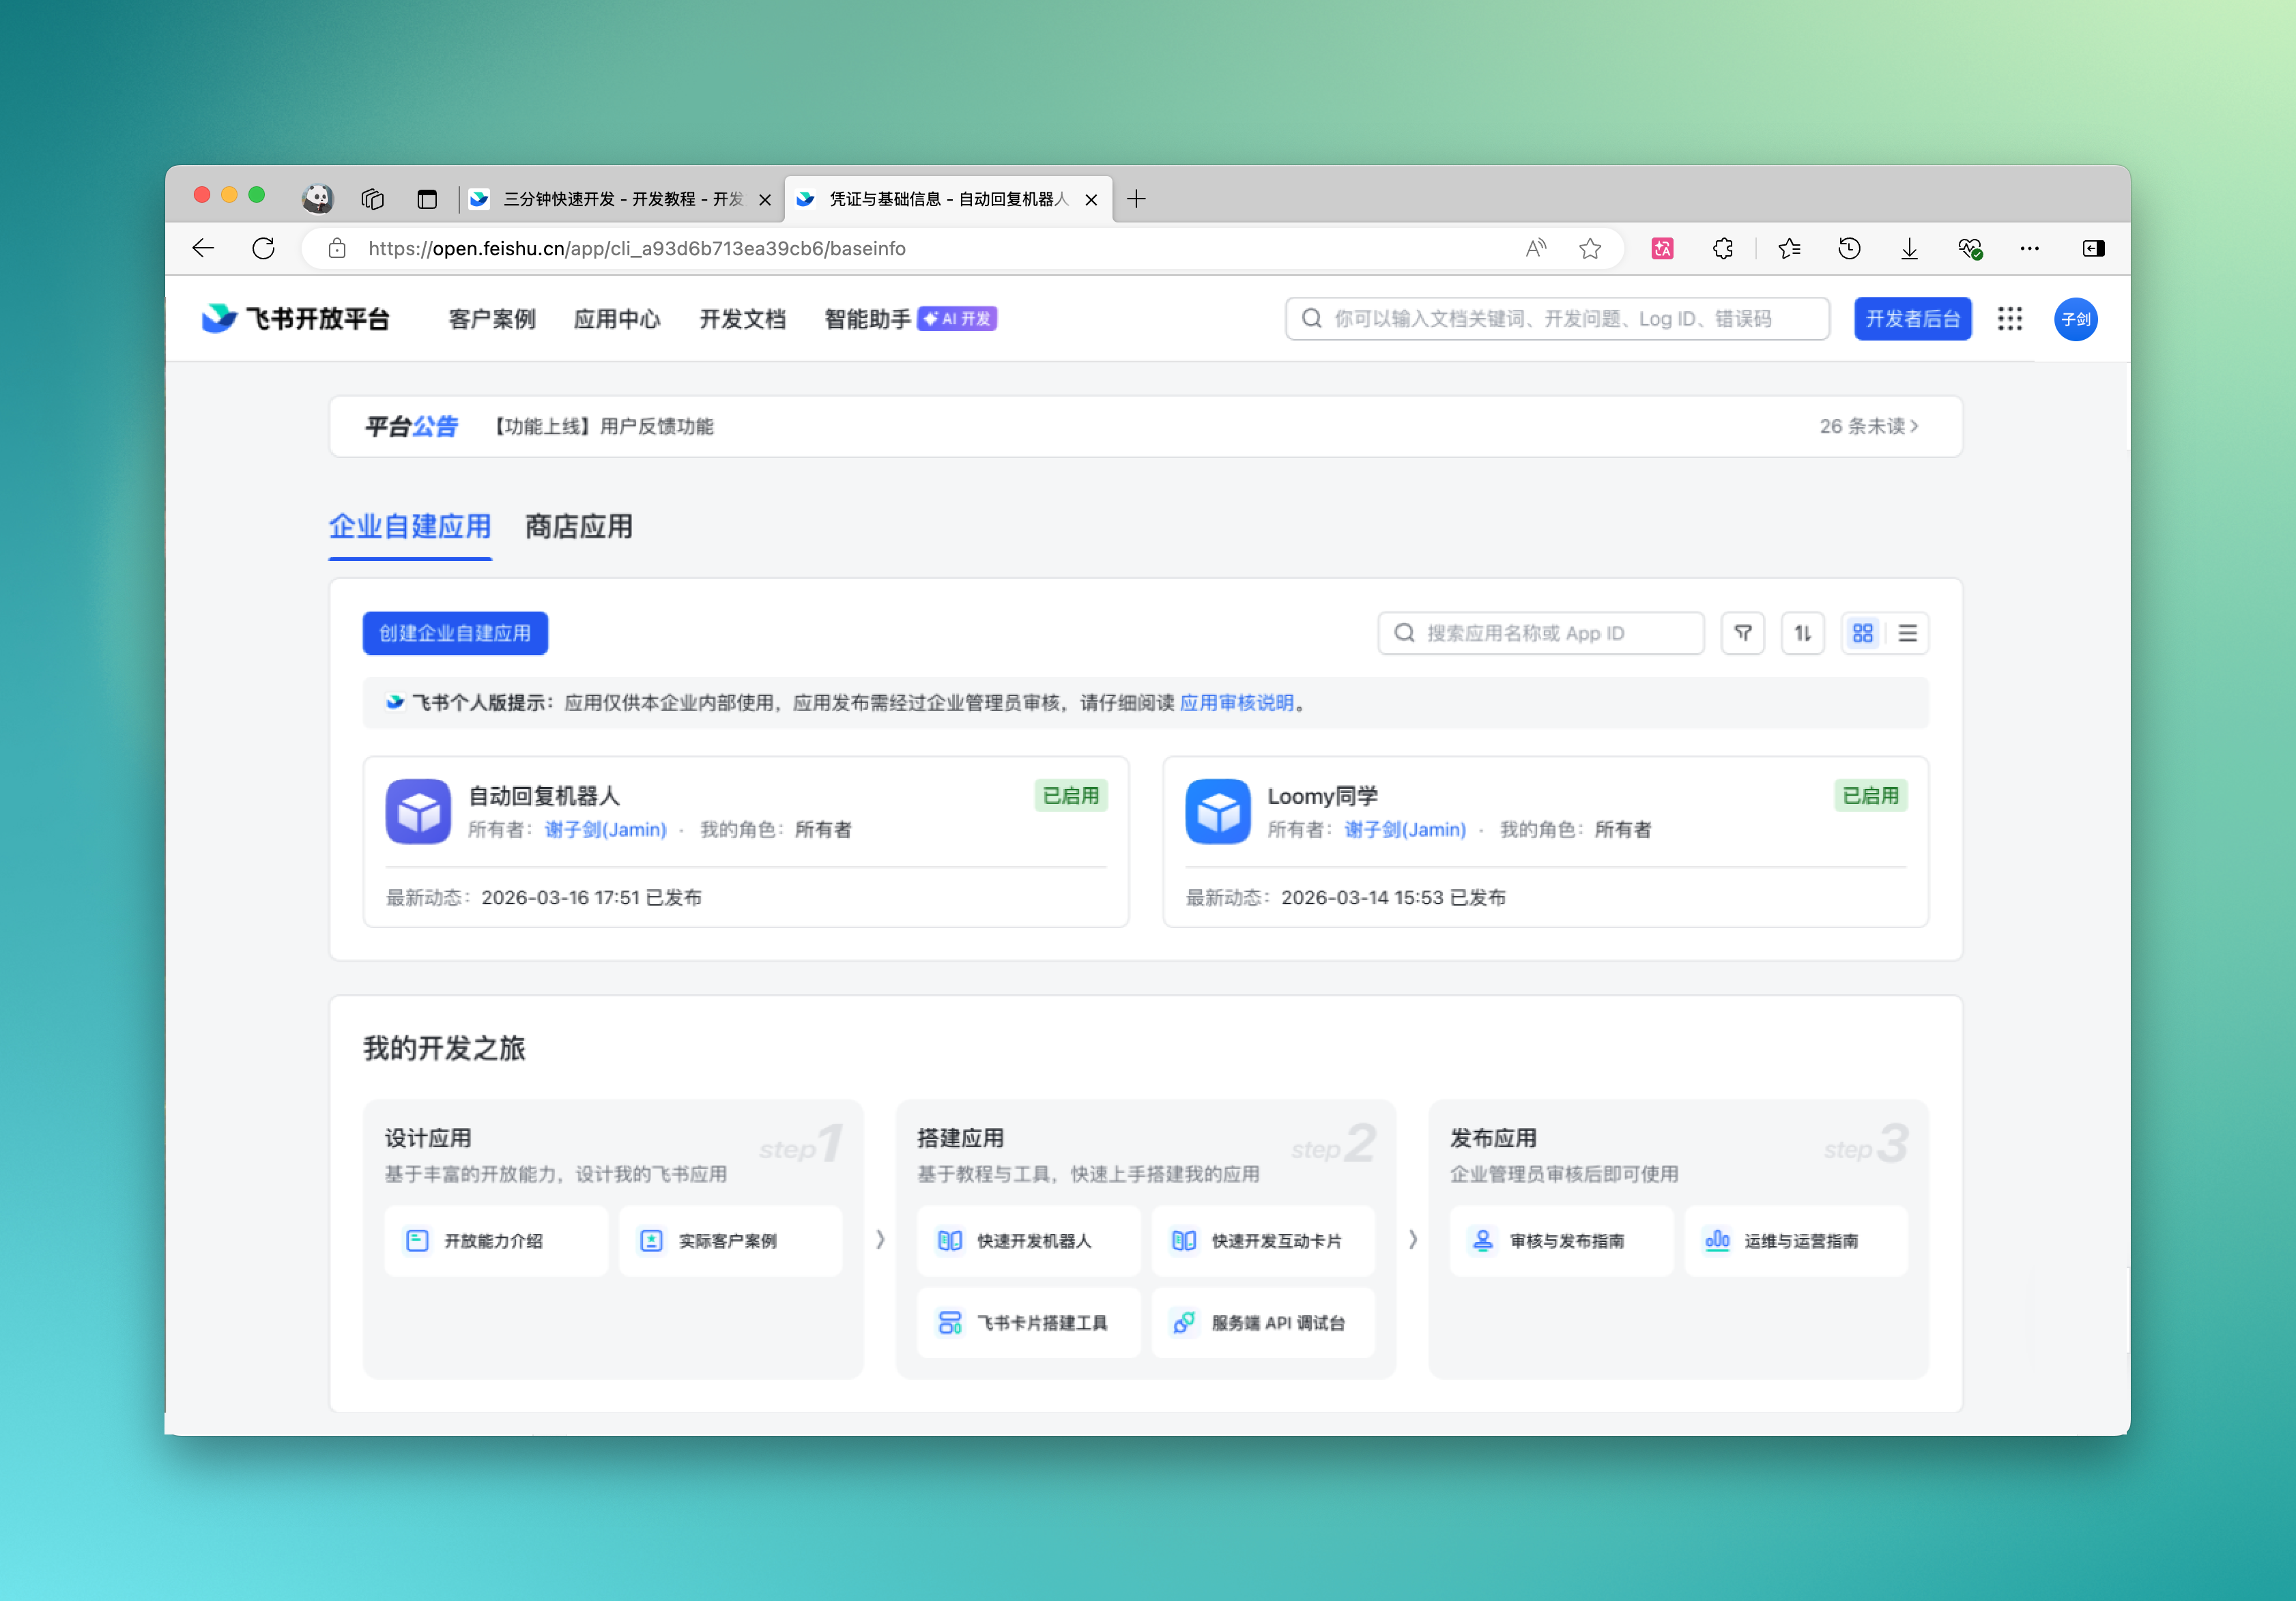
Find the bot app you just created in the list:
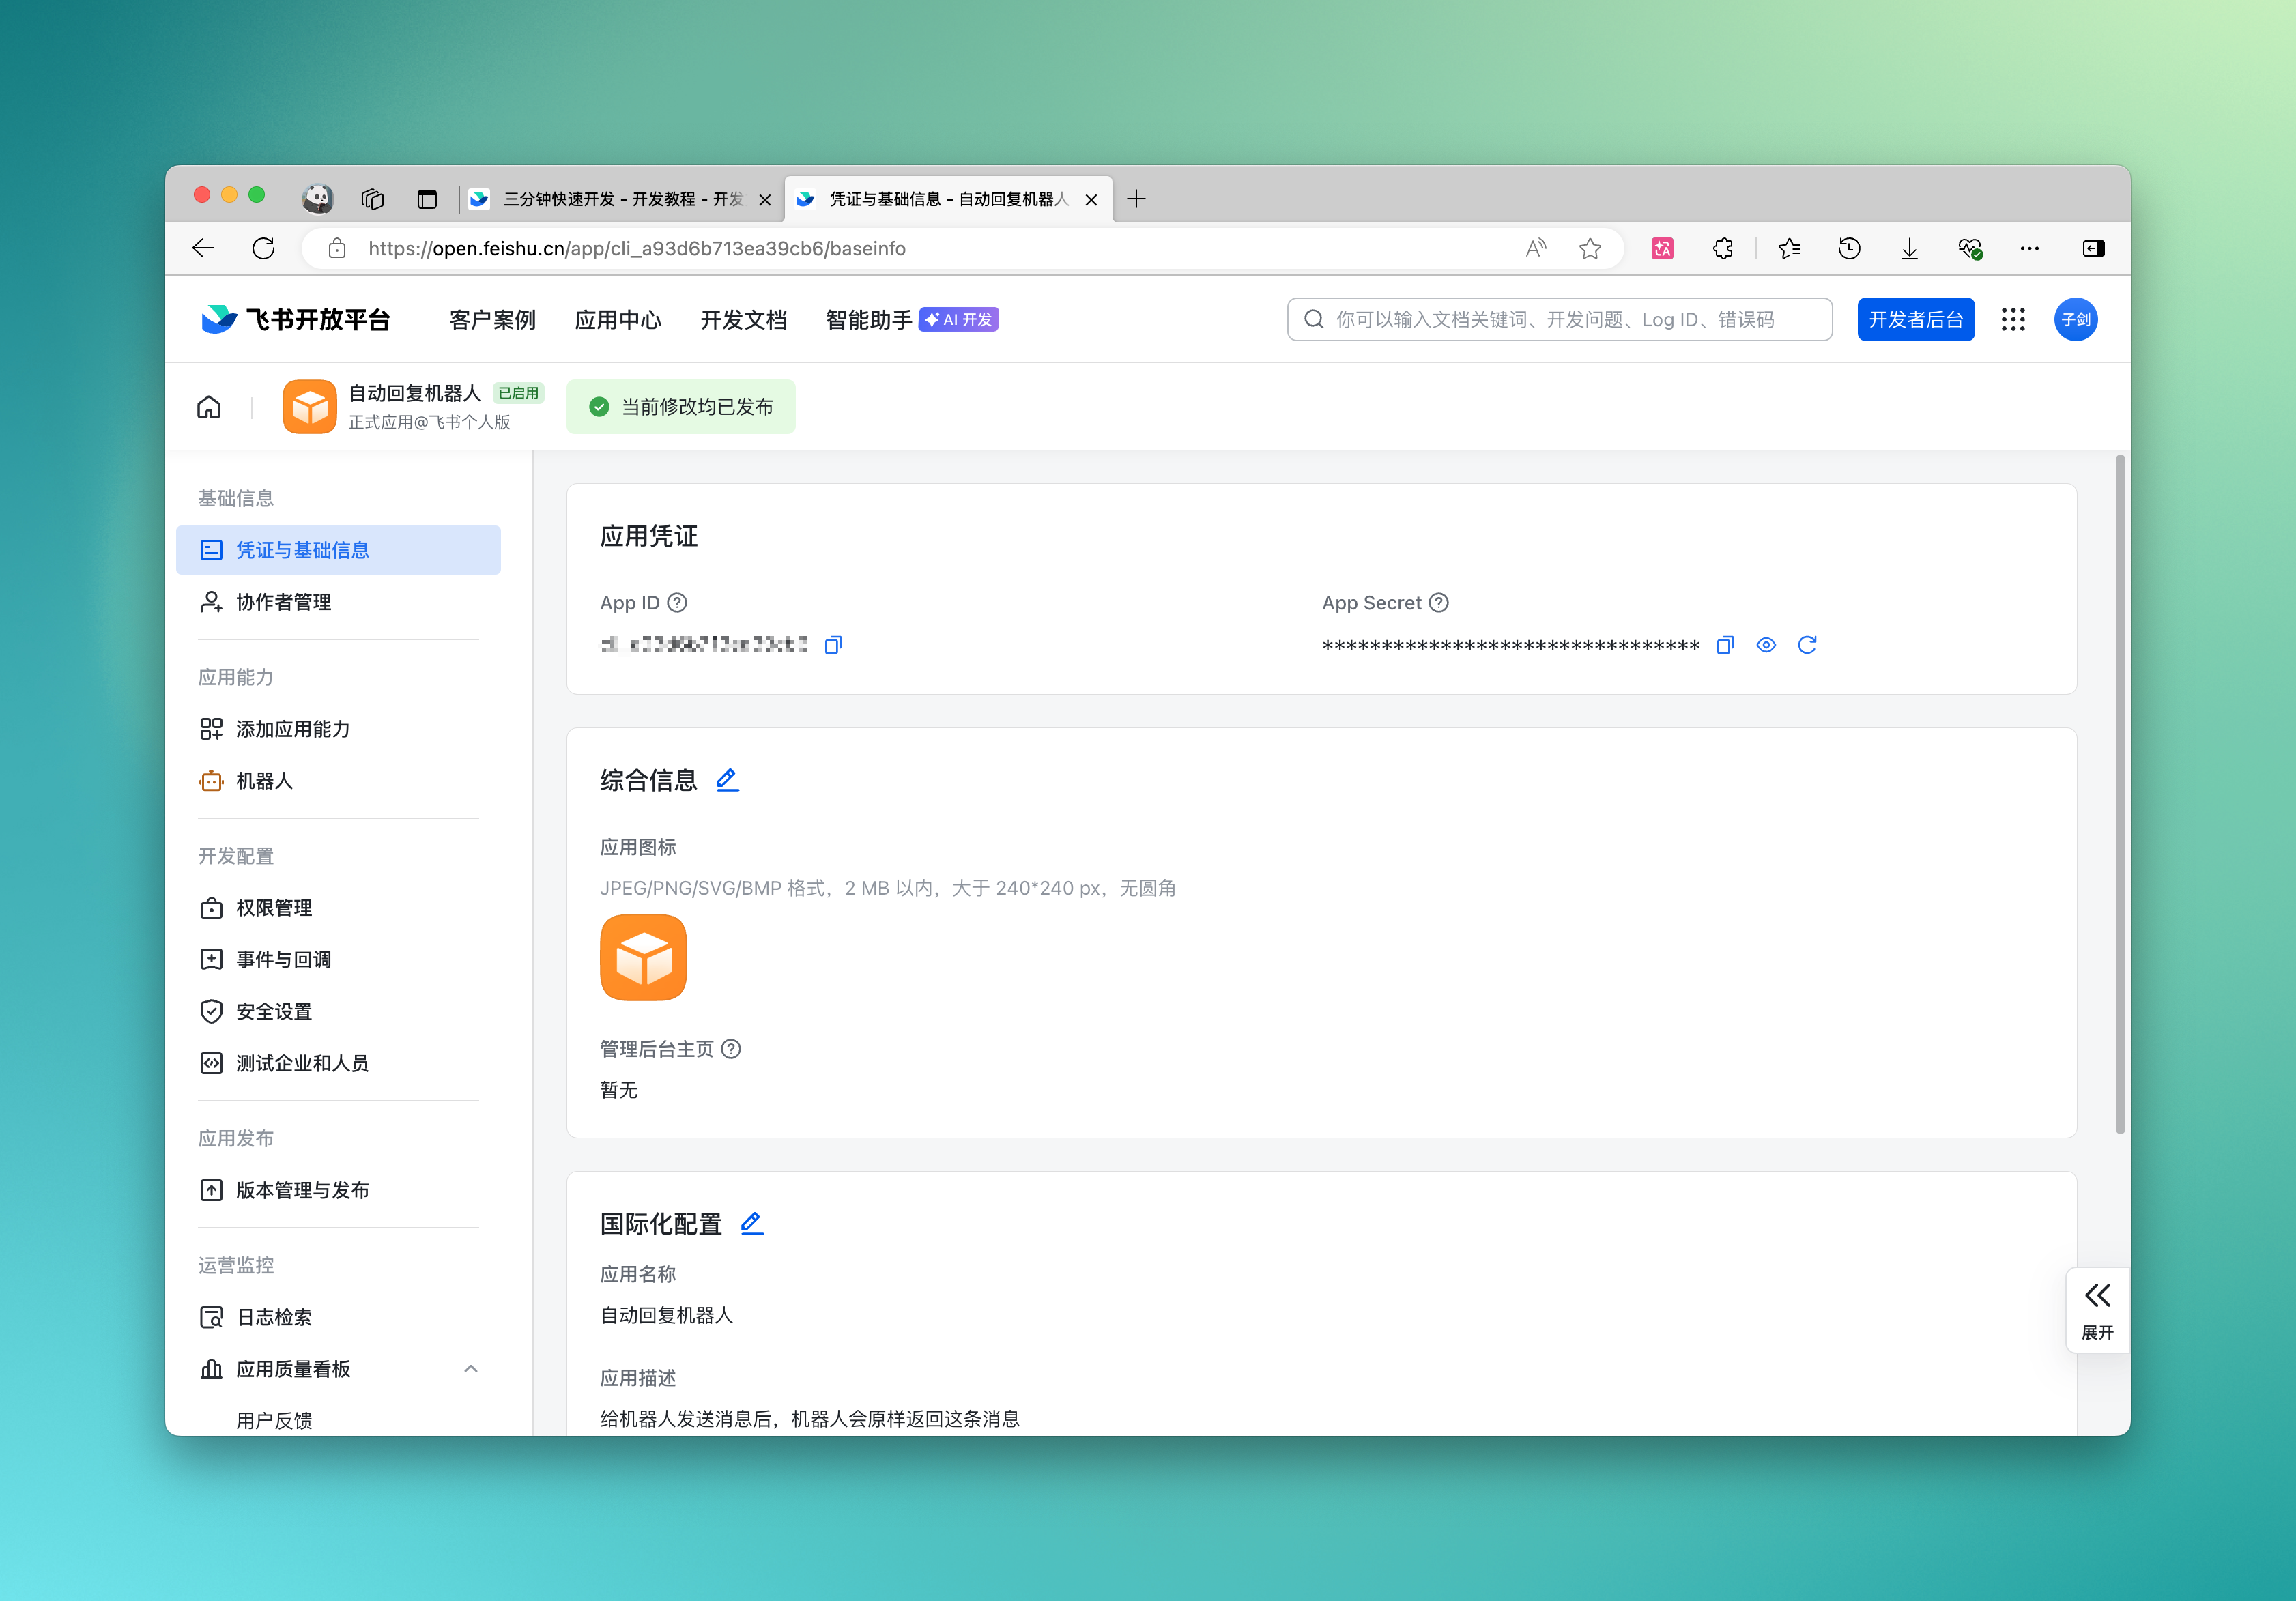
- Copy
App IDandApp Secreton the "Credentials and Basic Info" page:
- Open the Loomy client and enter the "Remote Control" function in "Settings":
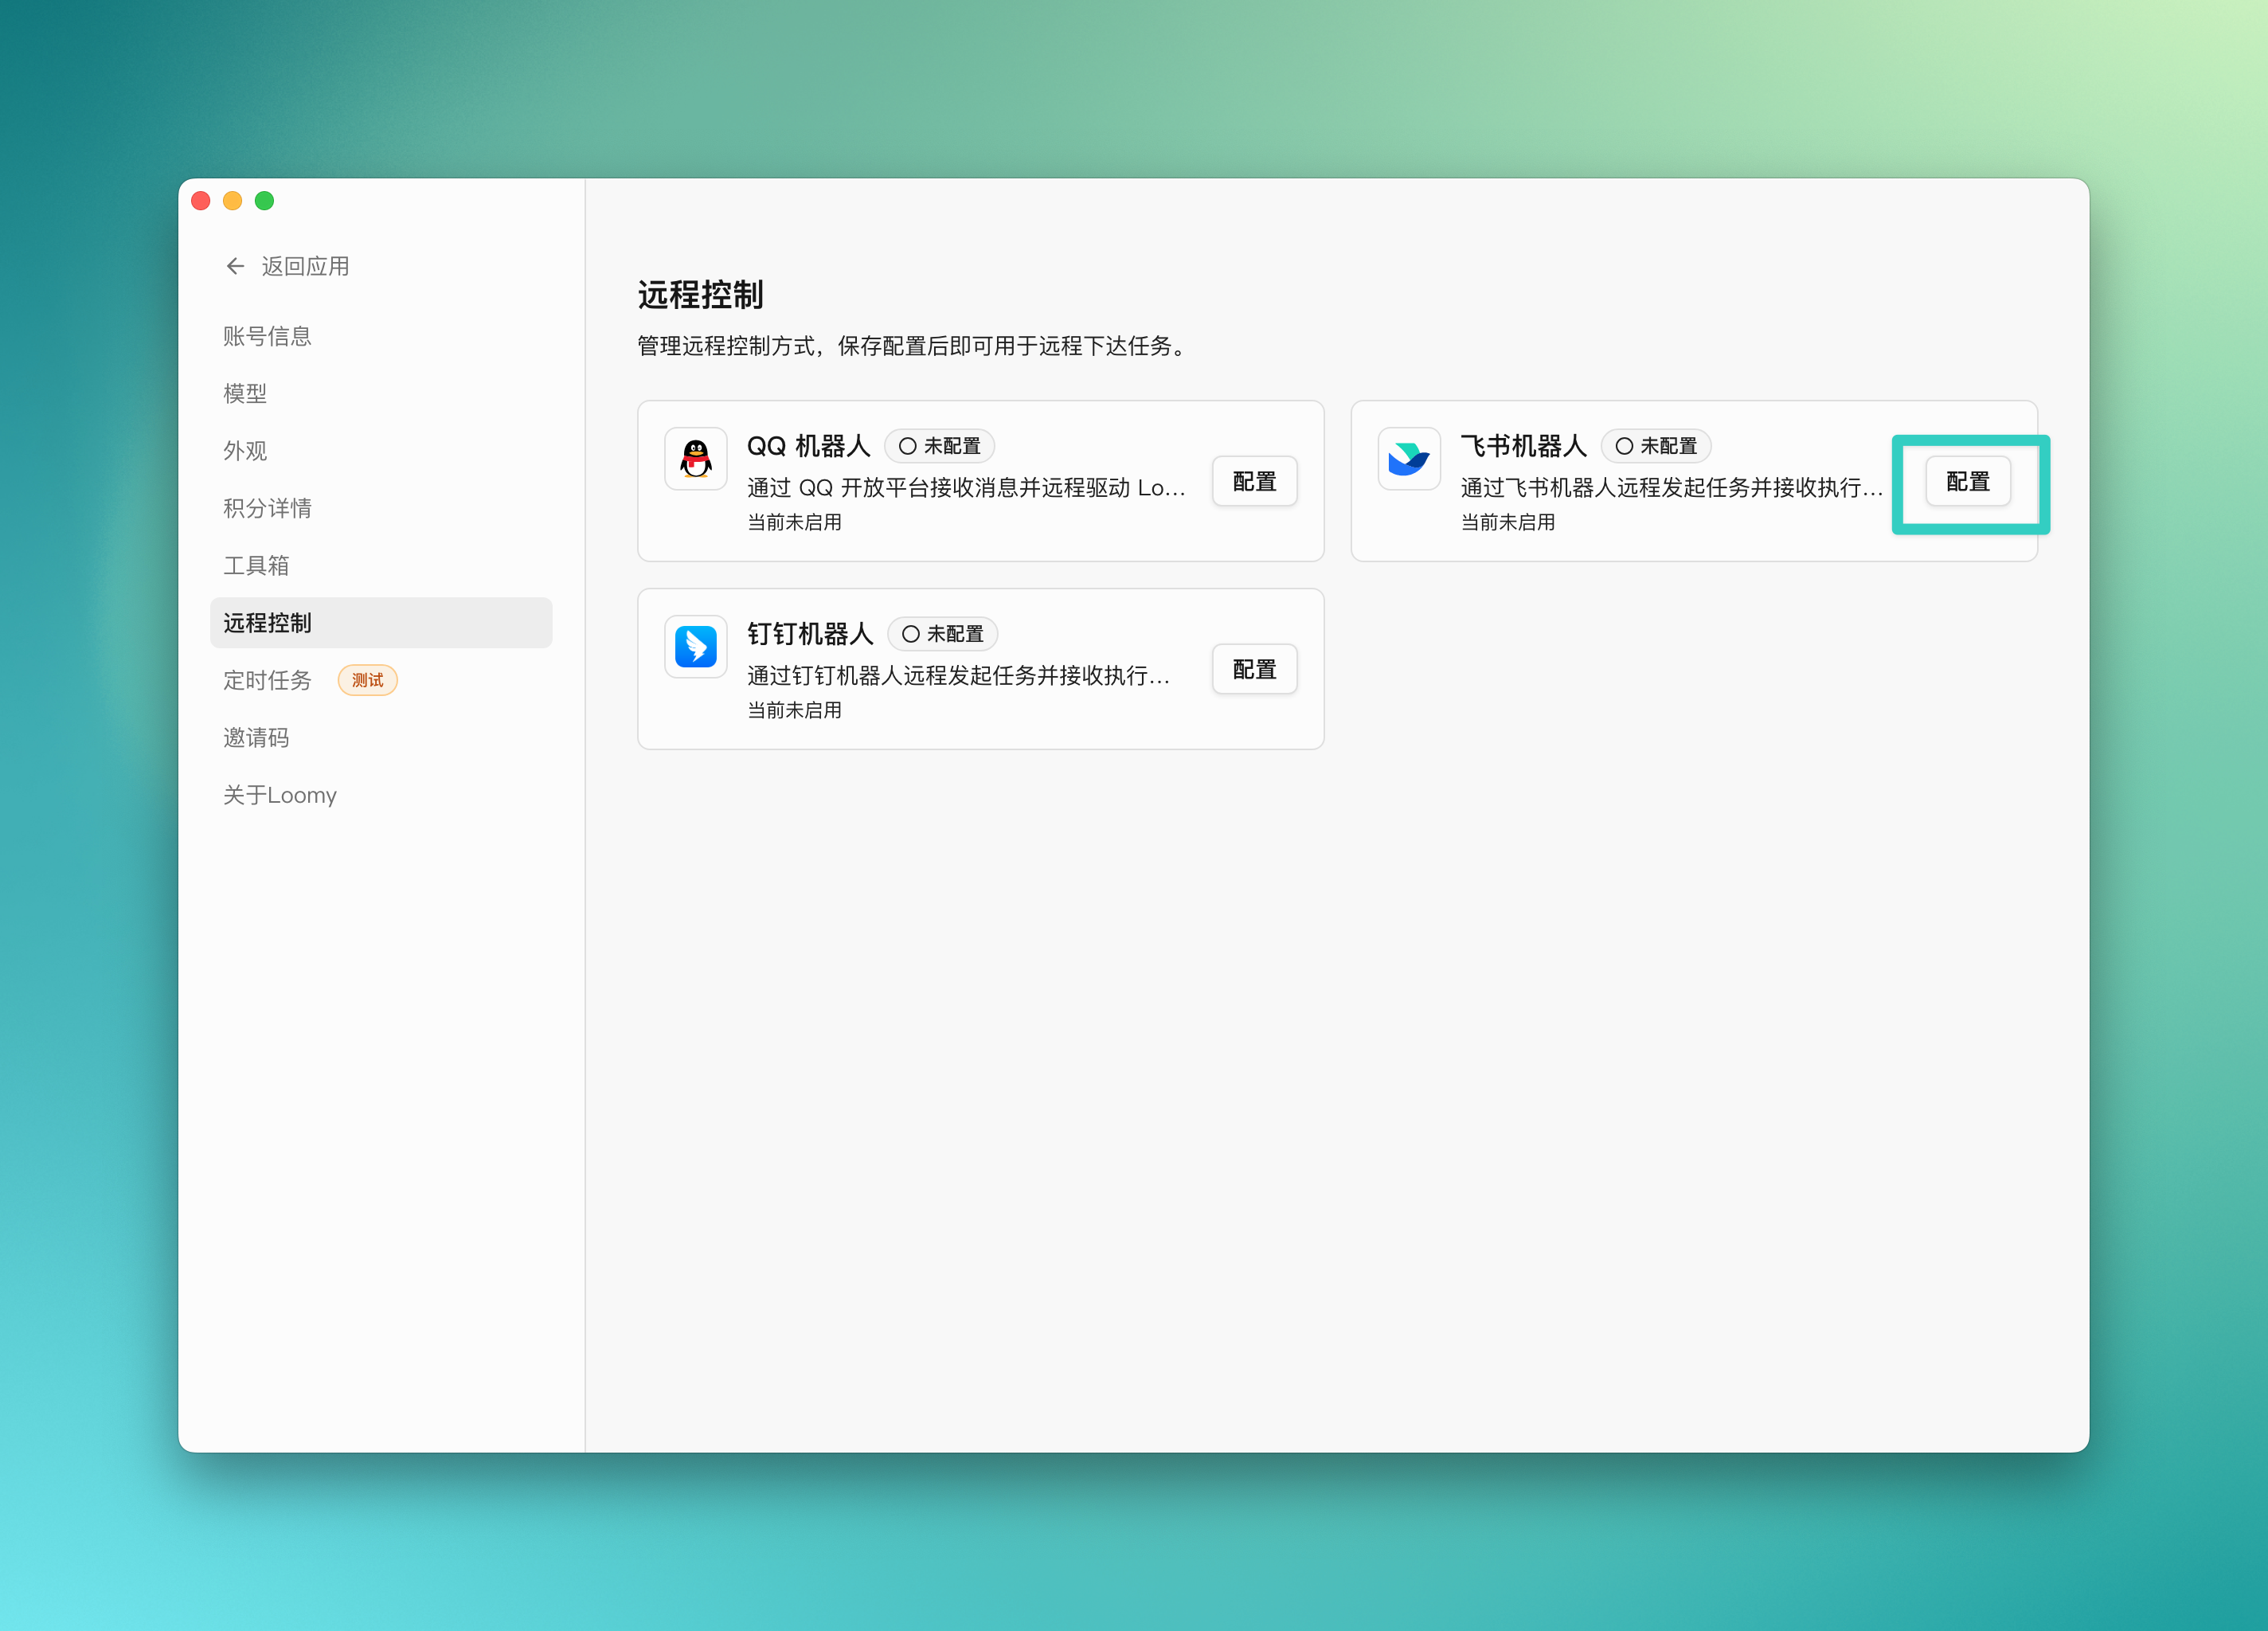
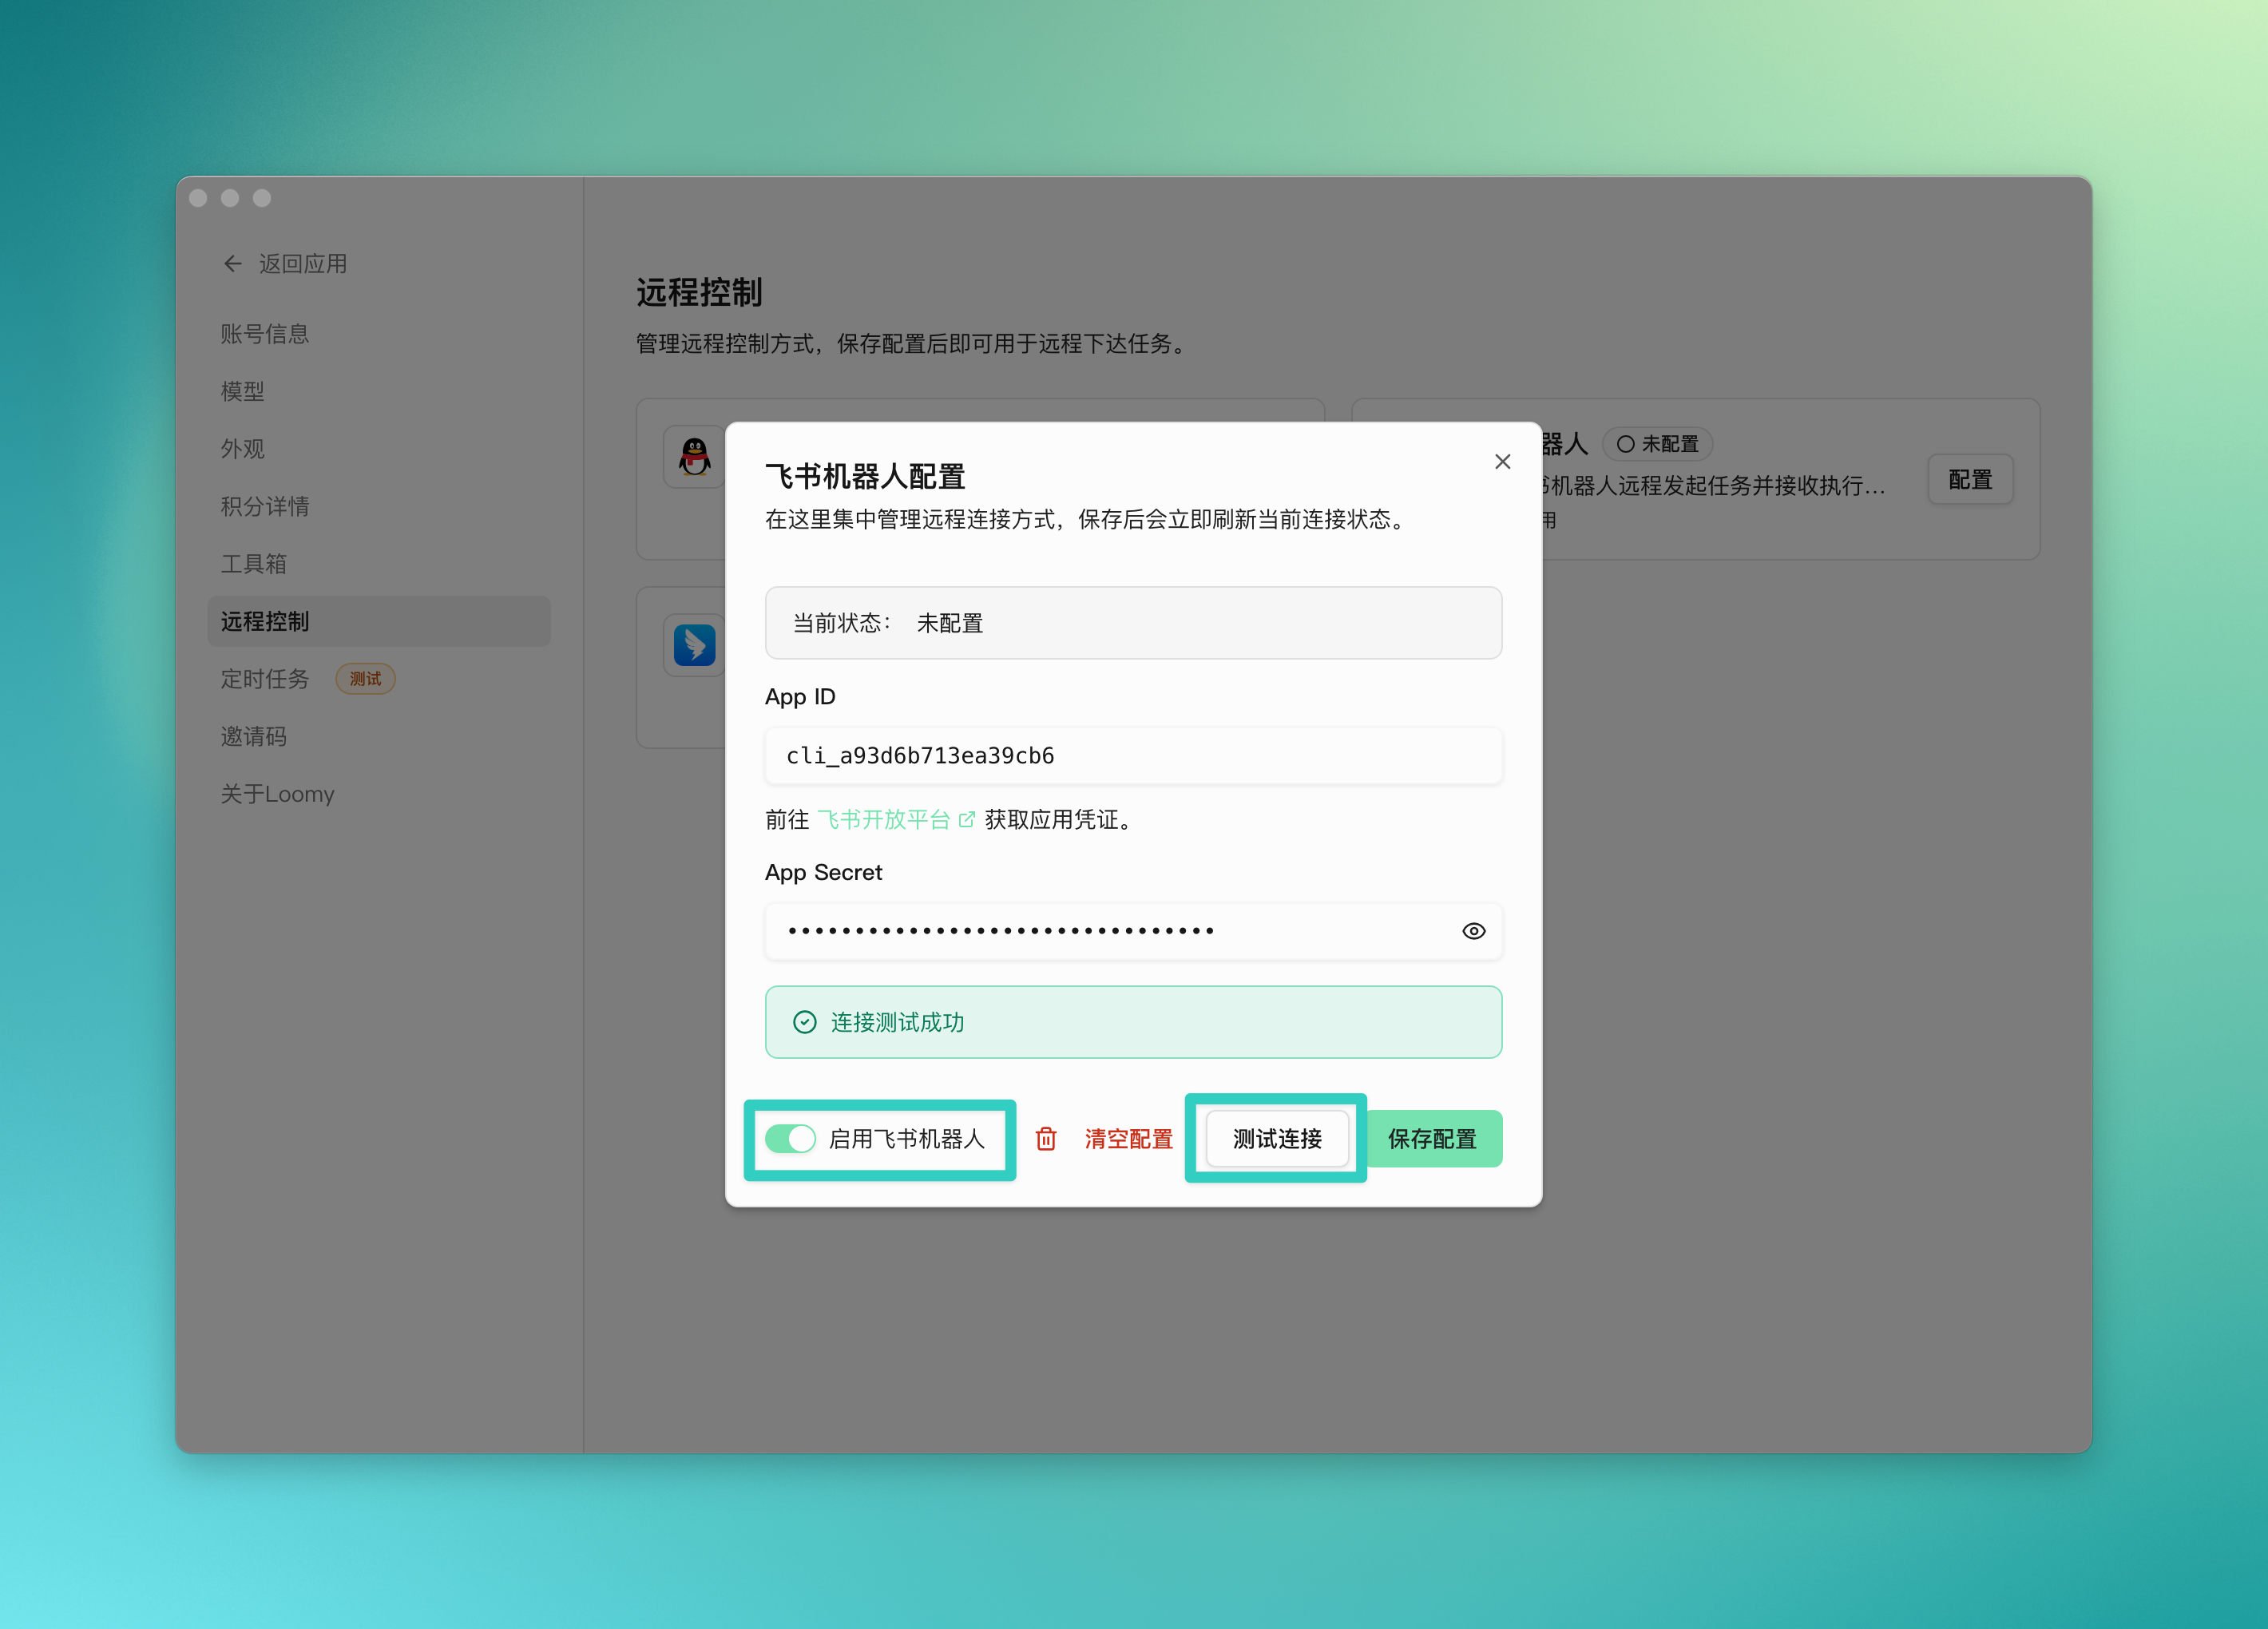
- Choose to configure the Feishu bot, fill in the
App IDandApp Secret, click test connection, and after confirming the connection is successful, enable the bot and save the configuration:
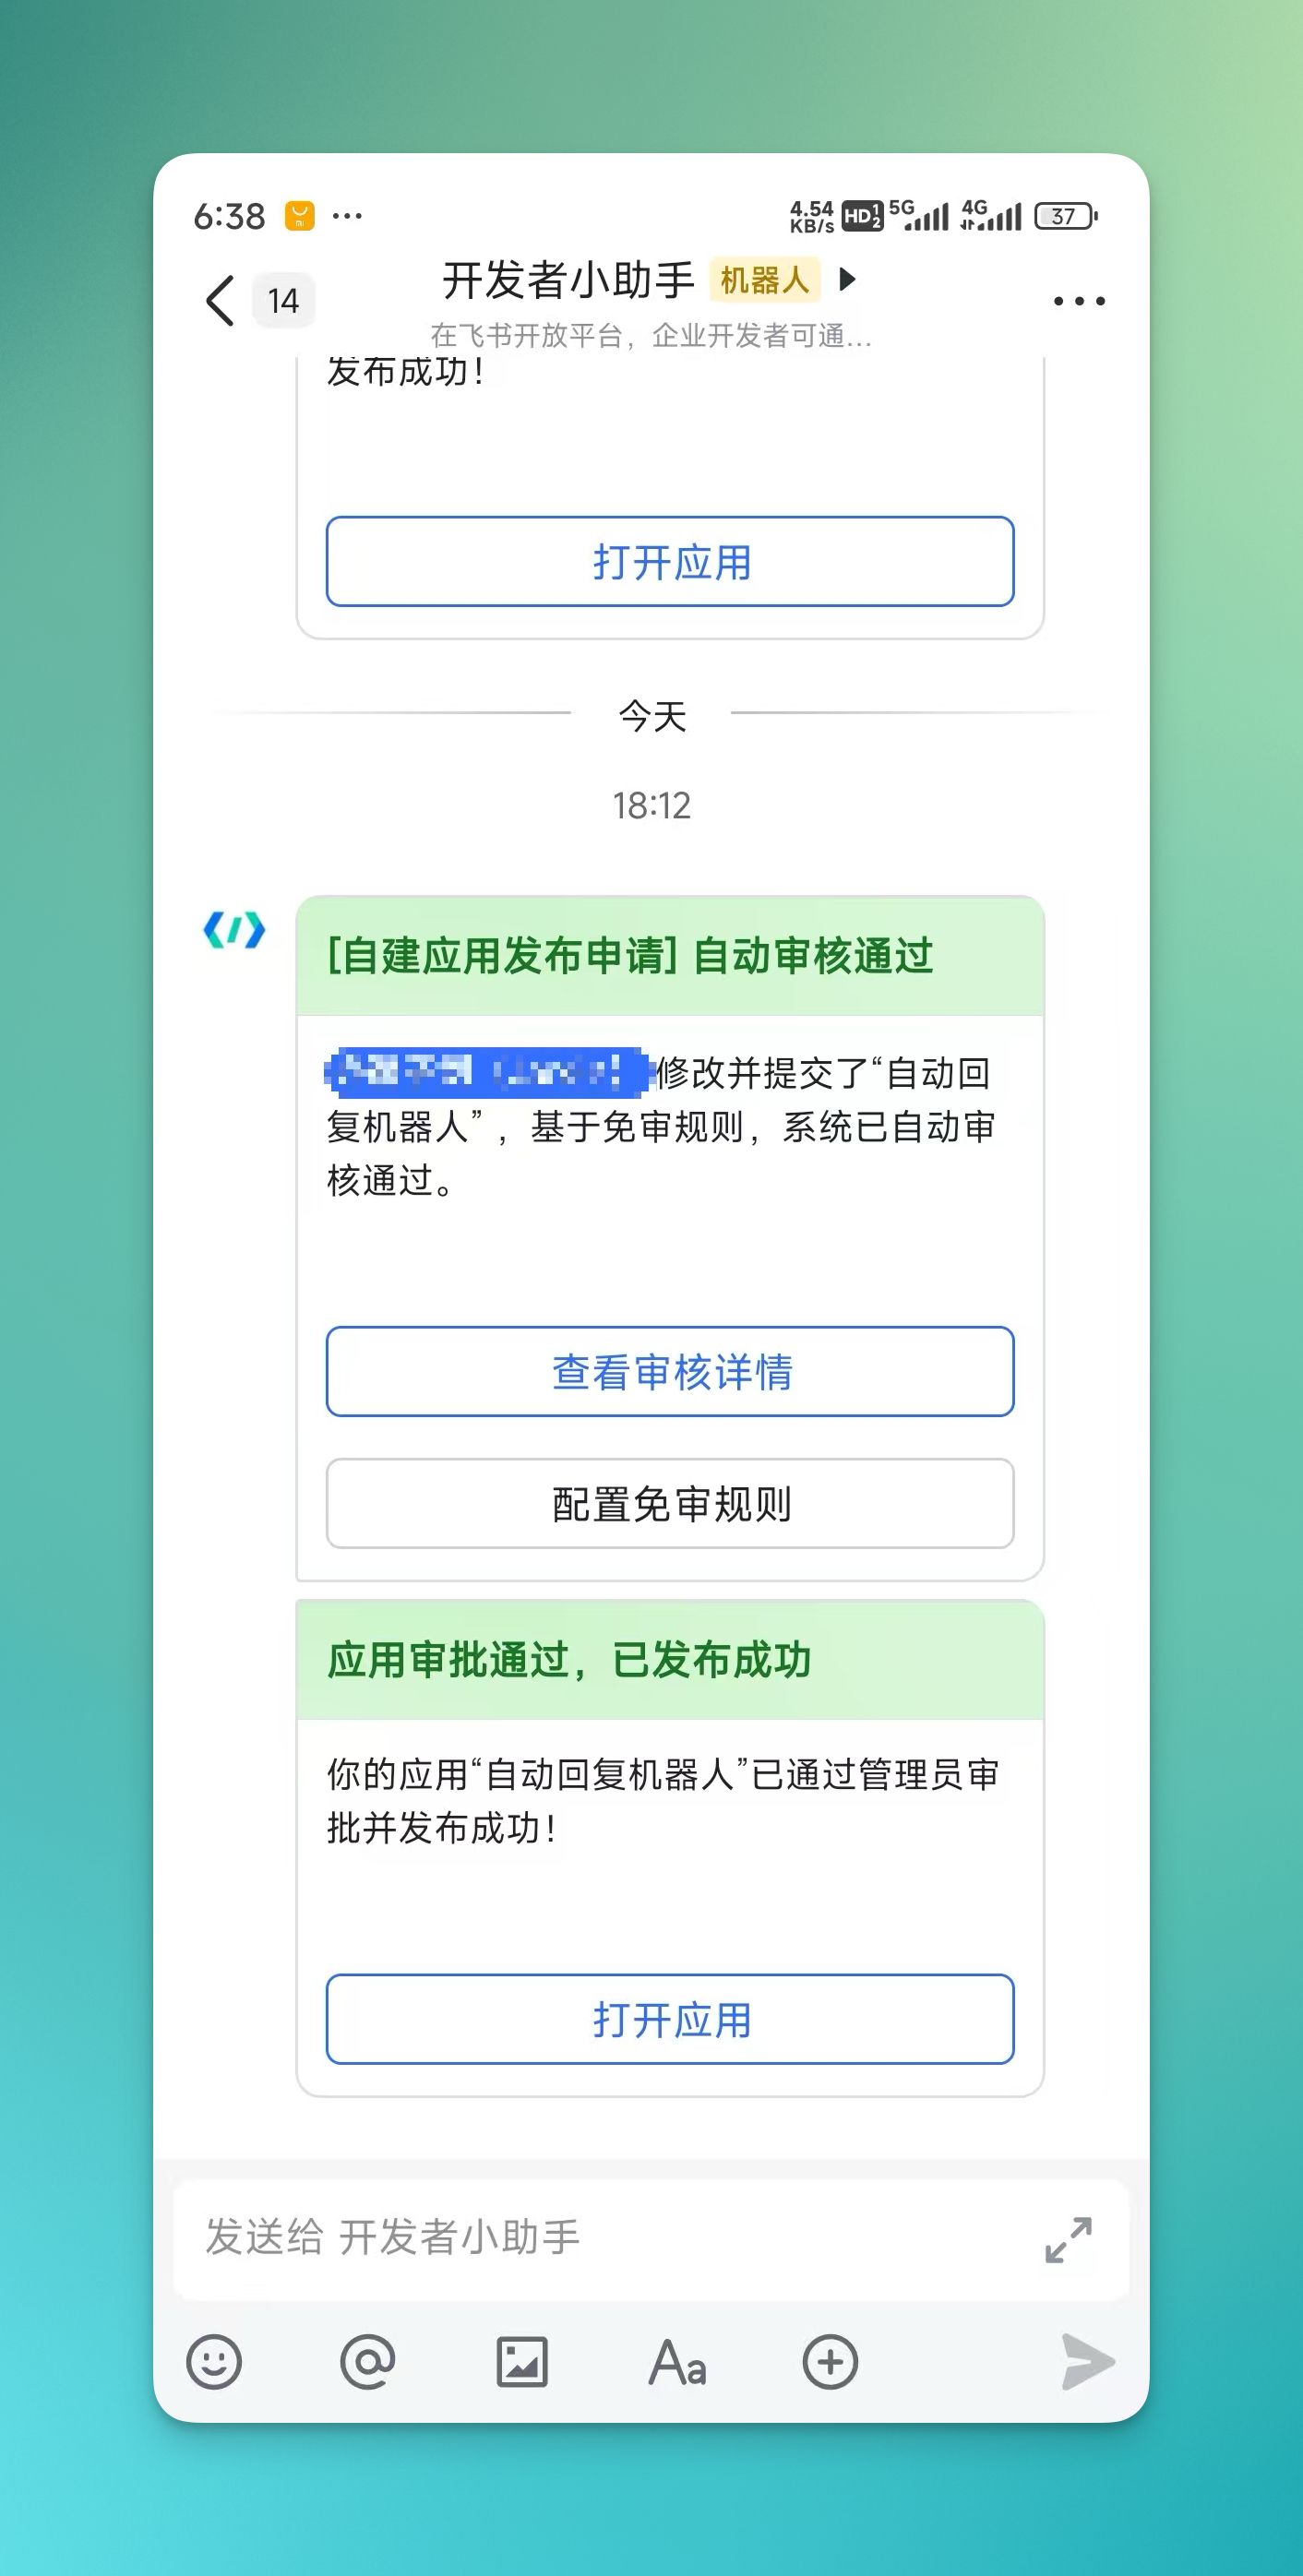
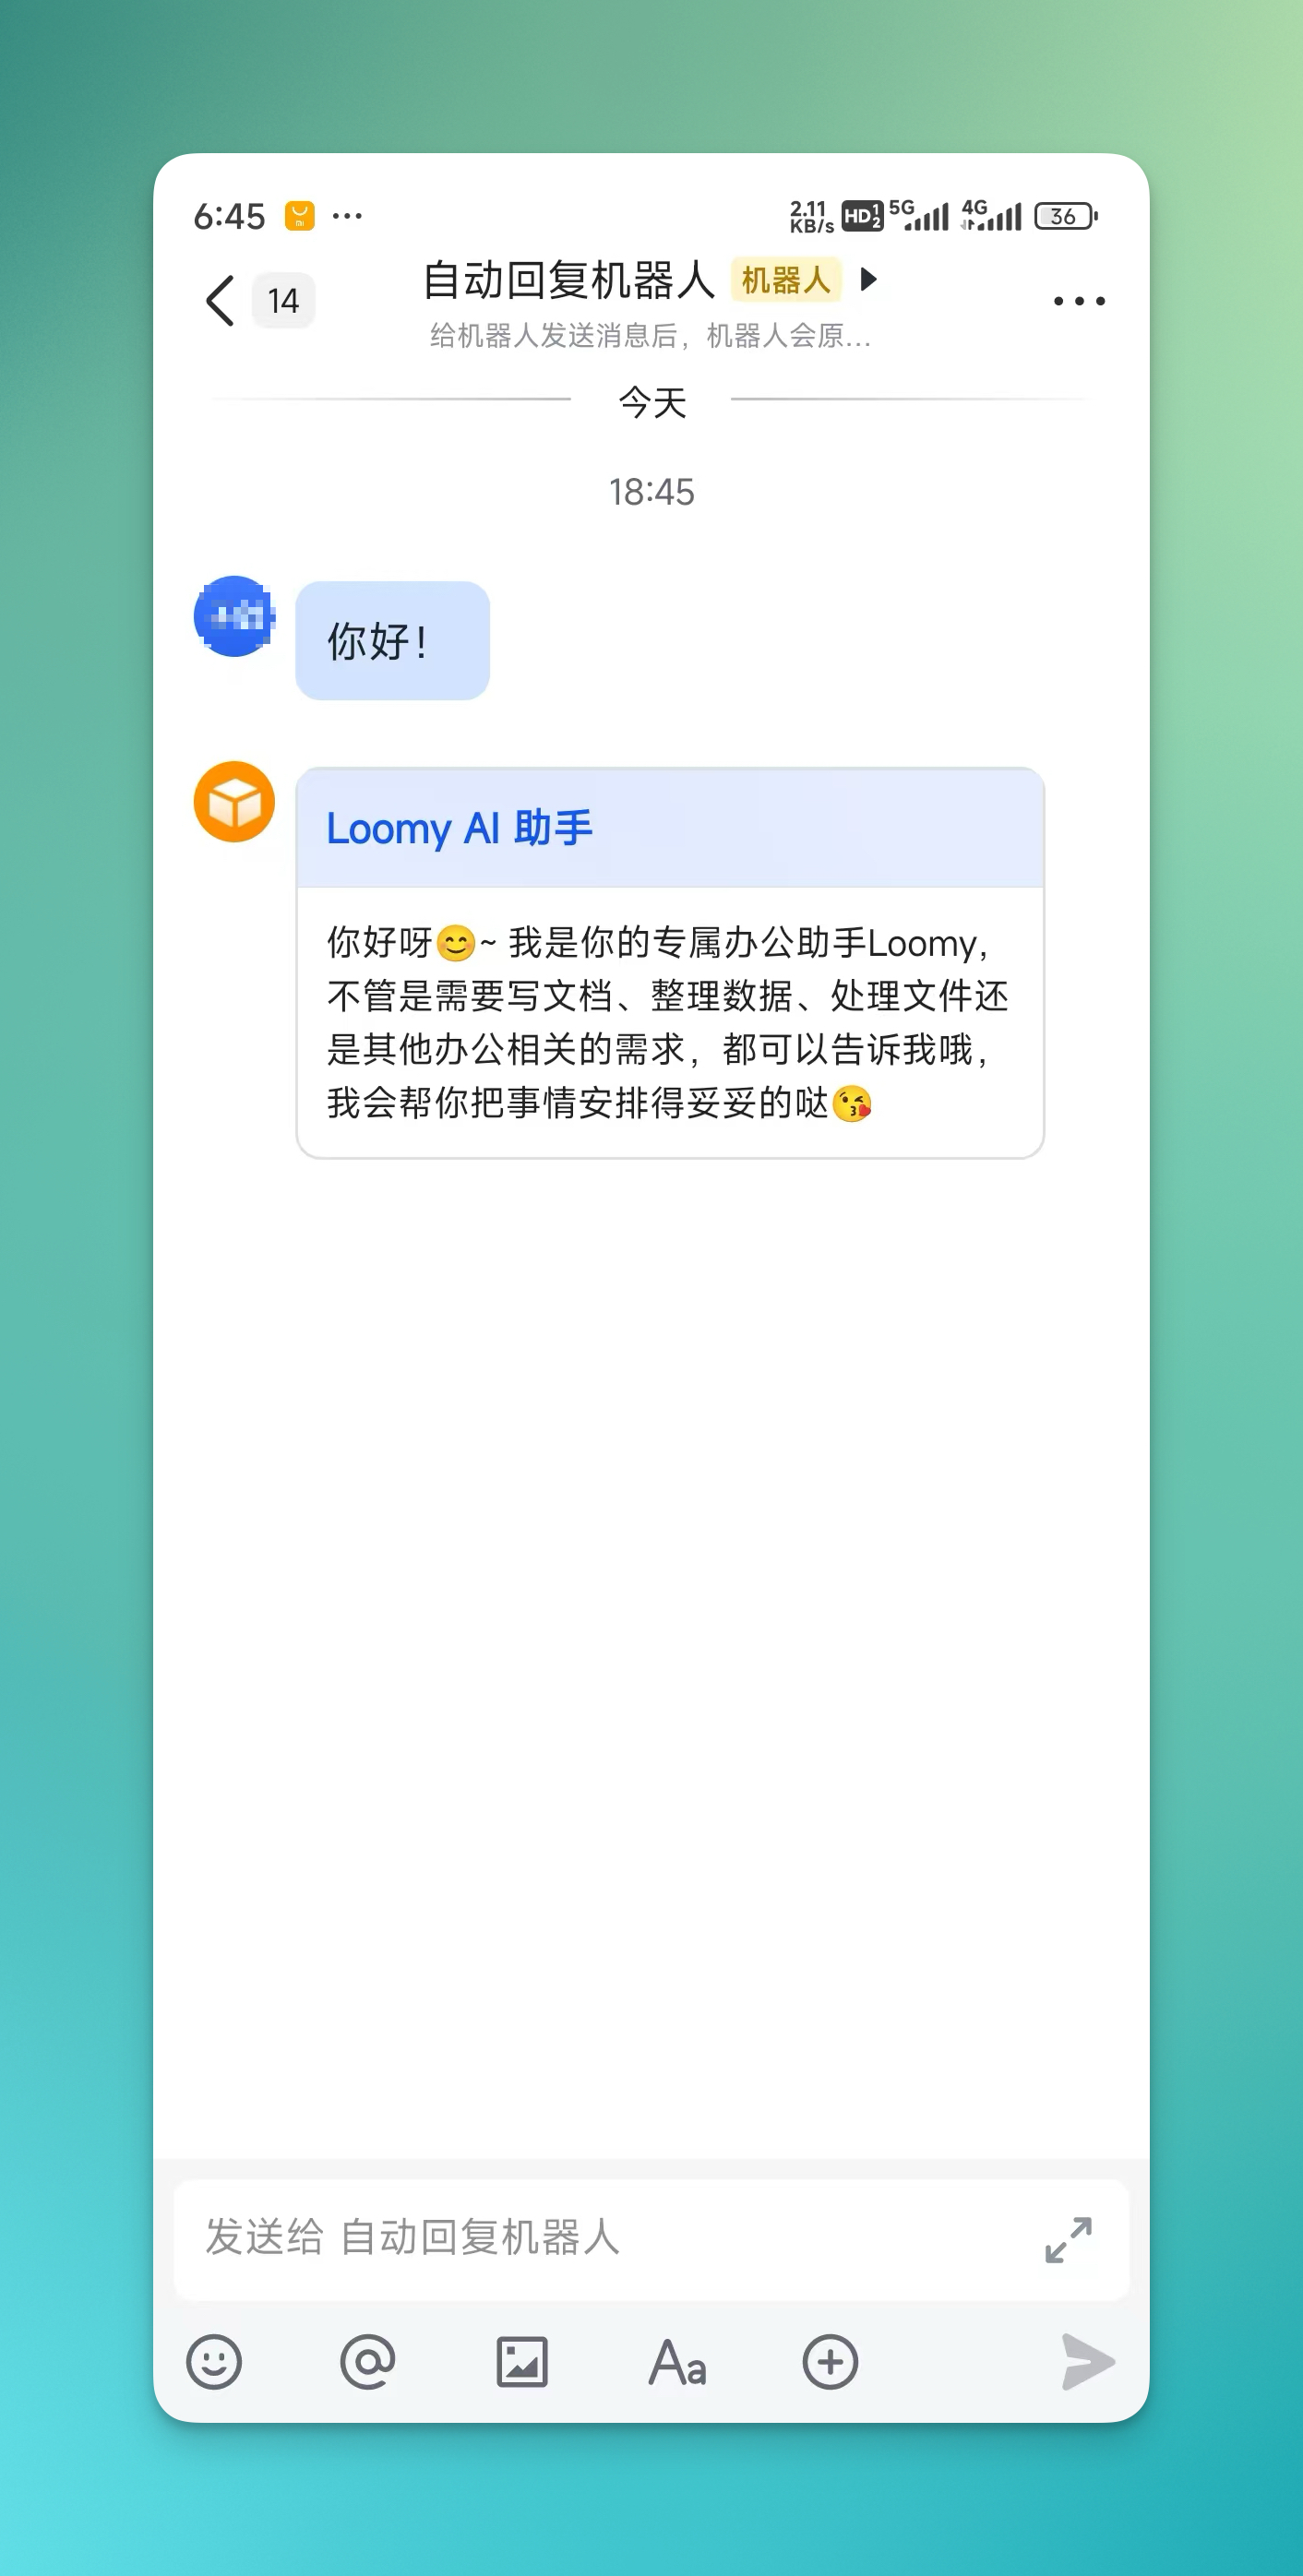
- Open your mobile Feishu, find "Developer Assistant", and when you receive the application approval reminder, click to open the app and start using it:
Connect to DingTalk Bot
- Log in to the DingTalk Open Platform:
Go to "App Development" -> "DingTalk App" -> "One-click Auto Create OpenClaw Bot App", and copy the Client ID and Client Secret.
After confirmation, the first version will be automatically published, and you can get the Client ID and Client Secret.
- Fill in the obtained Client ID and Client Secret into the Loomy bot configuration information, click enable DingTalk bot, test the connection, and save the configuration.
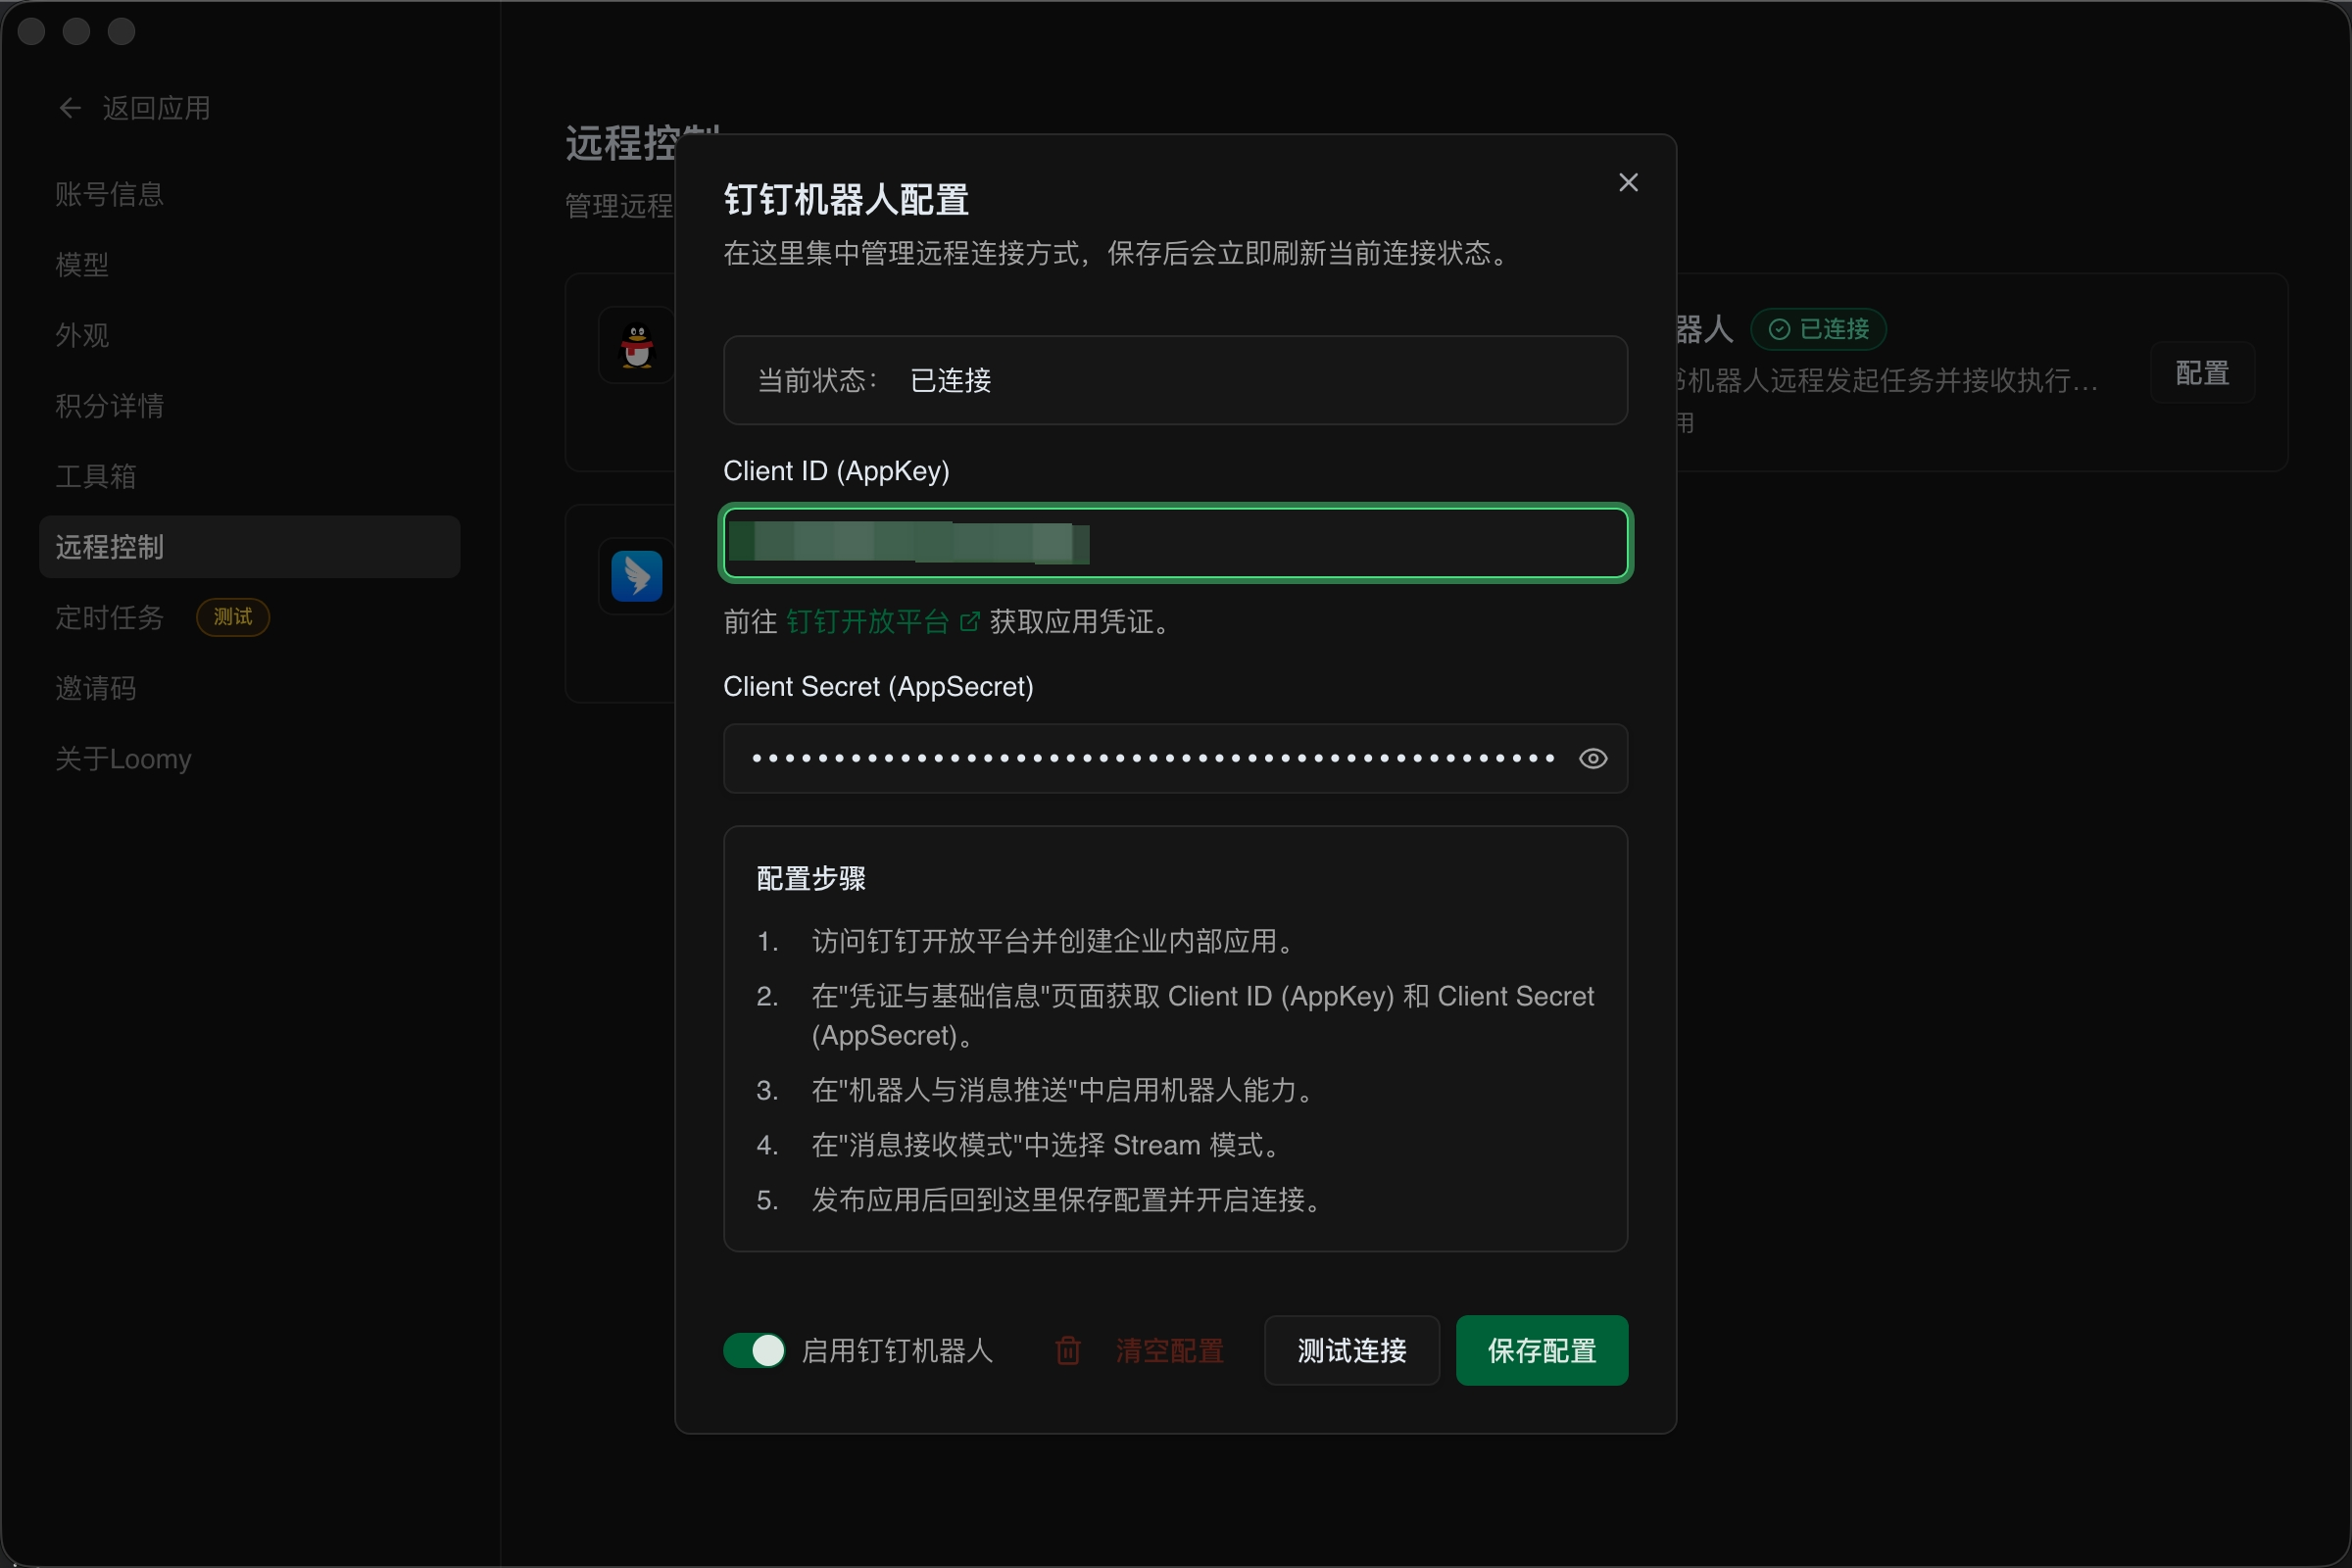
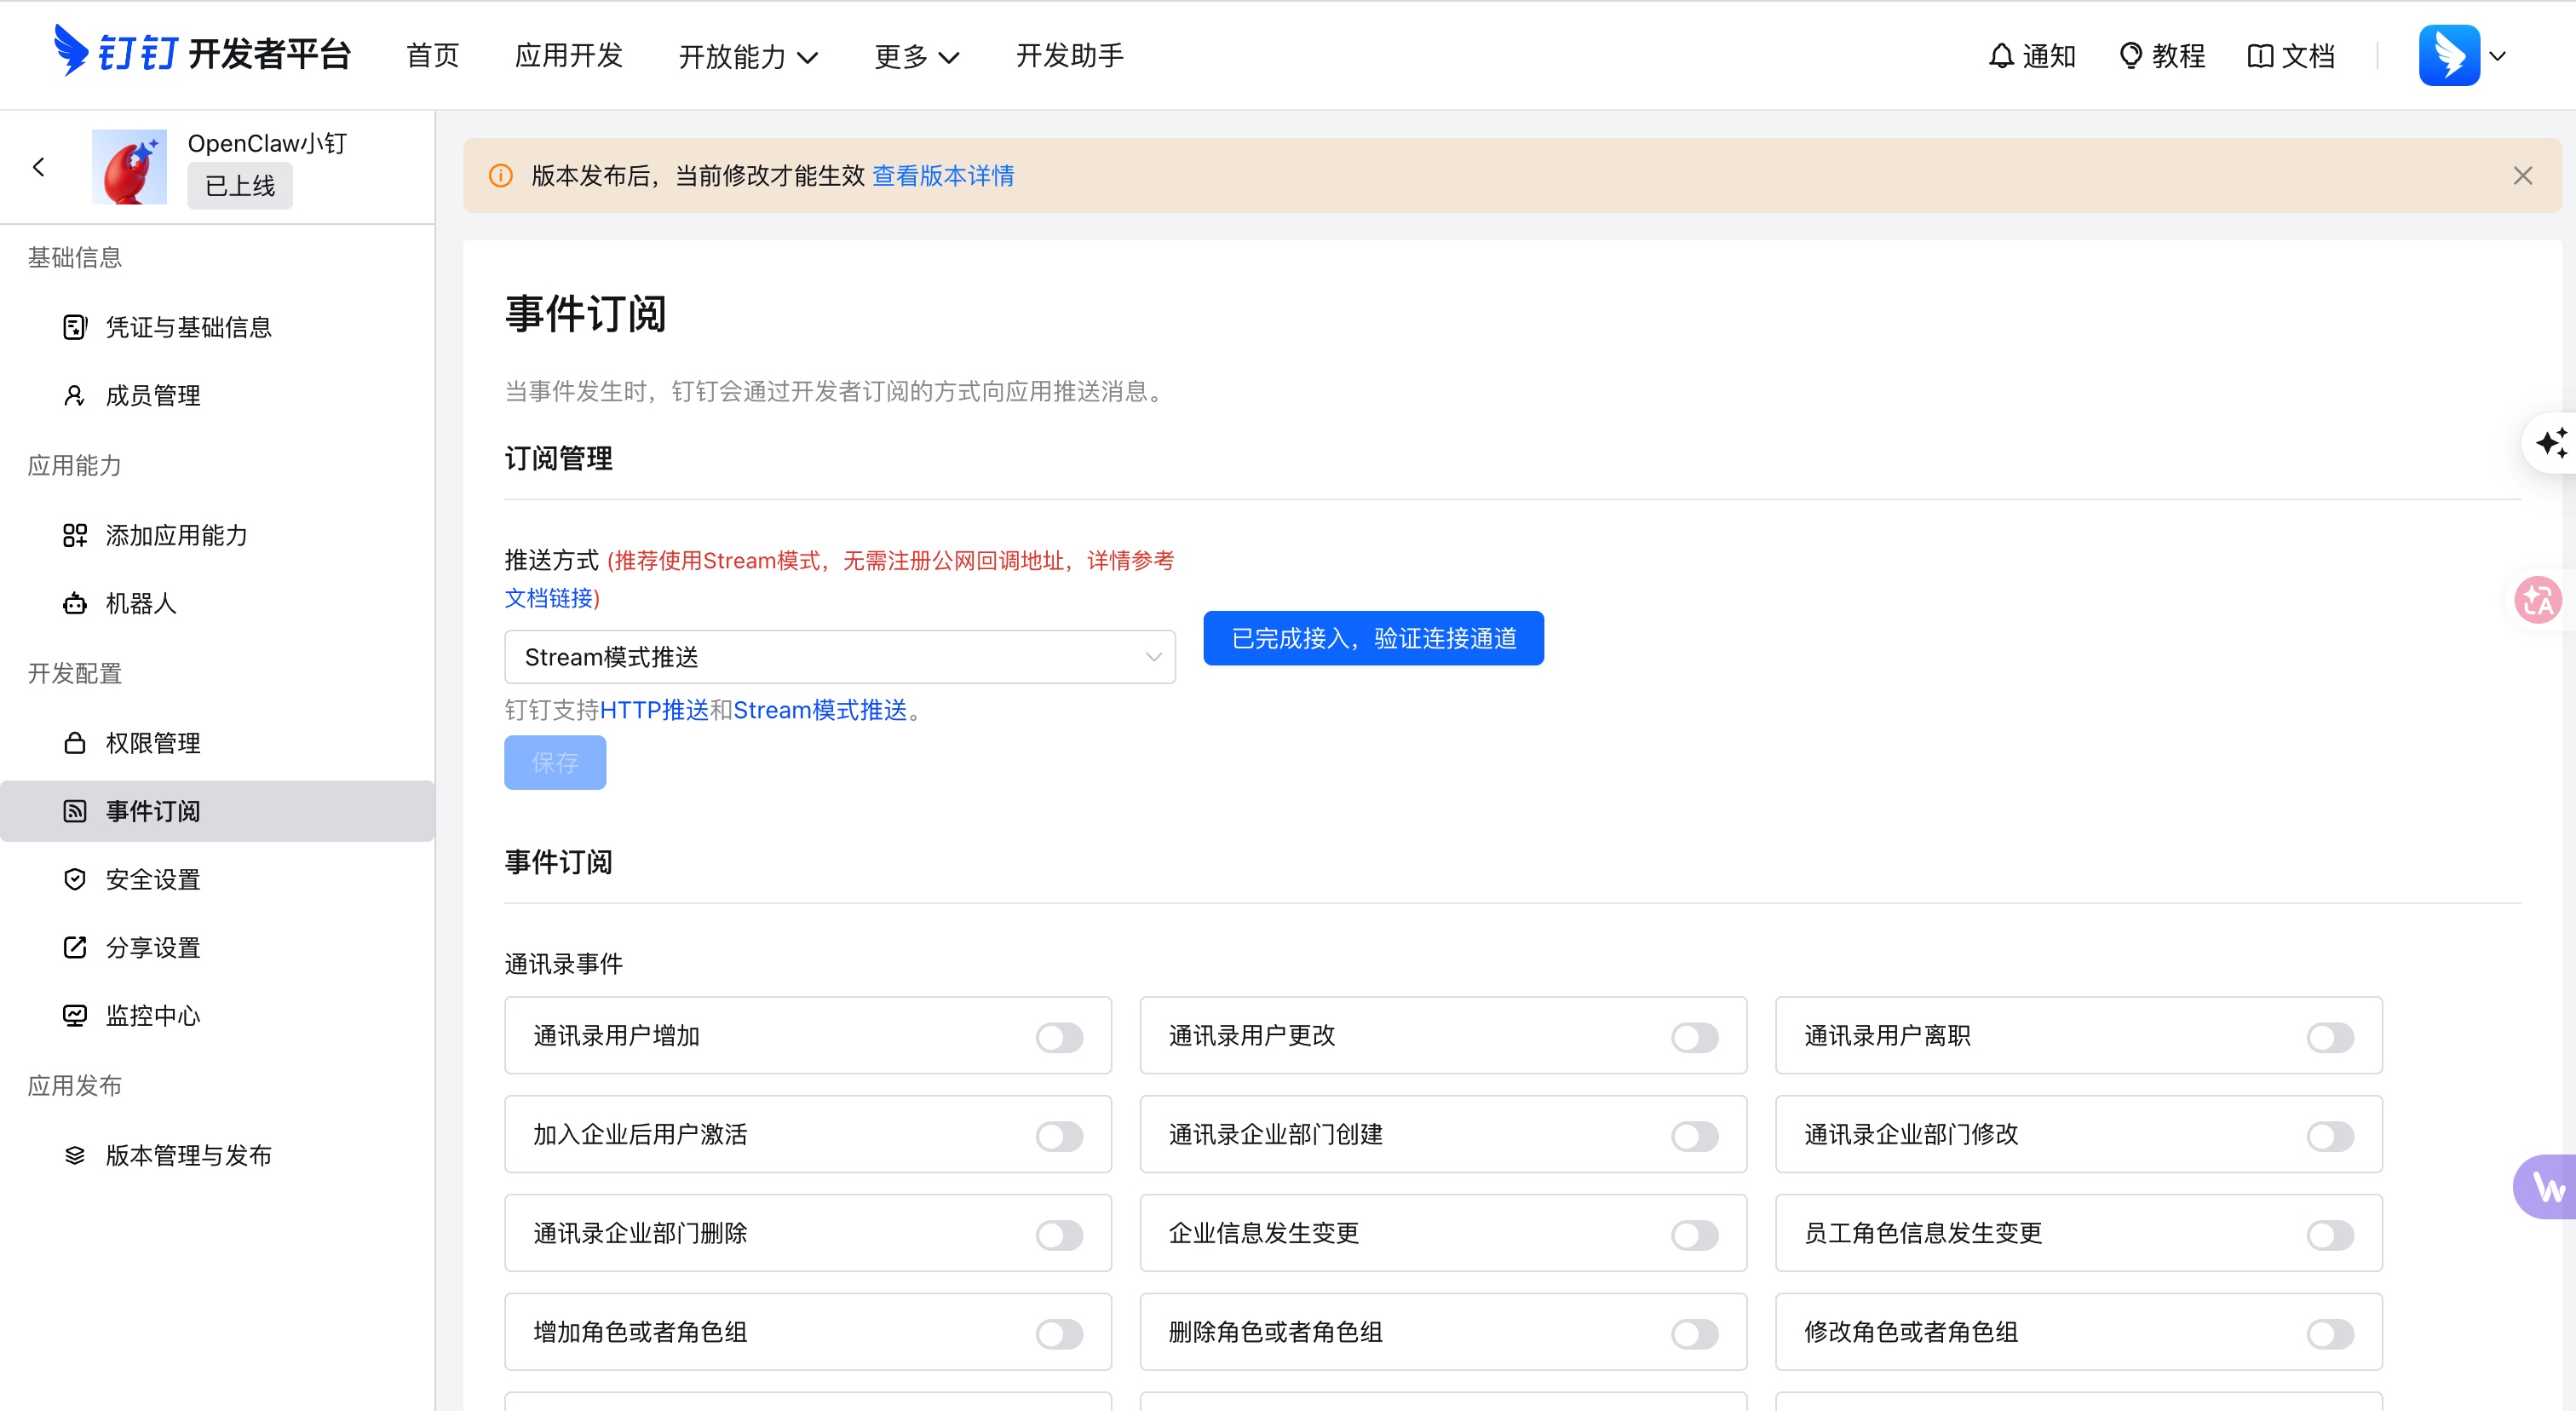
- Click event subscription, select stream push mode, click connected to verify the connection channel. After successful verification, you can freely choose events, save, and publish a new version.
- Open your DingTalk, a new chat window will appear showing that the bot has been created successfully, and you can start chatting~
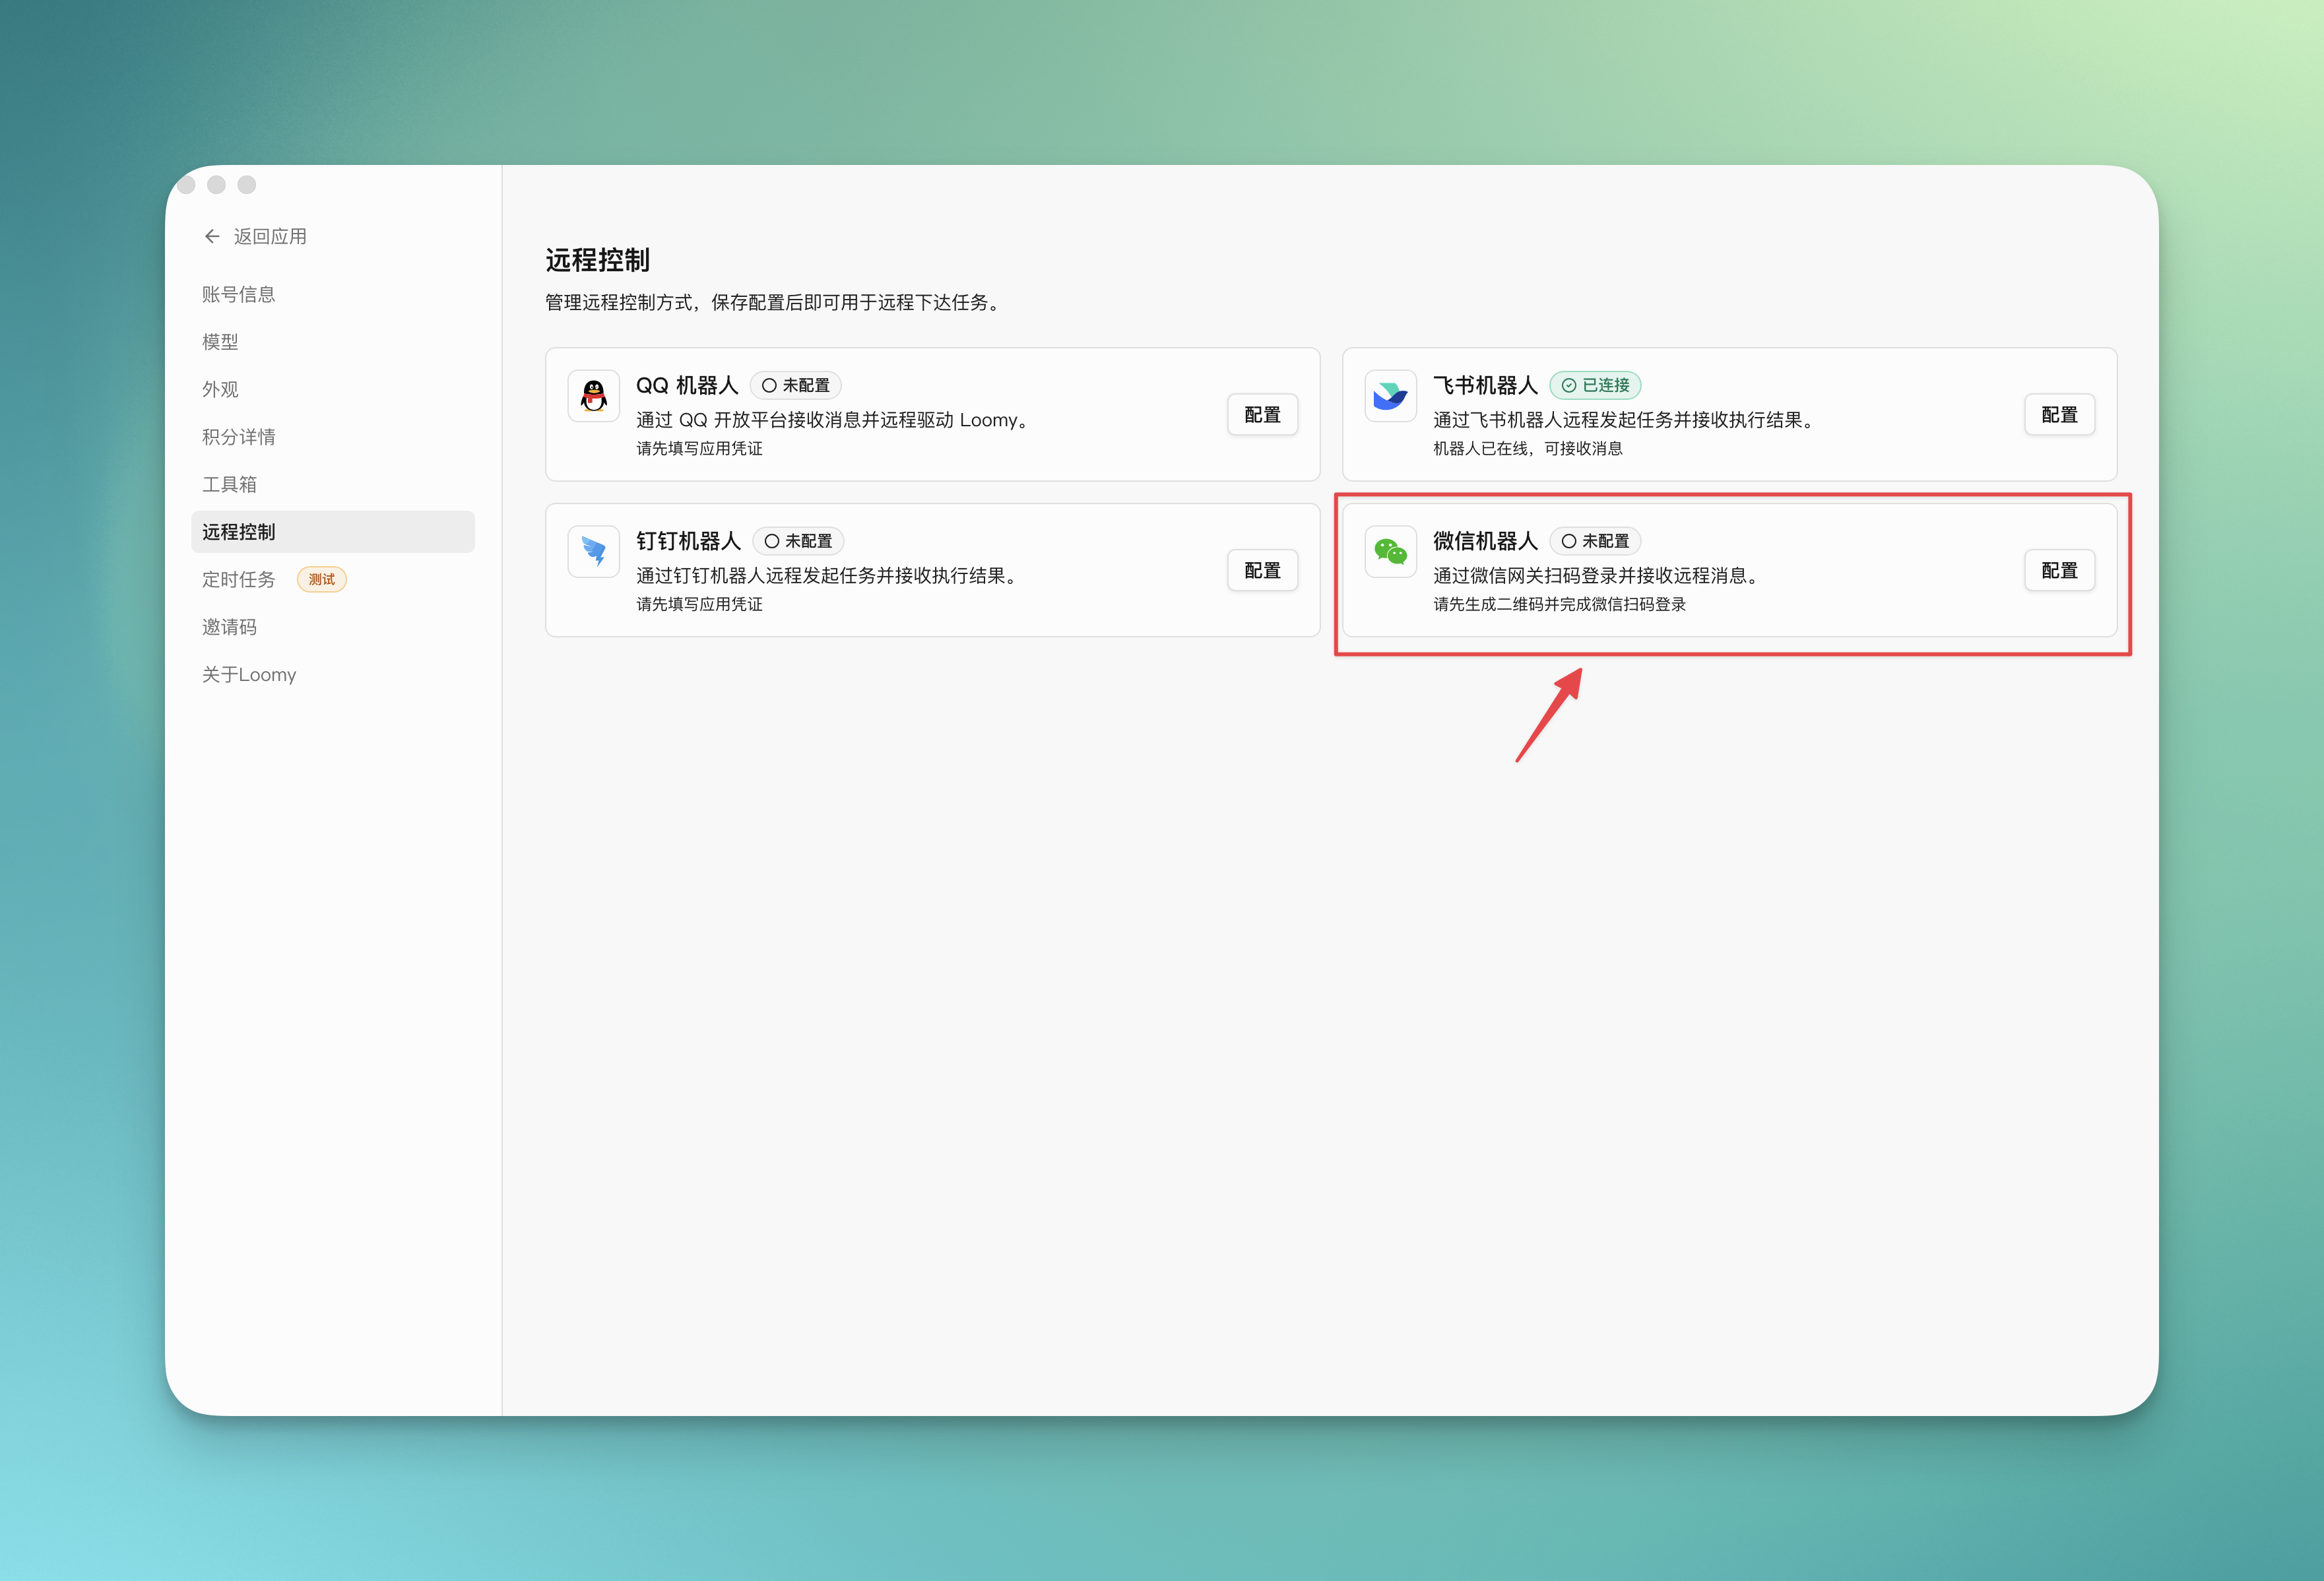
Connect to WeChat Bot
The WeChat bot can serve as one of the message entries for Loomy's remote control. After configuration, you can send commands to Loomy via WeChat and receive execution results.
Applicable Scenarios
- Remotely trigger tasks through WeChat direct messages
- Check Loomy's execution results on your mobile phone
- Quickly confirm current task status when away from your desk
- Use the convenience of WeChat to control Loomy anytime, anywhere
Basic Configuration Process
- Enter remote control settings: Open the Loomy client, click "Settings" in the left menu, and find the "Remote Control" functional area.
- Select WeChat Bot: In the remote control page, find and click the "WeChat Bot" option.
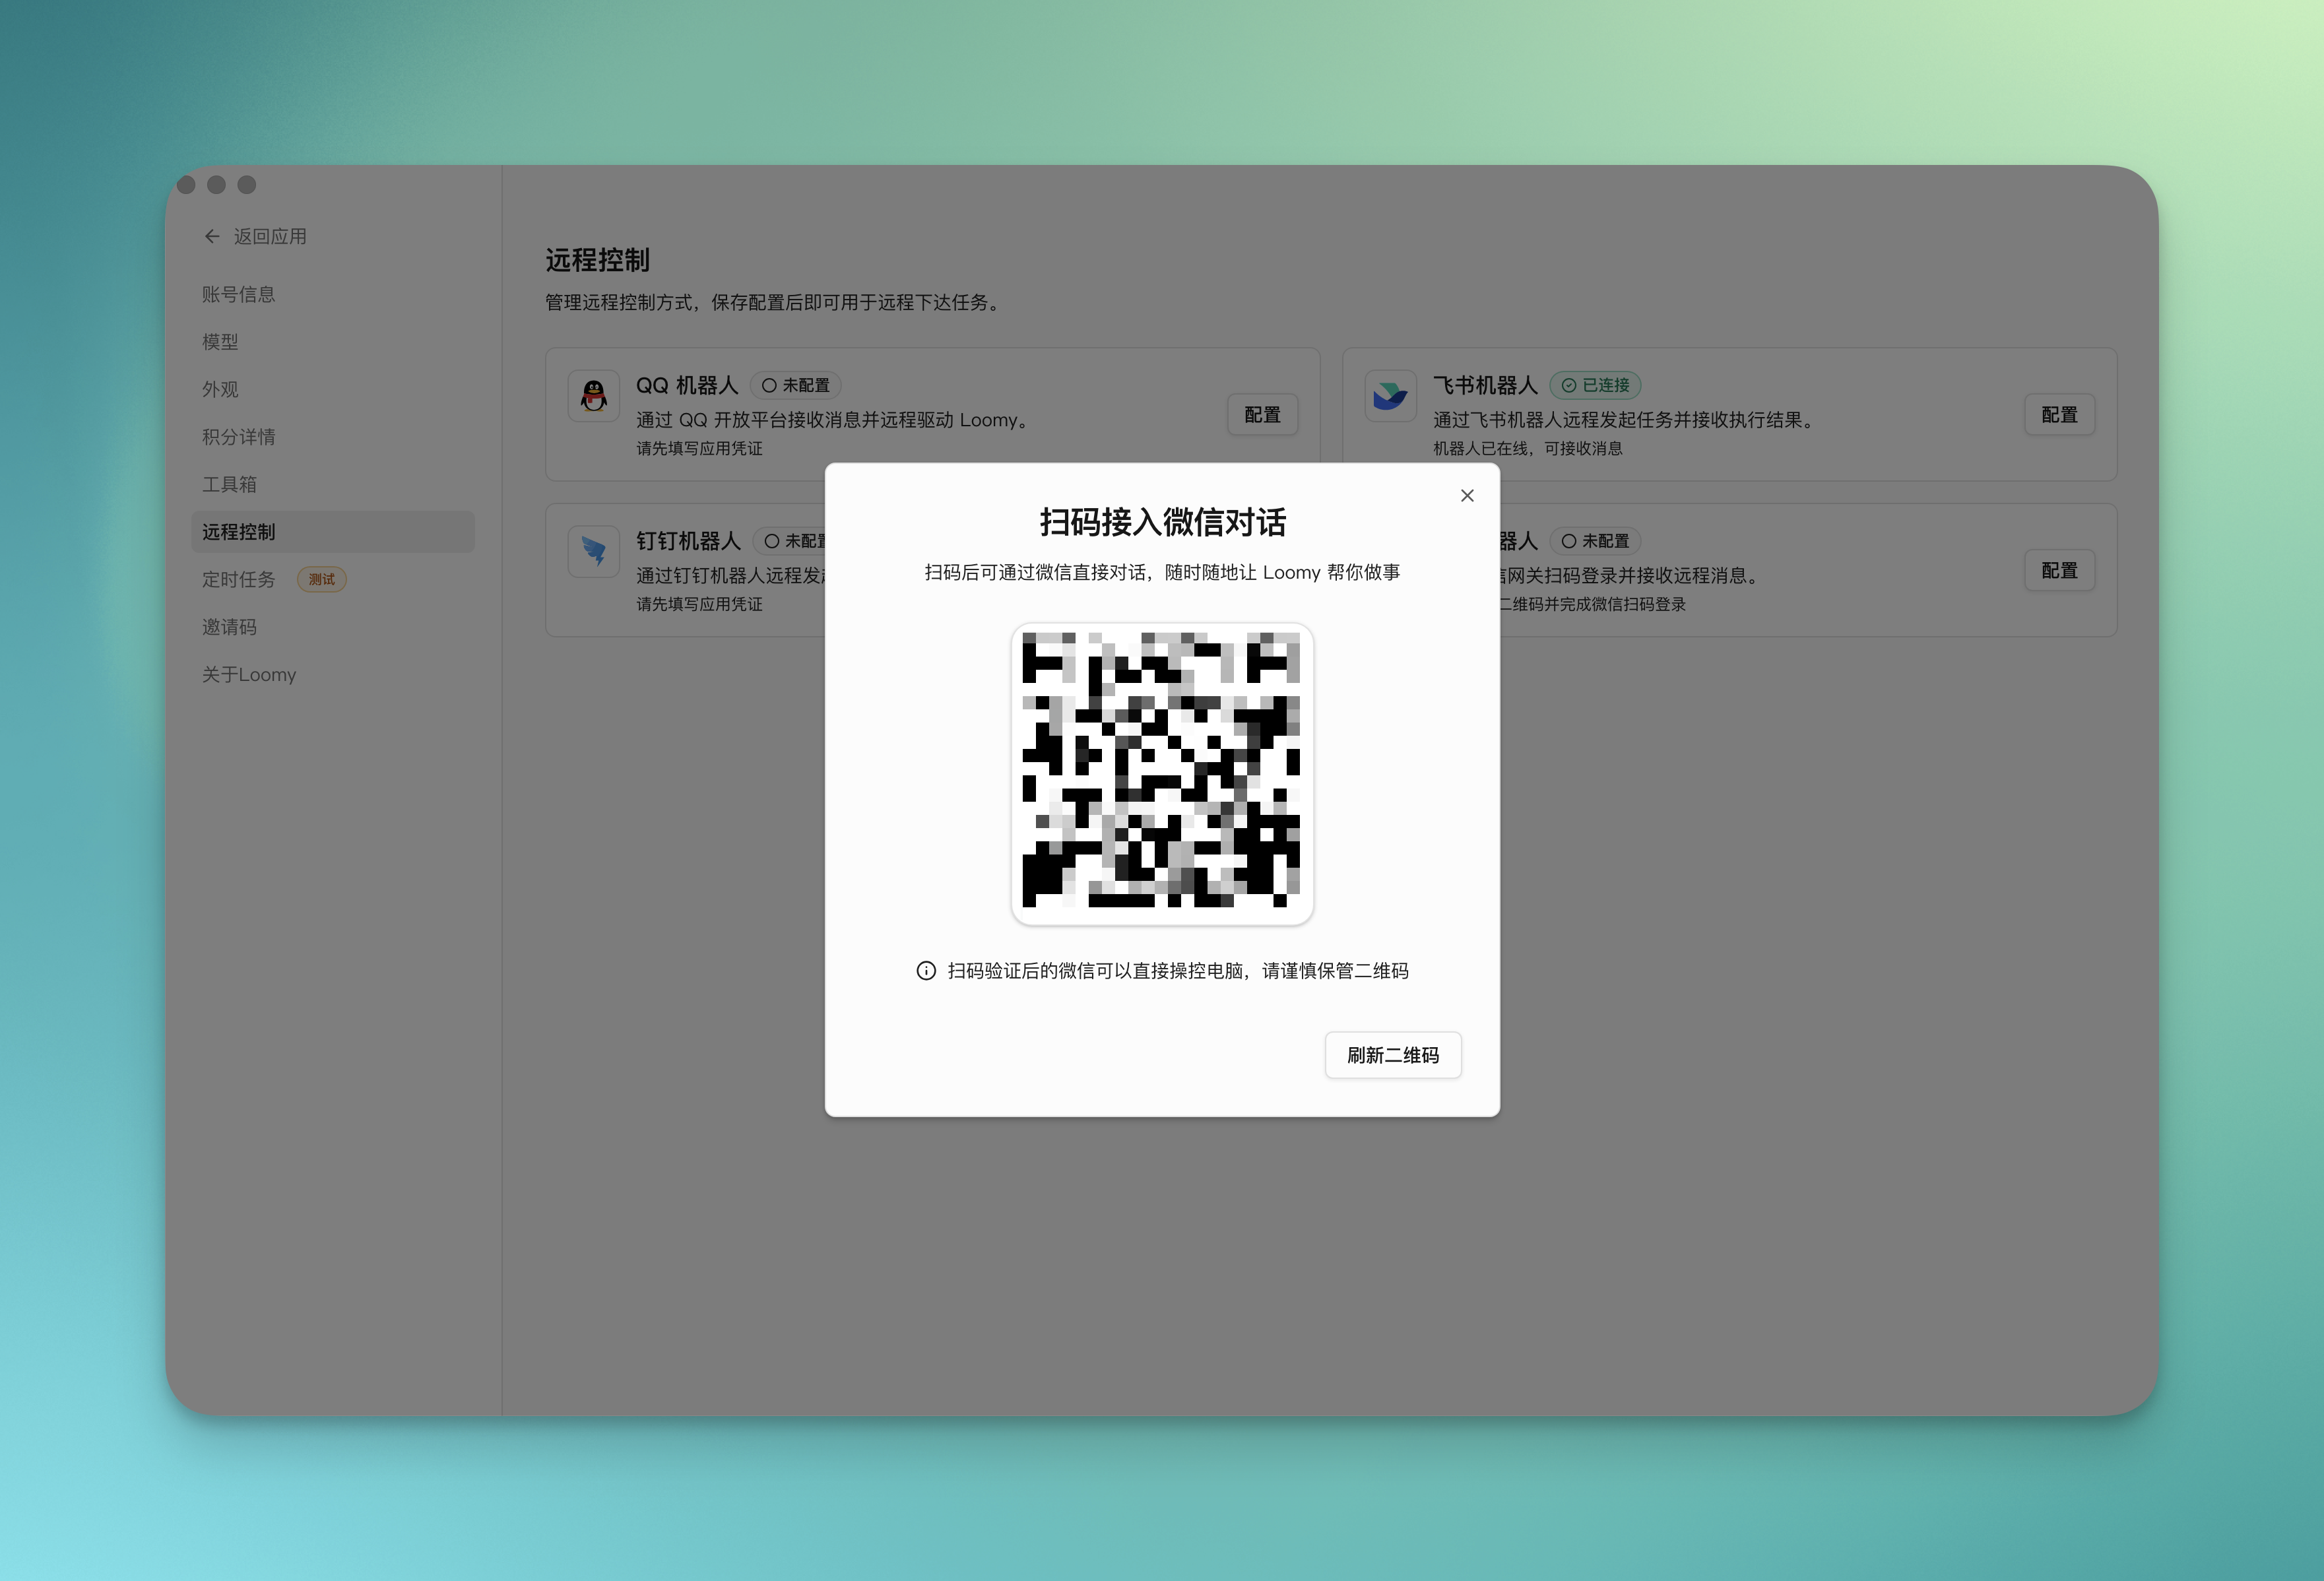
- Scan QR code to bind device: After clicking the WeChat bot, a QR code will pop up. Use your mobile WeChat to scan the QR code to complete the device binding.
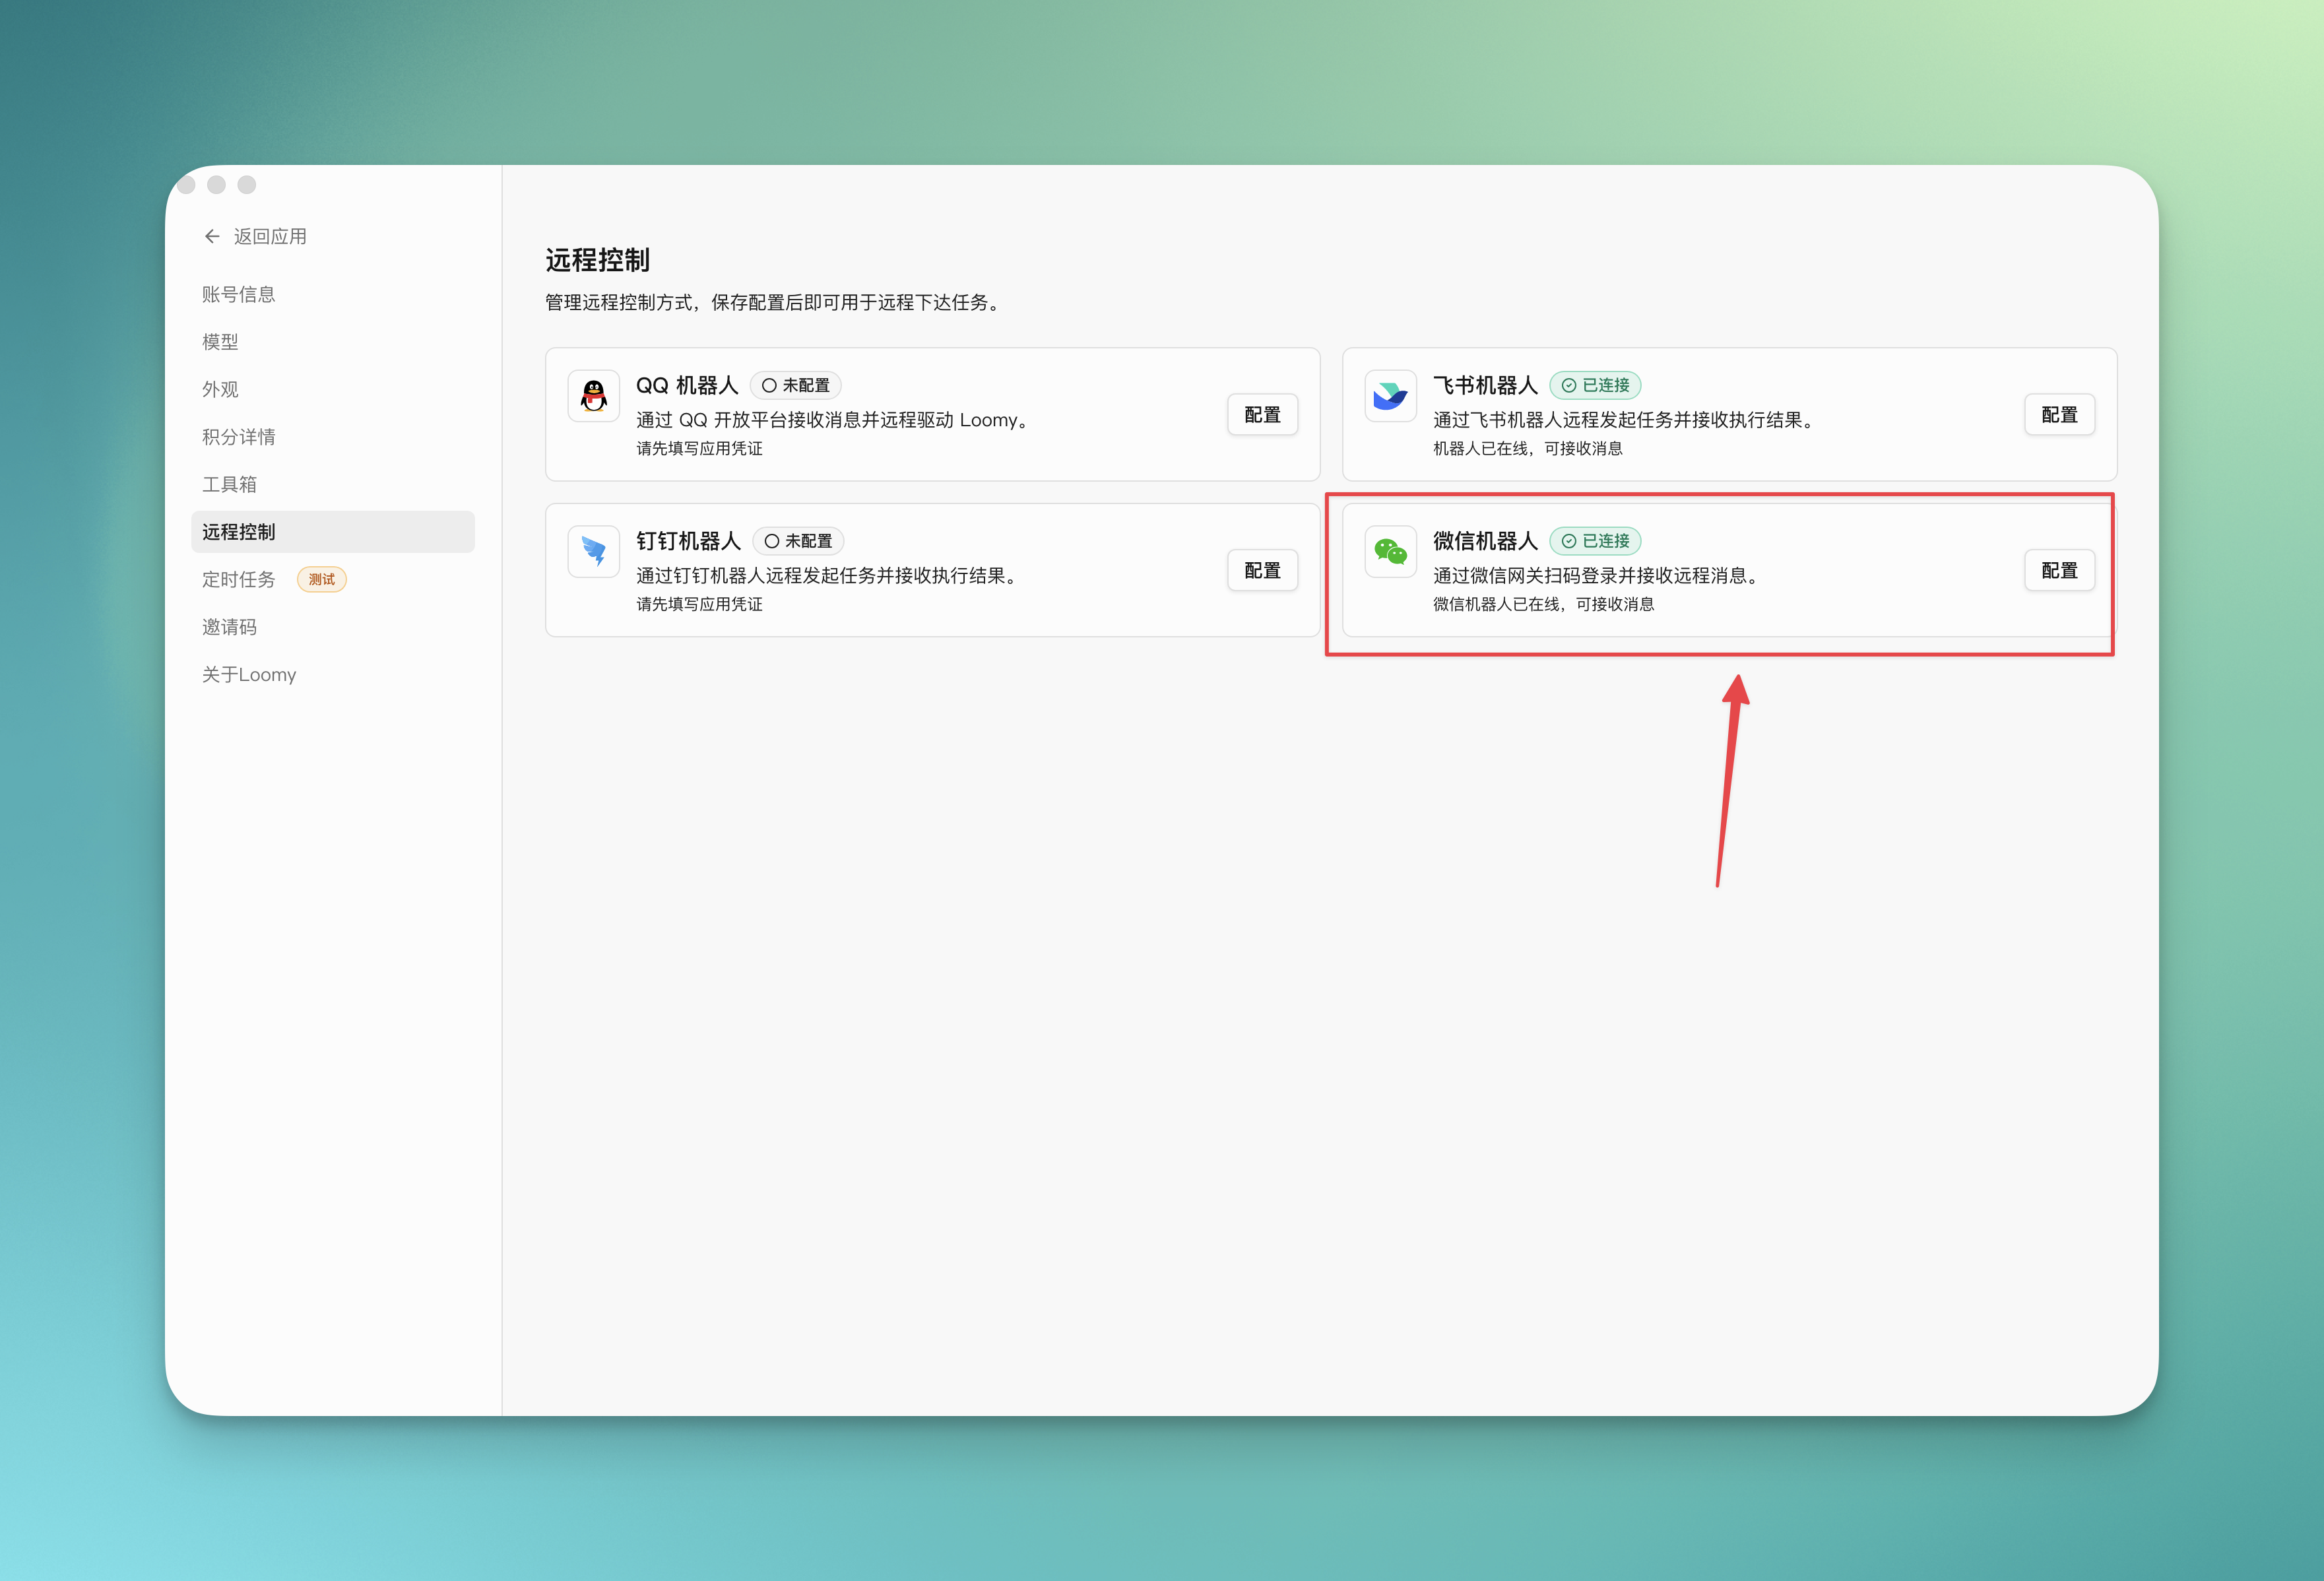
- Confirm connection status: After the binding is complete, the WeChat bot in the remote control page should show the "Connected" status, indicating successful configuration.
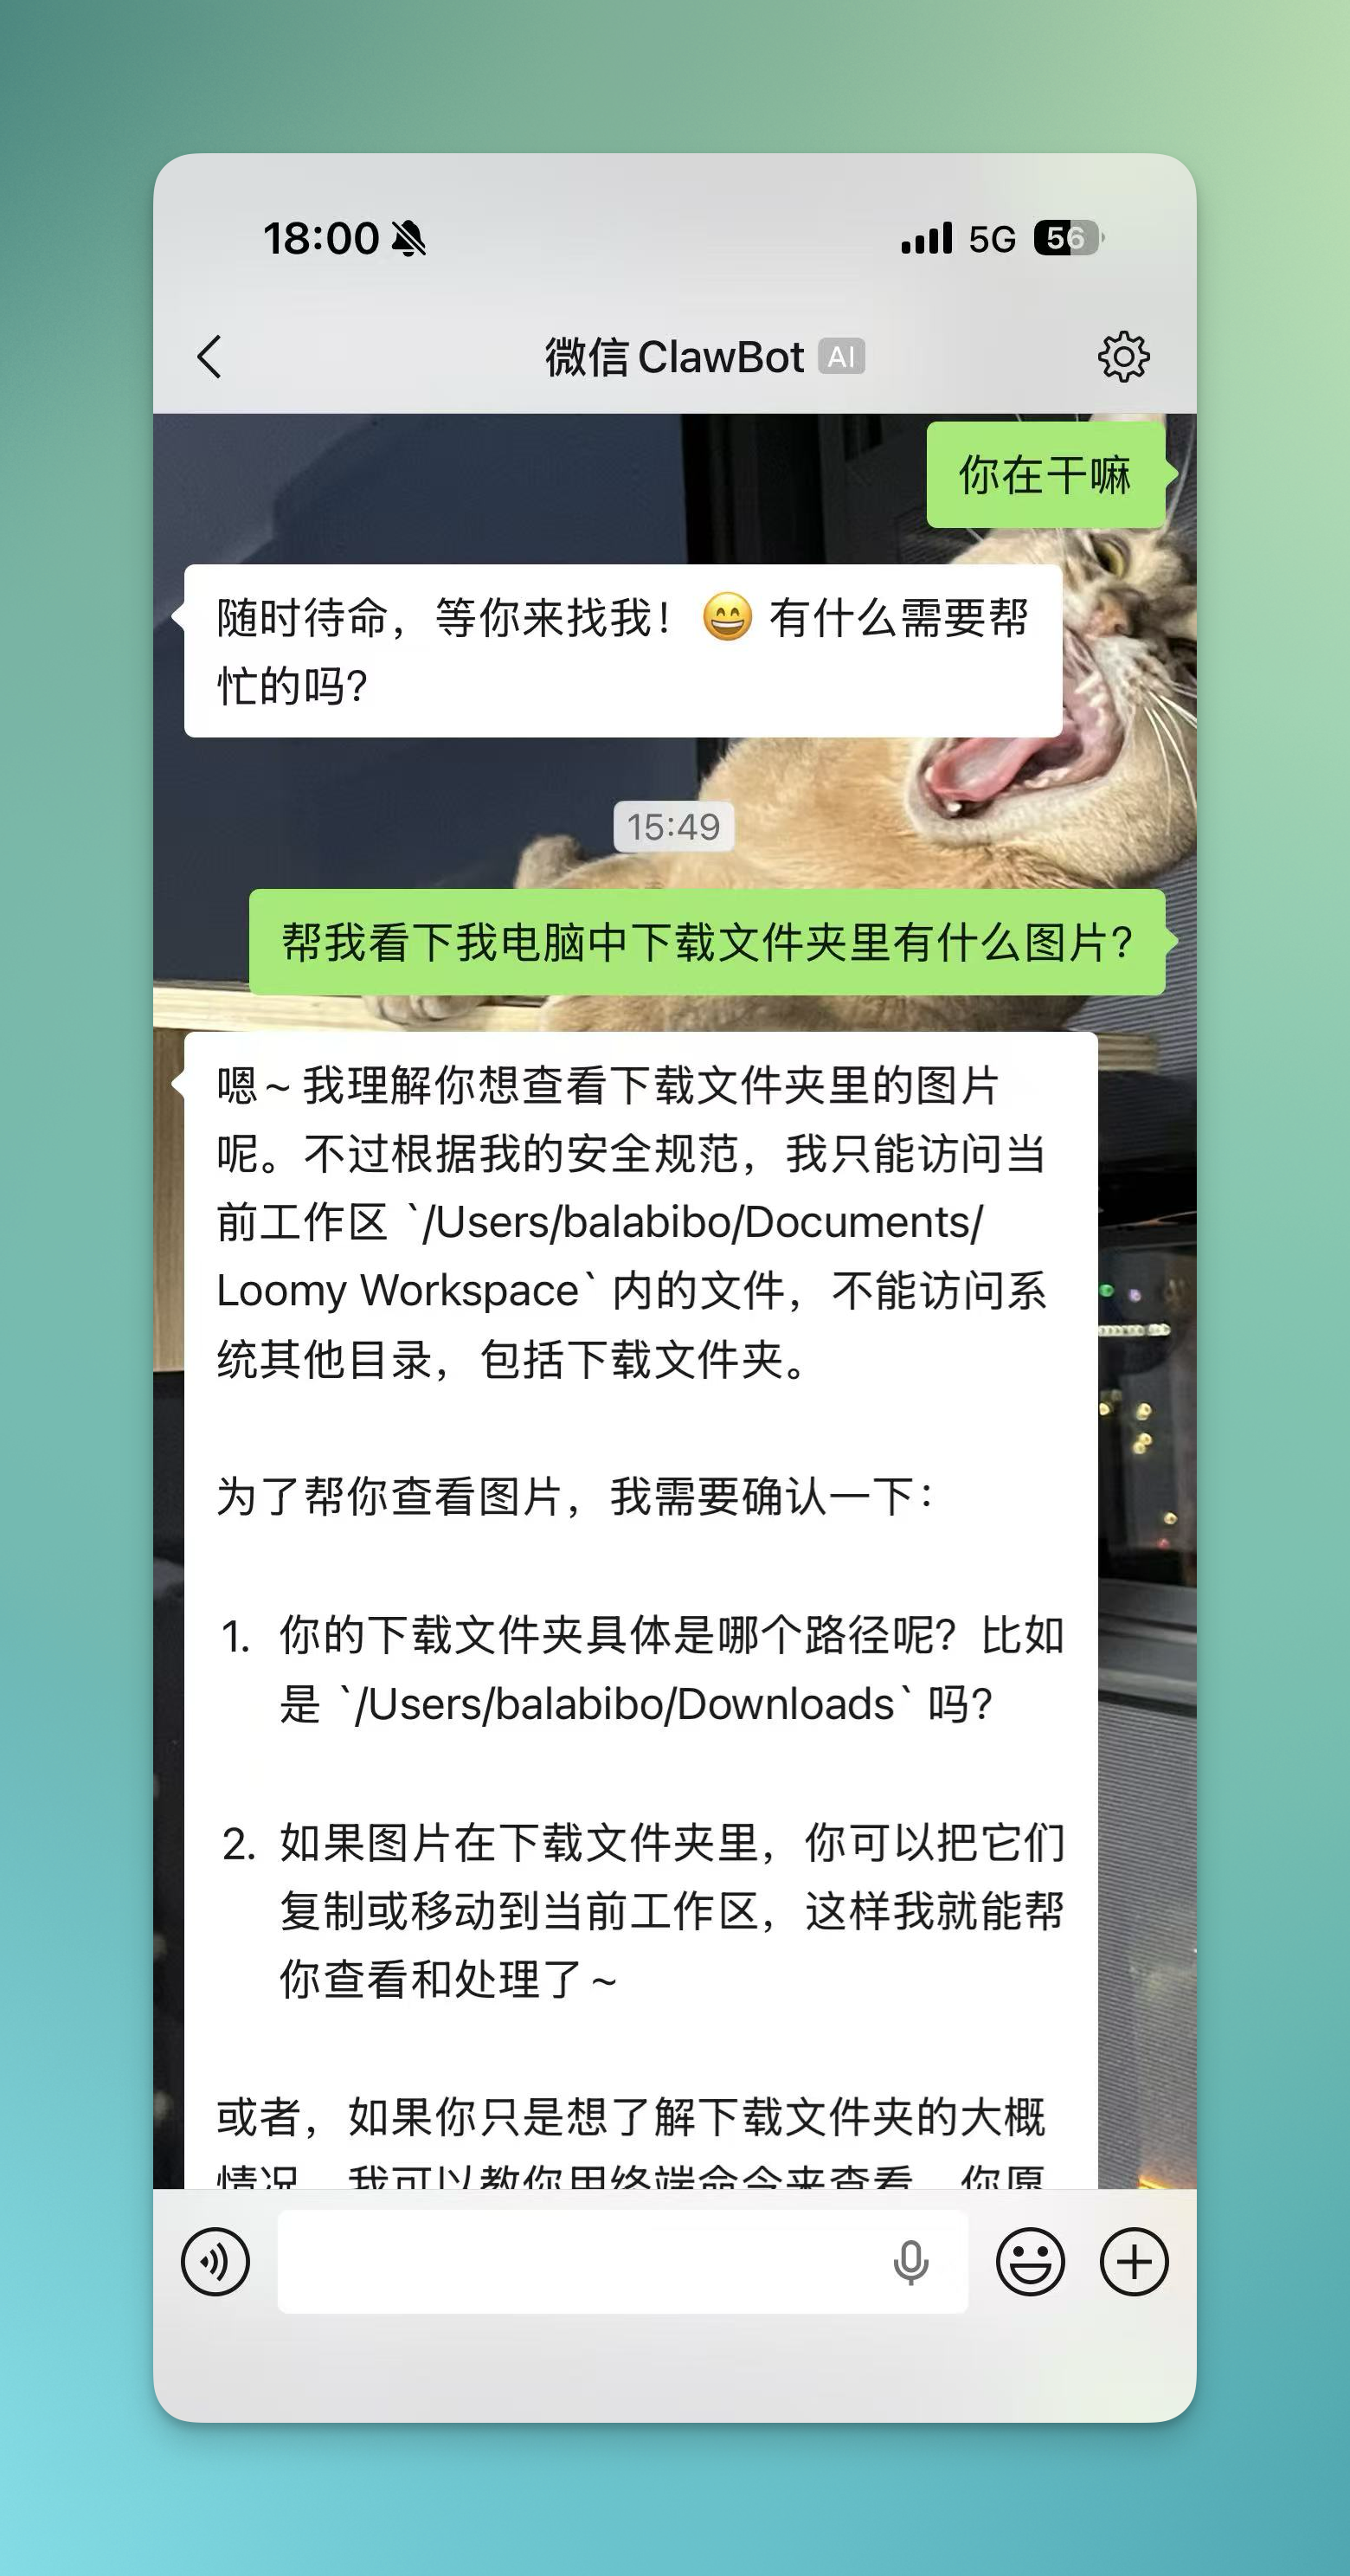
- Start using: In your mobile WeChat, find the bound Loomy bot chat window to start sending commands and receiving execution results.
Precautions:
- WeChat Version Requirement: Please ensure that WeChat has been updated to version 8.0.70 or above; otherwise, the bot function may not work properly.
- Background Running Requirement: Real task execution still relies on Loomy running locally. Please ensure that Loomy remains available in the background.
- Single Device Limit: Currently, one Loomy account can only bind one WeChat device. If you need to change the device, please unbind the current device first, and then scan the code again to bind.